There’s a special kind of magic in planting a single, unassuming seed and watching it explode into a plant so generous it offers you more delicious squash than you know what to do with. That, for me, is the joy of growing zucchini.
Its incredible productivity is legendary among gardeners, and it’s one of the most rewarding vegetables you can grow.
I know that starting something new can feel a little daunting, especially when you hear stories of plants taking over the garden! But I want you to put those worries aside.
I’ve poured all my research into creating this guide as your complete, step-by-step roadmap.
I promise that by following these instructions, you will have all the knowledge and confidence you need to go from a tiny seed to a triumphant, continuous harvest.
This guide is one of my favorites, and I’m so happy to have it join my complete library of Vegetable Growing Guides.
Core Summary (TL;DR)
- Plant After Frost: Zucchini is a tender summer vegetable. Plant your seeds directly in the garden only after all danger of frost has passed and the soil is consistently warm.
- Full Sun & Rich Soil: Choose a spot that gets at least 6-8 hours of direct sunlight per day. Zucchini are very heavy feeders, so amend your soil with plenty of rich compost before planting.
- Harvest Small & Often: The secret to the best-tasting zucchini and a productive plant is to harvest frequently when the fruits are 6-8 inches long. This encourages the plant to keep producing all season long.
- Water the Roots, Not the Leaves: Water deeply and consistently at the base of the plant. Keeping the leaves dry is your best defense against common fungal diseases like powdery mildew.
Zucchini Quick Facts Table
| Factor | Details |
| Sunlight | Full Sun (6-8+ hours/day) |
| Soil Type | Rich, well-draining loam |
| Soil pH | 6.0 to 6.8 |
| Planting Method | Direct sow seeds outdoors |
| Spacing | 2-3 feet apart in all directions |
| Days to Germination | 7-14 days |
| Days to Harvest | 45-60 days from sowing |
| Key Pests | Squash Vine Borer, Squash Bug |
| Key Diseases | Powdery Mildew |
When to Plant Zucchini
The best time to plant zucchini is in late spring or early summer, once all danger of frost has passed and the soil has warmed to at least 65°F (18°C), with an ideal range of 70-85°F (21-29°C) for the fastest germination.
As a classic warm-season crop, zucchini cannot tolerate frost, and planting too early in cold soil will lead to poor germination and stunted growth. For most North American gardeners, this means planting from late May to early July.
Zucchini Planting Calendar (USDA Zones 4-9)
How to Read This Calendar
The calendar below provides key planting dates for two different gardening styles: Aggressive (to maximize your season) and Safe (to minimize frost risk). You’ll notice the ‘Aggressive’ fall dates start later—this is a deliberate strategy to extend the harvest as late as possible.
Zucchini-Specific Timing Rules
Spring Planting Dates: These dates are for direct sowing seeds outdoors. To give this frost-sensitive vegetable the best possible start, they are intentionally set 1 to 2 weeks after the average last frost date. This crucial buffer allows the soil to warm up to the temperatures zucchini seeds require (at least 65°F / 18°C) for reliable germination. (For an even earlier harvest, you can start seeds indoors 2-4 weeks before these direct sowing dates and transplant them carefully.)
Fall Planting Dates: These dates are also for direct sowing. They are set 10 to 12 weeks before the average first frost date. This timing ensures your zucchini plants have enough time in the warm late-summer soil to germinate quickly and mature for a bountiful harvest before the cold arrives.
A Note on Fall Planting in Cooler Zones: You will see “N/A” for Zones 4-6. This is because the frost-free growing season in these cooler climates is generally not long enough to guarantee a successful fall crop. The window between planting in late summer and the first killing frost is typically too short for a zucchini plant to mature and produce a significant harvest.
| USDA Zone | Spring Planting(Aggressive) | Spring Planting(Safe) | Fall Planting(Aggressive) | Fall Planting(Safe) |
| Zone 4 | May 16 – May 23 | May 22 – May 29 | N/A | N/A |
| Zone 5 | May 7 – May 14 | May 14 – May 21 | N/A | N/A |
| Zone 6 | May 4 – May 11 | May 15 – May 22 | Jul 26 – Aug 9 | Jul 10 – Jul 24 |
| Zone 7 | Apr 13 – Apr 20 | Apr 15 – Apr 22 | Aug 13 – Aug 27 | Aug 2 – Aug 16 |
| Zone 8 | Mar 30 – Apr 6 | Apr 12 – Apr 19 | Aug 17 – Aug 31 | Aug 7 – Aug 21 |
| Zone 9 | Mar 7 – Mar 14 | Mar 25 – Apr 1 | Sep 7 – Sep 21 | Aug 18 – Sep 1 |
✔ Accuracy is my priority. The key planting dates in this calendar are calculated based on representative Aggressive and Safe frost date baselines established for each zone. Because your garden’s microclimate may vary, I strongly recommend that you verify your local frost dates for the most accurate timing. Learn My Methodology & Find a Frost Date Tool Here.
Understanding the Planting Windows
Spring Planting: The Main Season
The main goal for spring planting is to get your zucchini seeds in the ground as soon as the weather is reliably warm. Zucchini thrives in the long, sunny days of summer. Planting after your last frost date ensures the soil is warm enough for quick germination and gives the plant the entire summer season to reach its full, highly productive potential.
Fall Planting: Your Second Harvest Opportunity
For those of you in warmer climates (generally Zone 7 and above), zucchini isn’t just a spring-planted crop. By sowing a new batch of seeds in mid-to-late summer, you can get a fantastic fall harvest. The soil is already very warm, leading to explosive germination, and the plants mature in the slightly cooler, less humid weather of early autumn, which can sometimes mean fewer pest and disease issues.
The Danger Zone: Why Frost is the Enemy
I cannot stress this enough: zucchini has zero tolerance for frost. It is a tender summer squash native to warmer climates. Even a light frost with temperatures around 32°F (0°C) will damage the leaves and stems, and a hard freeze will kill the plant outright. Rushing to plant before your last frost date is a risk that simply isn’t worth taking.
Key Factors & Advanced Strategies
The Secret Signal: Ideal Soil and Air Temperatures
While your local frost date is a great guide, the plants themselves respond directly to temperature. Paying attention to these signals is key.
- Ideal Soil Temperature for Germination: Zucchini seeds germinate best when the soil temperature is between 70°F and 85°F (21°C – 29°C).
- Ideal Air Temperature for Growth: The plants thrive when daytime air temperatures are between 68°F and 82°F (20°C – 28°C). Growth slows significantly below 60°F (15°C) and can be stressed by extreme heat.
- High Heat Warning: Once temperatures consistently exceed 90°F (32°C), plants may struggle with pollination and fruit set. On these intensely hot days, providing some afternoon shade or misting the surrounding area can help reduce stress on the plant.
Pro Technique: Succession Planting
Because zucchini plants can be overwhelmed by pests (especially the dreaded squash vine borer) mid-season, I always recommend succession planting. Instead of planting all your seeds at once, sow a few seeds every 2-3 weeks through early summer. This simple strategy does two things: it provides a continuous, manageable harvest instead of a massive glut, and it ensures that if one planting fails or is attacked by pests, you have another wave of healthy plants coming right behind it.
Extending Your Season: Getting an Earlier Start
If you’re eager to get a head start, especially in cooler climates, you can warm the soil in your garden bed 1-2 weeks before planting by covering it with black plastic mulch. This is a powerful technique because the plastic absorbs solar heat, warming the soil while also retaining moisture—creating the perfect seedbed. After planting, you can also use a floating row cover to protect the young seedlings from any unexpected late-season cool snaps, acting like a mini-greenhouse.
How to Plant, Grow, and Harvest Zucchini: A Step-by-Step Guide
Follow these steps, and you’ll be on the fast track to a delicious harvest.
Step 1: Choose the Right Variety
Your first decision is choosing a variety that fits your garden space and culinary desires. Zucchini varieties generally fall into two categories based on their growth habit:
- Bush Types: This is the most common type for home gardeners. The plants grow in a relatively contained, fountain-like shape. They are perfect for raised beds, smaller gardens, and even large containers because they don’t spread aggressively.
- Vining Types: As your experience grows, you might consider vining types. These varieties spread out with long runners, similar to a pumpkin plant, and require much more space. They can be incredibly productive and are a great choice if you have a large garden plot where they can roam.
Beyond the growth habit, don’t be afraid to explore different colors and shapes—from classic green to golden yellow, and even round varieties perfect for stuffing. When you’re reading the seed packet, here is what I recommend you look for:
- Disease Resistance: This is my top priority. Look for varieties with stated resistance to Powdery Mildew (PM), as this is the most common disease you’ll likely face.
- Heat Tolerance: If you live in a hot climate, selecting a heat-tolerant variety can make a huge difference in mid-summer productivity.
- Days to Maturity: This number tells you roughly how many days it will take from sowing the seed to your first harvest. It helps you plan your season, especially if your growing window is short.
Step 2: Prepare the Perfect Soil and Location
This step is the foundation of your success, and I encourage you to spend a little extra time here—it will pay off all season.
Location: The Power of Sun
Select the sunniest spot you have. Zucchini requires at least 6-8 hours of direct sunlight per day to thrive. Insufficient light is the most common reason for failure, leading to a leggy plant that produces far fewer female flowers, and therefore, less fruit.
Soil: Fuel for a Hungry Plant
Zucchini plants are incredibly heavy feeders. They crave loose, fertile soil that retains both water and nutrients. Here is how I build the perfect soil environment, whether you’re planting in the ground or in pots.
For In-Ground Gardens or Raised Beds
Your goal is to create a rich, well-draining loam. While adding 2-4 inches of compost to your existing soil is a great start, if you are building a new raised bed or filling a garden plot from scratch, here is my ideal recipe:
- Ideal Soil Recipe: I recommend a mix of roughly 3 parts composted manure, 5 parts garden soil, and 2 parts coarse sand or perlite. This creates a perfect balance of nutrients, structure, and drainage.
- Pro Tip – Add Wood Ash: When you are tilling the soil, consider adding a light dusting of wood ash. It provides a fantastic source of potassium and can help to raise the pH of acidic soils. Important: Wood ash is alkaline and should only be used if you have tested your soil and know that it is acidic (pH below 6.5). Adding it to already neutral or alkaline soil can raise the pH too high and harm your plants.
- Improve Drainage: I highly recommend mounding the soil into a small, raised “hill” or a raised row about 8-10 inches high. This improves drainage and allows the soil to warm up faster in the spring.
For Container Gardening
Growing zucchini in a container is very rewarding, but it requires a carefully crafted potting mix that won’t compact and has enough nutrients.
- Pot Size: Choose a large container, at least 5 gallons (about 12 inches/30cm in diameter), to accommodate the plant’s vigorous root system.
- Ideal Potting Mix: For my pots, I use a rich, airy blend of 5 parts compost or leaf mold, 3 parts composted chicken manure, and 2 parts perlite.
- Crucial Drainage Tip: The key to preventing waterlogged roots is not a drainage layer, but a pot with multiple, large drainage holes and the use of a light, airy potting mix like the one I recommend. So-called drainage layers of gravel are a common myth; they actually raise the water table inside the pot and can increase the risk of root rot.
Step 3: Sowing Seeds
Zucchini seeds are large and germinate reliably, giving you two excellent options for planting. Direct sowing is the easiest path, but starting seeds indoors can give you a valuable head start on the season, which I consider a high-yield secret.
Method 1: Direct Sowing (The Easiest Path)
This is my recommended method for most beginner gardeners.
- Prepare the Spot: Create the “hills” or raised rows as described in Step 2. A crucial tip from my experience is to water the soil thoroughly before you plant. This ensures the seeds are placed into evenly moist soil without the risk of being washed away by watering after the fact.
- Plant the Seeds: Plant 2-3 seeds together in each hill, about 1 inch (1.5-2cm) deep.
- Cover and Wait: Gently cover the seeds with fine soil. To speed up germination, you can cover the spot with plastic film to trap heat and moisture. You should see seedlings emerge in 5-7 days. Be sure to remove the film as soon as they sprout.
- Spacing: Ensure your hills are spaced about 2-3 feet apart in all directions to give the mature plants plenty of room for air circulation.
Method 2: Starting Seeds Indoors (For a Head Start)
If you have a shorter growing season or want the earliest possible harvest, start seeds indoors 2-3 weeks before your last frost date.
- Use the Right Mix: Fill seedling trays with a light, airy mix. My preferred recipe is 2 parts peat moss and 1 part vermiculite.
- Sow the Seeds: Plant one seed per cell, about 1 inch deep.
- Care for Seedlings: Keep the soil moist and in a warm, sunny spot. Once the seedlings have their first true leaves, you can feed them with a very dilute fertilizer, like a 0.2% potassium phosphate solution.
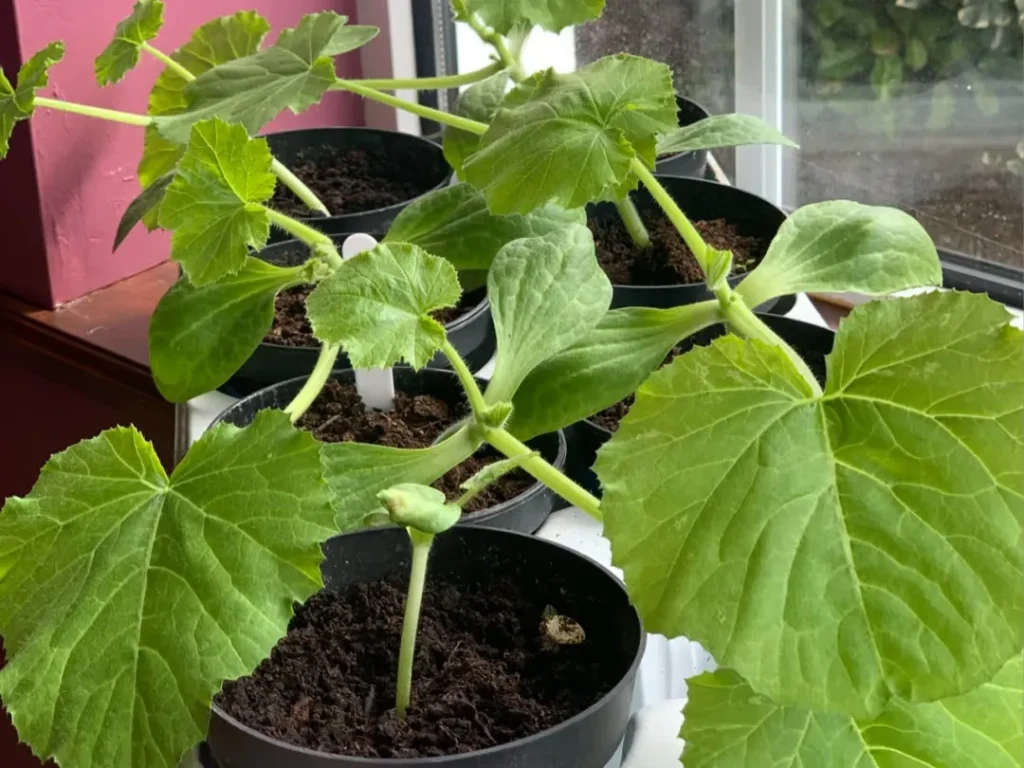
- Transplant Carefully: When the seedlings have 3-4 true leaves, they are ready to move to the garden. Water them well before you move them, and be extremely gentle to keep the root ball intact.
- Harden Off: This is a critical step. Do not move the seedlings directly into full sun. Place them in a sheltered, partly shaded spot for 3-4 days so they can acclimate to the outdoor conditions before planting them in their final location.
Pro-Tip for Faster Germination: Wake Up Your Seeds

I’ve found that zucchini seed coats can be a bit thick. To give them a boost and ensure even germination, you can pre-sprout them.
- Soak: A simple soak in room-temperature water for 5-6 hours is a safe and effective way to soften the seed coat.
- Sprout: After soaking, wrap the seeds in a damp paper towel or cloth, place them in a warm spot (around 77°F/25°C), and keep them moist. In 1-2 days, you will see the tiny white root tip emerge. They are now activated and ready for immediate planting using either method above.
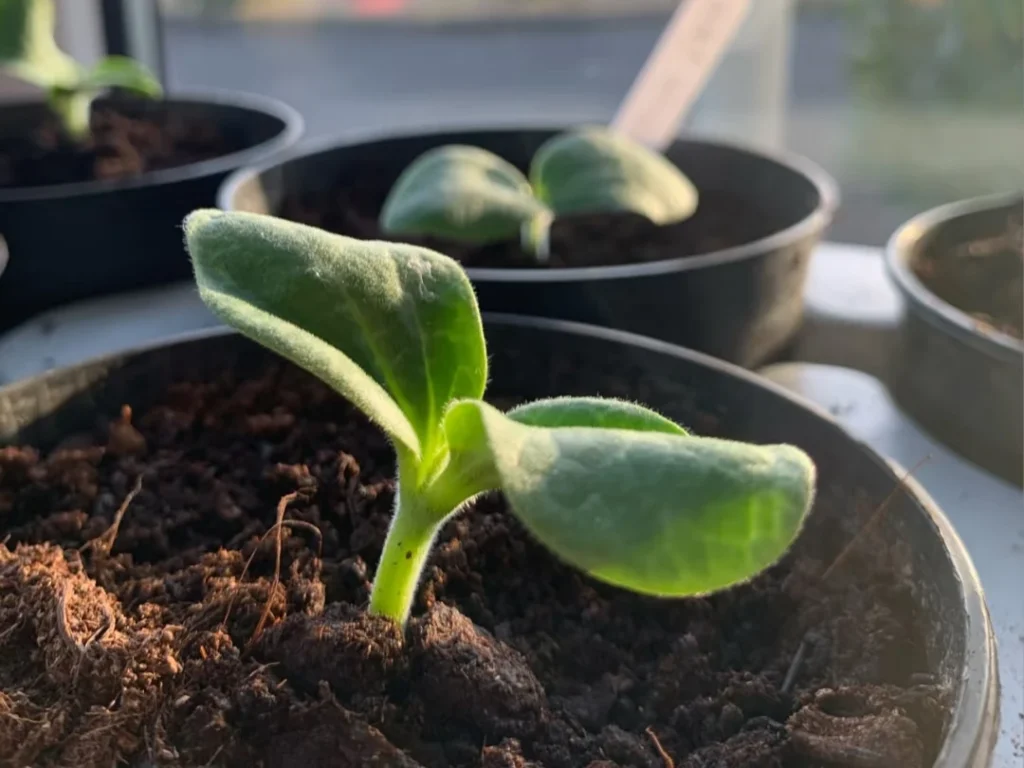
Step 4: Establish Your Plant for a Strong Season
About two weeks after emerging, your seedling will have several sets of true leaves and will begin to grow rapidly. This is a critical transition phase. Your goal now is not to get fruit, but to build a strong, healthy “factory” that will produce abundantly later. Here are the three key tasks for this stage.
Thin for Strength
If you sowed multiple seeds per hill, now is the time to choose the single strongest, healthiest-looking seedling to be your champion. It can feel tough, but you must remove the others. Use a small pair of scissors and snip the weaker seedlings off at the soil line. Do not pull them out, as this can disturb and damage the fragile roots of the seedling you want to keep. This crucial step ensures your chosen plant gets all the space, water, and nutrients it needs.
Pinch for Power (An Advanced Technique for High Yields)
This is an advanced technique that transformed my own zucchini harvests. The first year I gardened, I was so excited to see the first tiny zucchini forming that I let it grow. The result was a disaster—the small plant put all its energy into that one fruit and then stalled, a phenomenon I call “stalling”.
- The Rule: To avoid this, you must pinch off any flowers or tiny fruits that form until the plant has developed at least 5-6 large, healthy leaves.
- The Reason: This forces the young plant to focus all its energy on developing a robust root system and lush foliage. By sacrificing the first one or two potential fruits, you are rewarded with a much stronger plant that will produce dozens of zucchini for you later in the season.
- Note: This strategy is most effective in regions with a long growing season. If your frost-free season is very short (e.g., less than 100 days), you may choose to let the first fruit mature to ensure you get a harvest before the season ends.
Mulch for Health
Once the plant is established and you’ve completed the tasks above, apply a 2-3 inch layer of organic mulch (like straw, shredded leaves, or pine bark) around the base of the plant. Be sure to leave a small, mulch-free circle right around the stem to prevent rot. Mulching is a gardener’s best friend: it suppresses weeds, retains precious soil moisture, and keeps the developing fruit clean and off the soil.
For detailed information on the ongoing tasks of keeping your plant healthy, be sure to read the “Expert Guide” section below, where I cover my specific strategies for watering and feeding.
Step 5: Harvesting for Peak Flavor and Peak Production
This is the most exciting part, and it’s where your attention pays the biggest dividends. The goal is not to grow the biggest zucchini, but to harvest at the peak of flavor, which in turn signals the plant to produce even more. Remember my harvesting mantra: Harvest early and harvest often; the more you pick, the more it produces.
Knowing the Golden Harvest Window

To get that perfect, crisp texture, you need to pick your zucchini at just the right moment. Here are the three signals I look for:
- By Size: The ideal length for most varieties is 6-8 inches (15-20 cm).
- By Time: This is typically 7-10 days after the flower first opened.
- By Sight: The skin should be vibrant in color and have a beautiful, healthy gloss. If it looks dull or is starting to get hard, it’s past its peak.
What About the Giant Zucchini I Missed?
It happens to every single gardener! You check one day, and the next, a baseball bat is hiding under a leaf. Don’t worry, it’s not a waste. While these oversized, mature squashes will be tougher and have large seeds, they are perfect for shredding into zucchini bread, grating into fillings, or pickling.
How to Harvest: The Cut and The Cadence
- The Cut: Always use a sharp knife or pruning shears. Cut the stem cleanly 1-2 inches from the fruit. Never twist or rip the fruit off, as the resulting wound on the main stem can invite diseases. A clean cut helps the plant heal quickly.
- The Cadence: During peak season, you must check your plants every day. A small zucchini in the morning can be perfectly ready by the next afternoon. Frequent harvesting is the single most important signal you can send to the plant to keep producing.
Pro-Tip: Adjust Your Harvest to the Plant’s Health
You can become an advanced gardener by learning to “read” your plant.
- For Weak or Stressed Plants: Harvest the zucchini even earlier and smaller. This reduces the energy demand on the plant, allowing it to recover and focus on new growth.
- For Very Vigorous, Healthy Plants: You have a bit more flexibility. You can occasionally let a fruit grow slightly larger without stressing the plant.
Step 6: Storing and Using Your Abundant Harvest
Congratulations on your harvest! Now comes the fun part: enjoying it. Proper handling right after picking will ensure you get the most out of every single zucchini.
For Fresh Eating (Short-Term Storage)
For zucchini you plan to eat within 4 to 7 days, the process is simple:
- Handle Gently: Bring your harvest inside, but do not wash it until just before you’re ready to cook. Water encourages mold and spoilage.
- Keep it Cool: Store the unwashed zucchini in the crisper drawer of your refrigerator.
- Enjoy Peak Flavor: This is the time to use your perfectly harvested tender squash. Their crisp texture is ideal for quick preparations like stir-fries, fresh salads, grilling, or spiralizing into “zoodles.”
For the Inevitable Surplus (Long-Term Storage)
Because zucchini is so productive, you will almost certainly have more than you can eat fresh. Here are the best ways to preserve your bounty:
- Freezing: This is the easiest and most popular method. I recommend shredding your zucchini first (it’s perfect for future loaves of zucchini bread!). You don’t even need to peel it. Simply shred it, pack it into freezer bags or containers in pre-measured amounts (e.g., 1 or 2 cup portions), squeeze out the excess air, and freeze. It will last for months.
- Pickling & Relish: Remember those giant zucchini I talked about in the last step? Their firmer texture makes them fantastic candidates for making pickles or relish.
A Note on Saving Seeds
If you are growing an open-pollinated or heirloom variety (not a hybrid), you can save seeds for next year. To do this, allow one or two healthy fruits from your strongest plant to mature into a very large, hard-skinned squash. Scoop out the seeds, wash them, and let them dry completely on a paper towel for several weeks before storing them in a cool, dark, and dry place.
Expert Guide to a Healthy Harvest: Tips & Troubleshooting
1. Watering and Feeding: The Engine of Production
Once your plant is established, consistent watering and timely feeding are the keys to unlocking its full productive potential. Here is the exact regimen I follow.
Watering: The Art of Consistency
Your goal is to maintain consistently moist soil, never letting it swing from bone dry to soaking wet.
- Why Consistency Matters: Inconsistent watering is the primary cause of splitting fruit. Deep, regular watering helps the plant develop beautiful, perfectly formed zucchini.
- How to Water: Continue to water deeply at the base of the plant, aiming for the root zone and keeping the leaves dry to prevent powdery mildew.
- When to Water: The timing of your watering makes a difference. In the heat of summer, water in the early morning or evening to minimize evaporation. In the cooler temperatures of spring or fall, watering in the middle of the day is perfectly fine.
Feeding: My High-Yield Fertilizing Strategy
Zucchini’s incredible growth rate requires a serious amount of nutrients. While good soil provides a foundation, a targeted feeding schedule during the fruiting stage is my secret to a massive harvest.
- The Trigger: Begin this feeding regimen when you see the first baby zucchini reach the size of an egg. This is the signal that the plant’s energy needs are shifting dramatically toward fruit production.
- The Main Feed (Targeted Nutrients): The most scientific approach is to base your fertilizer choice on a soil test, which tells you exactly what your garden needs. If a soil test isn’t possible, the general strategy is to start with a balanced all-purpose fertilizer. Once fruiting begins, ensure the plant has enough potassium (K) for development. If you see lush leaf growth but poor fruiting, that’s a sign of too much nitrogen (N). In that case, switch to a fertilizer where the potassium (K, the third number) is higher than the nitrogen (N, the first number).
- The Schedule: Apply this high-potassium fertilizer every 10-14 days for 2-3 applications during the peak of the growing season.
- Pro-Technique – Foliar Feeding: If you notice young fruits turning yellow and shriveling from the tip, it’s often a sign of a temporary nutrient shortage. You can provide an instant boost with a foliar feed. Once a week, spray the leaves with a dilute, potassium-rich liquid fertilizer, such as liquid kelp or a specific foliar feeding product.
2. Pruning for Health and Productivity
Many gardeners think of pruning as something for tomatoes or trees, but I’ve found that strategic pruning is a game-changer for zucchini. As the plant grows, it can become a dense jungle of leaves, which traps humidity and creates a breeding ground for diseases like powdery mildew. Pruning creates better air circulation, allows more sunlight to reach the fruit, and makes it much easier to spot pests and harvest your squash.
The Essential Pruning Task: Removing Lower Leaves
If you do only one type of pruning, make it this one.
- What to Prune: Once the plant begins to produce fruit, identify the large, older leaves at the base of the plant. You should remove any leaves that are yellowing, damaged, or touching the soil. I generally remove most of the large leaves below the lowest developing fruit.
- How to Prune: Use a clean, sharp knife or pruning shears. Follow the leaf’s long stem back to the main stalk of the plant and make a clean cut an inch or two away from the main stalk.
- Why it Works: This single act dramatically improves air circulation around the base of the plant, which is the #1 defense against fungal diseases. It also eliminates hiding spots for pests like squash bugs.
Advanced Technique: Shaping for Higher Yields
For those looking to maximize production or manage plants in tight spaces, you can use more advanced pruning techniques to shape the plant’s growth.
- Single-Stem Pruning: This technique is ideal for containers or densely planted gardens. The goal is to encourage vertical growth rather than a wide bush. To do this, you consistently remove all side shoots that emerge from the main stem, focusing all the plant’s energy into that single leader.
- Double-Stem Pruning: This is a high-yield technique I use for my in-ground plants. Once the plant has about 5-6 true leaves, I pinch off the very tip of the main growing stem. This encourages the plant to send out strong side shoots. I then select the two healthiest side shoots to become the main leaders and remove any others that form. This creates a more open, V-shaped plant that can support a larger overall harvest.
3. Natural Pest and Disease Control
Vigilance is your best tool. A daily morning walk through the garden to inspect your plants is the most effective way to catch problems before they become infestations. Here are the most common issues to watch for.
Common Insect Pests
- Squash Vine Borer: This is the most destructive zucchini pest. The adult moth lays eggs at the base of the plant, and the larva bores into the stem, eating it from the inside out and causing the entire plant to suddenly wilt and die.
- Prevention: The best prevention is to cover your young plants with floating row covers from the moment you plant them until you see female flowers appear (you must remove them then for pollination). You can also wrap the bottom 2-3 inches of the stem with aluminum foil to prevent the moth from laying eggs.
- Squash Bugs: These gray, shield-shaped insects suck the sap from leaves, causing yellow spots that eventually turn brown and die.
- Control: The best control is manual. Check the undersides of leaves for clusters of shiny, bronze-colored eggs and scrape them off. Hand-pick and drop any adult bugs you see into a bucket of soapy water.
- Aphids and Whiteflies: These tiny, sap-sucking insects cluster on the undersides of leaves and on new growth, causing leaves to yellow and curl.
- Prevention & Control: Place yellow sticky traps near your plants to monitor and reduce adult populations. For active infestations, a strong blast of water from a hose can knock them off, or you can spray the undersides of leaves with insecticidal soap.
- Spider Mites: These are minuscule pests that are hard to see with the naked eye, but you’ll notice their fine webbing on the undersides of leaves. They thrive in hot, dry conditions.
- Prevention & Control: Misting your plants with water can raise the humidity and deter them. For active outbreaks, neem oil is an excellent organic miticide.
Common Fungal Diseases
- Powdery Mildew: This looks like white, powdery splotches on the leaves.
- Prevention: Good air circulation from proper spacing and pruning is your best defense. Always water the soil, not the leaves.
- Treatment: At the first sign of infection, spray all affected leaves with an organic fungicide. Common effective options include a potassium bicarbonate solution, a dilute solution of milk (1 part milk to 9 parts water), or neem oil.
- Gray Mold / Botrytis: This fungus often appears on the blossom end of the fruit or on the flowers themselves, causing a fuzzy, gray-brown rot.
- Prevention: This is a disease where good hygiene is paramount. The single most important preventative step is to promptly remove any spent blossoms and rotting fruit. This removes the primary food source for the fungus. Improving air circulation via pruning also helps immensely.
A Final Note on Pests & Diseases: Remember that pest and disease pressures can vary greatly by region. If you encounter a problem you can’t identify, or if the organic methods above are not effective, your best resource is your local University Extension Service. They often provide free, region-specific advice and diagnostics for home gardeners.
4. Solving Common Problems with Zucchini
Even with the best care, you might encounter a few confusing situations. Here are the solutions to the most common problems I get asked about.
Problem 1: I have lots of beautiful flowers, but they just fall off without making any zucchini!
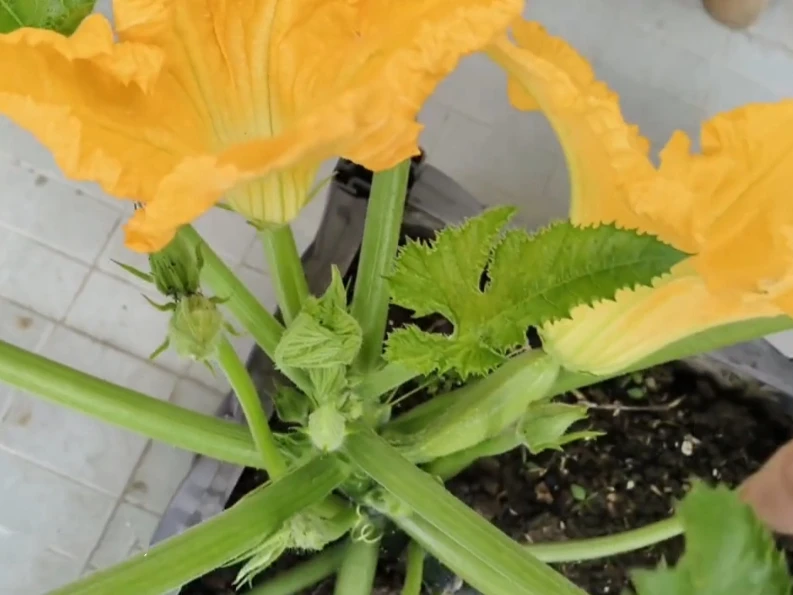
Cause: This is the most common issue, and it’s almost always a simple case of timing and pollination. Zucchini plants have separate male and female flowers. Often, especially early in the season, the plant will produce a wave of all-male flowers first. This is normal; it’s the plant’s way of attracting pollinators to the area.
Solution: First, learn to tell your flowers apart. The female flower is the one with a tiny, immature zucchini right at its base—I call this the “baby squash”. The male flower grows on a long, thin, straight stem and has no fruit at its base. Once you see both types of flowers present, you need bees to do their job. If you have low bee activity, you must become the bee.
How to Hand-Pollinate: The best time is in the morning when the flowers are fully open. Use a small, soft paintbrush or a cotton swab. Gently collect the bright yellow pollen from the stamen inside a male flower, then carefully transfer and dab it onto the sticky stigma in the center of a female flower. Your success rate will be nearly 100%.
Problem 2: My baby zucchini start to grow, but then turn yellow and shrivel from the tip.
Cause: This is a classic sign of incomplete pollination. The fruit was never fully fertilized, so the plant aborted it. While it can occasionally be caused by a nutrient deficiency (a sign to try the foliar feeding tip mentioned earlier), it’s almost always a pollination problem.
Solution: Be more diligent with hand-pollination, especially on cloudy or rainy days when bees are less active.
Problem 3: My plant is a giant, gorgeous green bush, but it’s giving me very little fruit.
Cause: This is a frustrating situation that usually points to an imbalance in the plant’s energy.
Solution Checklist:
Check Your Light: Is a nearby tree leafing out and now casting shade? Your plant needs at least 6-8 hours of direct sun. Less than that will result in lush leaves but few flowers.
Review Your Pruning: Is the plant an overgrown, dense jungle? If so, air and light can’t penetrate to the center to ripen fruit. Refer back to the pruning section and remove some of the large, lower leaves.
Check Your Fertilizer: Are you using a fertilizer that is high in nitrogen (N), the first number in the N-P-K ratio? High nitrogen tells the plant to grow beautiful leaves, not fruit. Switch to a high-potassium (K) fertilizer as recommended in the feeding section.