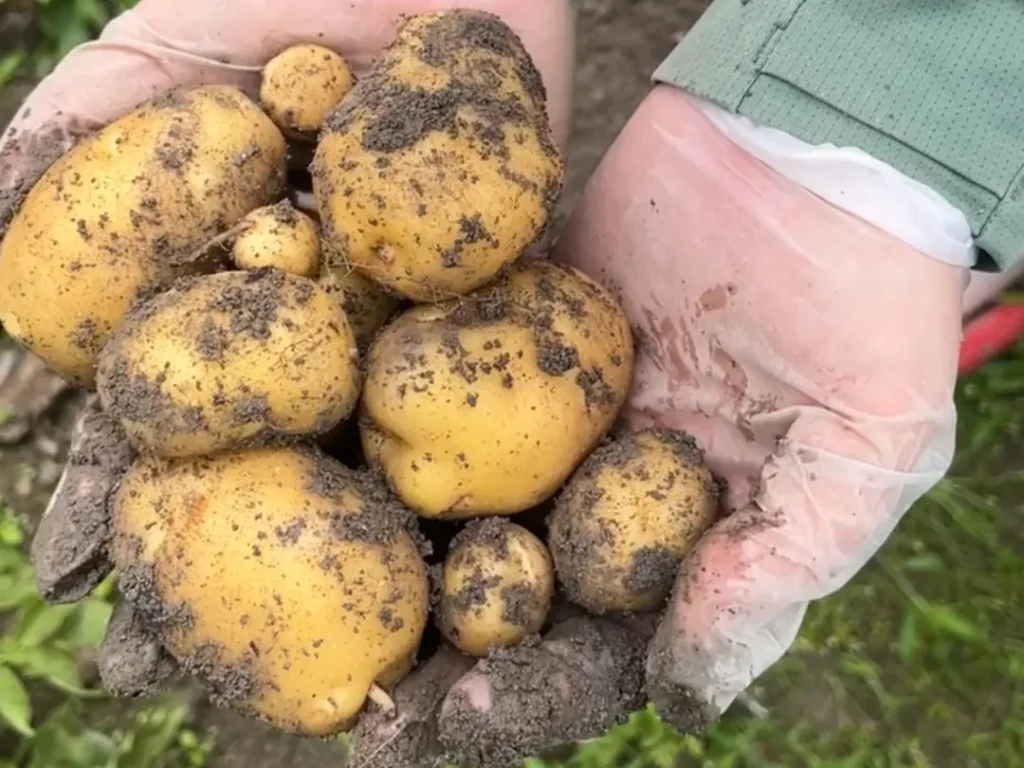
There’s a unique magic to growing potatoes, a sense of unearthing buried treasure that few other vegetables can offer. The real prize, however, is the flavor—creamy, earthy, and so much richer than anything you can buy at the store.
From my research and gardening, I know that starting with a vegetable that grows entirely underground can feel like a bit of a mystery, especially for a beginner. You can’t see the progress day by day, and you have to trust the process happening beneath the soil.
But I promise you, it’s one of the most rewarding and straightforward experiences a gardener can have. This guide is my complete roadmap, designed to give you the confidence and knowledge to succeed.
I’ve structured every step, from choosing the right seed potato to the final, joyful harvest, to be as clear and simple as possible. By the time you’re done reading, you’ll be ready to grow your own amazing crop. You’ll find this same clear, step-by-step approach in my complete library of Vegetable Growing Guides.
New to Gardening? Start Here.
Before you dive into the specifics of growing potatoes, it’s essential to have your garden basics covered. My comprehensive Beginner’s Guide to Starting a Garden will walk you through everything from choosing the perfect sunny spot and preparing your soil to selecting the right tools for the job.
Core Summary (TL;DR)
- Start with Certified Seed: Always use certified “seed potatoes” instead of grocery store potatoes. This prevents diseases and ensures they are primed for sprouting and vigorous growth.
- Hill Your Plants: As the potato plants grow, you must mound soil up around the stems (a process called “hilling”). This protects the developing tubers from sunlight (which turns them green and toxic) and encourages more potatoes to form.
- Harvest at the Right Time: For small “new” potatoes, you can typically start harvesting 7-8 weeks after planting. For full-sized storage potatoes, wait until the plant’s foliage has completely died back.
- Cure for Storage: Before storing, potatoes need to be “cured” in a dark, moderately warm, and humid place for 2-3 weeks (14-21 days). This toughens their skin and helps them last for months.
Quick Facts Table
| Attribute | Information |
| Sunlight | Full Sun (at least 6 hours/day) |
| Soil Type | Loose, Loamy, Well-Drained |
| Soil pH | 6.0 to 6.5 (Practical Range)(Use scab-resistant varieties at this pH) |
| Planting Depth | 3-4 inches (8-10 cm) |
| Spacing | 10-12 inches (25-30 cm) apart, in rows 2.5 to 3 feet (75-90 cm) apart |
| Days to Germination | 14-28 Days |
| Days to Harvest | 65-90+ Days (depending on variety) |
| USDA Hardiness Zones | 3-10 |
Tools & Materials Checklist
What You’ll Need to Get Started Before you dig, make sure you have these essentials ready:
- Equipment: Spading fork (best for digging without slicing tubers), garden hoe, and a hand trowel.
- Seed: Certified seed potatoes (not grocery store produce).
- Soil Amendments: Compost or aged manure to improve drainage.
- Fertilizer: A balanced organic fertilizer (like 5-5-5) or a specific starter mix.
- pH Testing: A simple soil pH meter or test kit (aiming for pH 6.0-6.5).
- Watering: Soaker hoses or a drip irrigation system (preferred for keeping leaves dry).
When to Plant Potatoes
Timing is the single most critical factor in potato growing. Because potatoes are sensitive to both cold, wet soil (which causes rot) and extreme summer heat (which stops growth), your planting window depends entirely on your climate zone.
The Basic Rule of Thumb
- For Cool Climates (Zones 4-7): Your season begins in early spring. The general rule is to plant 2 to 4 weeks before your last expected frost date, once the soil has warmed to at least 40°F (4°C).
- For Hot Climates (Zones 8-9): You are in a race against the summer heat. You must plant much earlier—typically 4 to 6 weeks before the last frost—or utilize a second planting window in late summer for a fall crop.
Need Exact Dates? I have calculated the precise planting windows for every USDA Zone (4-9), including specific “Safe” and “Aggressive” dates to match your gardening style.
Find your specific date here: When to Plant Potatoes: The Best Dates for Zones 4-9
How to Plant, Grow, and Harvest Potatoes: A Step-by-Step Guide
Master the complete steps to growing potatoes. This guide will teach you how to choose the right variety, prepare the soil, cut and handle seed potatoes, when to plant, how to soil the plants, and best practices for harvesting and storing potatoes to ensure a bountiful harvest.
Step 1: Choose the Right Variety
This is your most important first decision. Based on my research, the best way to select a potato is to ignore confusing labels and focus on three practical factors:
1. How You Plan to Cook Them
This is often the most critical factor. The University of Minnesota suggests dividing potatoes into two main cooking types:
a. Mealy / Starchy Potatoes (Best for Baking & Mashing): These are high in starch and low in moisture. They become light and fluffy when cooked.
Examples: Russet varieties (like ‘Russet Burbank’), ‘German Butterball’.
b. Waxy Potatoes (Best for Salads & Boiling): These are low in starch and high in moisture. They hold their shape beautifully after cooking and won’t fall apart in soups or potato salads.
Examples: ‘Red Norland’, ‘Adirondack Blue’, ‘French Fingerling’.
c. All-Purpose (The In-Between): These have a medium starch content and work reasonably well for almost any dish.
Example: ‘Yukon Gold’ is a famous all-purpose potato.
2. When You Want to Harvest
As recommended by Utah State University, you can stagger your harvest by planting varieties that mature at different times. This is a pro-technique to get potatoes for months.
a. Early-Season (approx. 65-75 days): Great for a quick harvest in early summer. Examples include ‘Dark Red Norland’ or ‘Superior’.
b. Mid-Season (approx. 80-90 days): These are often good all-purpose potatoes. Examples include ‘Yukon Gold’, ‘Chieftain’, or ‘Reba’.
c. Late-Season (90+ days): These are typically the best varieties for long-term storage. Examples include ‘Katahdin’ or ‘Russet Burbank’.
Pro-Tip: Understanding the Timeline: These maturity dates are the most important factor in your total grow time. Because this is such a common question, I’ve written a separate, detailed guide explaining exactly how variety choice, harvest goals (like “new” potatoes vs. “storage”), and your climate all work together to create your final timeline.
You can read it here: How Long Does It Take to Grow Potatoes
3. Disease Resistance (Crucial Pro-Tip)
This is a detail I always look for. Many suppliers, as Cornell University recommends, will list if a variety is “scab-resistant.” If your soil pH is high (above 6.0), choosing one of these resistant varieties (like ‘Superior’ or ‘Chieftain’) is my top tip for a successful, blemish-free harvest.
The Golden Rule: ALWAYS Use Certified Seed
No matter which variety you choose, you must follow this one rule: Always buy “certified” seed potatoes.
This is critical: certified seed guarantees disease-free potatoes and vigorous growth. This is the single best investment you can make.
Why it matters: Store-bought potatoes are often treated with sprout inhibitors and can carry diseases (like blight or scab) that infect your garden soil for years. Certified seed eliminates these risks and ensures vigorous, healthy plants from day one.
Step 2: Prepare the Perfect Soil and Location
Note: Growing in a Small Space? This guide focuses on planting potatoes in the ground (garden beds or trenches). If you are short on space and want to grow in pots, grow bags, or containers, the rules for soil and watering are slightly different. Read my specialized guide: Growing Potatoes in Containers
Potatoes need two things from their location: full sun (at least 6 hours a day) and loose, well-drained soil. Compacted, heavy clay soil is the enemy of good potatoes, as it prevents the tubers from expanding.
1. The Foundation of Soil Prep
This is where the magic really begins. Creating a loose, fertile bed is the most important gift you can give your future potato plants.
a. Loosen and Amend: Several weeks before planting, I make it a priority to work the soil to a depth of at least 10-12 inches (25-30 cm). This deep tilling is essential to remove any rocks or roots.
b. Add Compost: I then amend the soil by mixing in 1-2 inches of well-rotted compost. This step is crucial for adding nutrients and improving soil structure. (Note: University research recommends a conservative application of no more than 1 inch per 100 sq. ft. to ensure balanced fertility).
c. A Key Warning: Be cautious with high-nitrogen organic matter. Too much nitrogen (like from fresh manure) can encourage lush foliage at the expense of tuber production—a common mistake I’ve seen many gardeners make.
2. The Secret of Soil pH
This is critical, and there’s an important balance to strike.
a. The Ideal vs. The Practical: Research shows potatoes perform best in very acidic soil (pH 4.8-5.5), which significantly reduces scab disease. However, this is rarely practical in a home garden where you grow multiple crops, since most vegetables prefer near-neutral pH (6.0-6.5).
b. My Recommended Approach: I maintain pH between 6.0 and 6.5—the practical range recommended by major universities. This works for potatoes AND your other garden vegetables.
c. Fighting Scab at Higher pH: If your soil pH is above 5.5 (which it likely is), plant scab-resistant varieties like Norland, Chieftan, or Russet Burbank. This is far more practical than acidifying your entire garden.
d. Special Case Only: If you have a dedicated potato bed separate from other vegetables, aiming for pH 5.2-5.5 (using sulfur) is the gold standard for scab prevention.
3. Pro-Tips for Your Soil Type
In my experience, not all soil is created equal. Here’s how I adapt my approach:
a. If you have heavy, clay soil: The biggest challenge here is drainage and compaction. I’m extra generous with the compost to help break up the clay. The best solution? Raised beds. They dramatically improve drainage and give your tubers room to expand. Applying that same drainage principle, a technique I often use is to plant in raised rows or “high ridges”, which elevates the tubers out of the waterlogged soil.
b. If you have sandy soil: Sandy soil drains wonderfully but can lose water and nutrients too quickly. To counter this, I add even more compost and organic matter to help it hold onto moisture.
4. A Final Pro-Tip (Recommended)
If you are preparing a new garden bed, consider using the “stale seedbed technique” (a pro-tip recommended by UC ANR).
a. How it Works: After your initial tilling, irrigate the plot deeply to encourage the germination of any weed seeds hiding in the soil.
b. The Follow-up: In a week or two, after a substantial number of weeds have sprouted, work the area again to kill all the new weed seedlings. This simple extra step substantially reduces weed competition for your potato plants.
Step 3: Prepare and Plant Your Seed Potatoes
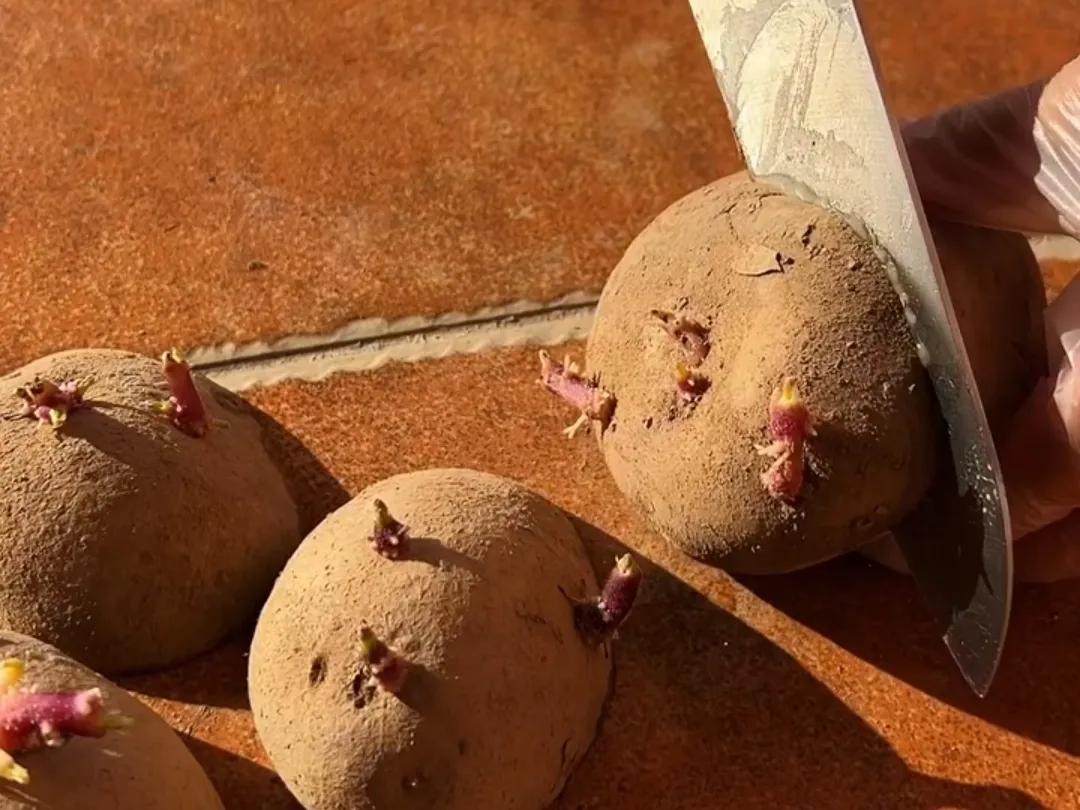
This step is more of a process than a single action, and getting it right is my secret to a vigorous start. I break it down into three phases.
1. Pre-Sprouting or “Chitting” (Optional but Recommended)
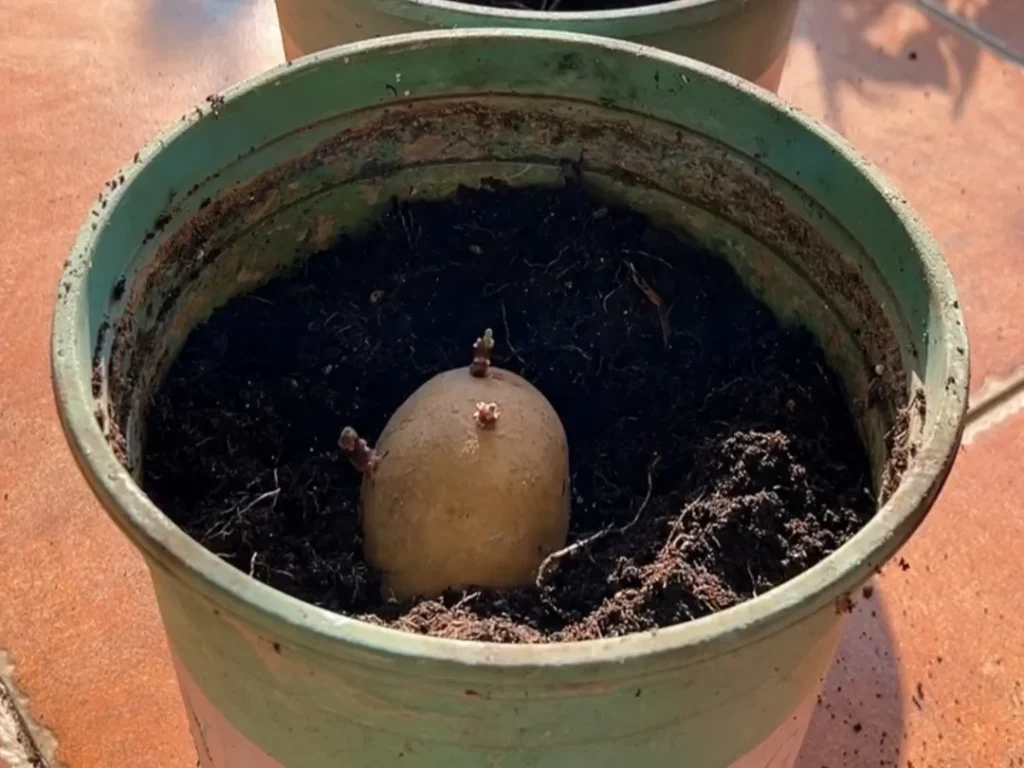
In my experience, giving your seed potatoes a head start by pre-sprouting them (a process called “chitting”) results in an earlier harvest and stronger plants.
a. How to Chit: About two to three weeks before your target planting date, I arrange the seed potatoes in a single layer in an open-topped container, like an egg carton. I make sure the “eyes” are pointing upwards.
b. The Right Spot: I then place the container in a location that is cool but bright, away from direct sunlight.
c. The Goal: You’re looking for short, sturdy, green or purple sprouts, about 1/2 inch (1-2 cm) long. Long, white sprouts mean the location is too warm and dark.
2. Cutting and Curing the Seed
I recommend cutting your seed potatoes about 1-3 days before planting. This timing is critical for the “curing” process.
a. How to Cut: For any seed potato larger than a chicken egg, I slice it into pieces. I make sure each piece is roughly 1.5 to 2 ounces (30-50 grams) and has at least two healthy eyes.
b. Pro-Tips for Cutting: A small but critical detail I always follow is to disinfect my cutting knife with rubbing alcohol between potatoes to prevent spreading any potential diseases. I also gently rub off any very small or weak sprouts, leaving only the one or two strongest eyes on each piece.
c. Curing the Pieces: After cutting, the raw surface needs to heal. This forms a protective callus that prevents the piece from rotting.
The Air-Drying Method: This is the university-recommended approach. Simply let the cut pieces sit in a single layer at room temperature for 1 to 3 days until the cut surface is dry to the touch.
3. Planting into the Garden
With your soil prepared and your seed pieces ready, it’s time to plant.
a. Prepare the Trench: I dig a trench about 3-4 inches (8-10 cm) deep. This 3-4 inch depth is the research-backed sweet spot. A trick I swear by is to water the bottom of the trench before planting and let it soak in.
b. Add a Nutrient Base: I place a small amount of compost or a balanced organic fertilizer in the bottom of the trench, then cover it with a thin layer of soil. This “sandwich” method ensures the new plant has food to reach for.
c. Place the Seed: I place the seed pieces in the trench about 10-12 inches (25-30 cm) apart. If planting multiple rows, space rows 30-36 inches (75-90 cm) apart to allow room for hilling and good air circulation.
d. Orientation (Crucial): Place the pieces cut-side down and sprout-side up. This gives the sprouts the best possible start.
e. Cover Lightly: Finally, I gently cover the seed pieces with about 3-4 inches (8-10 cm) of loose soil. This ensures the seed pieces are buried at the optimal final depth.
After planting, be patient—sprouts typically emerge in 2 to 4 weeks(14-28 days), depending on soil temperature. Warmer soil means faster emergence.
Step 4: Hilling Your Plants for a Bigger Harvest
Once your potato plants have emerged, your next job is to “hill” them. Master this one technique, and you can easily double your harvest.
1. The Hilling Process
Hilling—mounding soil up around the plant’s stems—is the secret to a bumper crop. This simple technique does two critical things:
It creates more underground stem length for tubers to form (this is where new potatoes grow).
It protects the developing potatoes from sunlight. (This is critical: as Cornell University confirms, sunlight turns tubers green and produces a toxic compound called solanine.)
Here’s the research-backed schedule that works perfectly:
a. When to Start: I recommend starting to hill when your plants reach 6 to 8 inches tall. This timing is supported by research from institutions like Cornell University and UC ANR. (Note: Some guides, including from the University of Minnesota, suggest waiting until plants are 12 inches tall. I prefer the earlier timing for better sun protection, but both approaches work well.)
b. How to Hill: Gently mound loose soil up around the stems. Leave about 4 inches of the top of the plant exposed—this ensures the plant gets enough light for photosynthesis while protecting the tubers below.
c. How Often to Repeat: You will repeat this process 2 or 3 times. I find hilling again every 2 to 3 weeks works perfectly.
d. The Final Goal: Your objective is to build a final ridge that is 6 to 8 inches deep in total. This gives your potatoes the perfect, dark, loose environment to expand.
2. An Optional Practice: Managing Flowers
You may see flowers appear on your plants. I recommend pinching off these flowers to direct the plant’s energy away from producing seed and toward growing larger tubers. While this is an optional step, I find it’s worth doing if you have the time.
Step 5: Harvesting for Peak Flavor
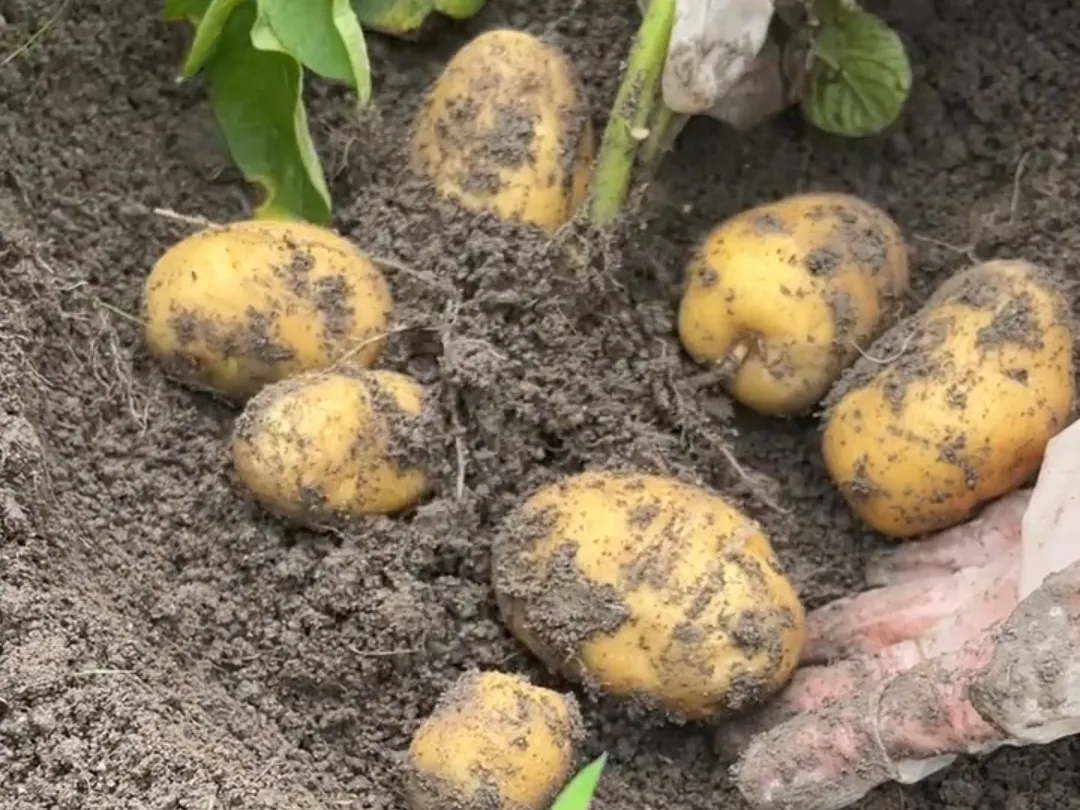
You have two options for harvesting, depending on whether you want tender “new” potatoes now or robust potatoes for winter storage.
1. “New” Potatoes (For Eating Now)
This is the first reward of the season.
a. The Signal: The best time to start harvesting “new” potatoes is approximately seven to eight weeks after planting. To check if they’re ready, carefully dig into the side of the hill and feel for tubers—if they’re golf-ball-sized or larger, they’re ready to harvest.
b. How to Harvest: At this point, you can carefully dig around the base of the plant (a practice known as “robbing”) and gently remove a few small, tender tubers. These have very thin skins and are delicious when cooked right away.
2. Main Crop / Storage Potatoes
For your main harvest, timing and proper skin curing are key to long-term storage success.
a. Watch for the Signal: The main signal is when the plant’s foliage turns yellow and begins to die back. This tells you the potatoes are nearing maturity.
b. Stop Watering: When you see the vines yellowing, stop watering completely. This signals the plant to redirect energy into toughening the tuber skins rather than continued growth.
c. The In-Ground Curing Period (My Pro-Tip): Once the vines have completely died back, cut them off at soil level but leave the potatoes in the ground for another 2 to 3 weeks—as long as your soil stays dry. This technique is my secret to potatoes with exceptionally tough, storage-ready skins. The cool, dark soil provides perfect curing conditions.
d. Dig Carefully: Choose a dry day for the final harvest. Use a garden fork and start digging at least 8-12 inches away from where the main stem was, then work your way inward. Dig deep—tubers can be a foot down. Work gently to avoid piercing your hard-earned harvest.
e. Handle Damaged Tubers: If you do accidentally spear a potato, set it aside for immediate use. Damaged tubers will spoil in storage, but they’re perfectly fine to eat right away.
Step 6: Post-Harvest Handling & Storage
You’ve successfully harvested your potatoes! Taking these next steps carefully is the key to enjoying your homegrown crop for months to come.
1. Initial Surface-Drying
The moment you pull your potatoes from the earth, resist the overwhelming urge to wash them. Water encourages rot in storage. Instead, if the day is dry, I let them sit right on the garden bed for a couple of hours to allow the soil on their surface to dry. The goal is just to let excess moisture evaporate, not to bake them in the hot sun.
2. The Curing Process (The Most Critical Step)
This is my secret to potatoes that last all winter. Curing thickens the skins and heals minor harvest wounds.
a. How to Cure: I gently brush off any large clumps of loose dirt (still no washing!) and spread the potatoes in a single layer on screens or in shallow crates—good air circulation is essential to prevent rot during curing.
b. The Right Conditions: Store them in a dark, well-ventilated location with high humidity (around 85-95%) and temperatures of 55-65°F. A basement or garage often provides these conditions naturally.
c. How Long: Cure for 2-3 weeks. This timeframe allows skins to fully thicken and minor wounds to heal. In my experience, a minimum of two weeks is essential for potatoes destined for long-term storage.
3. The Final Inspection
After curing, I meticulously inspect every single potato. This is my “no exceptions” rule, as one bad potato can truly spoil the whole bunch. I set aside any potatoes that have deep cuts, soft spots, blemishes, or any signs of greening. These imperfect spuds don’t go to waste—they simply get moved to the front of the line to be eaten within the next week or two.
4. Long-Term Storage
Only the best, fully cured, and blemish-free potatoes go into long-term storage.
a. The Right Location: Store potatoes in a dark, well-ventilated space. A cardboard box with holes or a burlap sack in a cool basement works perfectly.
b. Storage Temperature Matters: For long-term storage, keep potatoes in the dark at 40-45°F (4-7°C). Potatoes can be stored at even cooler temperatures (32-40°F, such as in a refrigerator), though potatoes destined for frying are best kept at 40-50°F to prevent cold-induced sweetening that can cause discoloration when fried.
c. Critical Rule #1: Keep Away from Ethylene-Producing Fruit. Never store potatoes near apples or pears. These fruits release ethylene gas, which causes potatoes to sprout prematurely.
d. Critical Rule #2: No Green Potatoes. Never eat the green parts of a potato. The green portion contains solanine, a toxin that is bitter and can cause illness. If it’s just a small spot, you can deeply peel it away, but if the potato is significantly green, discard it entirely.
Expert Guide to a Healthy Harvest: Tips & Troubleshooting
The steps I’ve covered so far will get you a harvest, but mastering these ongoing care techniques is how you get an amazing harvest. This section is where I share my deeper knowledge on fine-tuning the process.
Ongoing Care: Mastering Watering, Mulching, and Feeding
Once your potato plants are established, your job is to provide the consistent resources they need to focus on the all-important task of forming tubers.
My Watering Strategy
My approach to watering potatoes is built on one word: consistency.
In my experience, almost all tuber problems—like hollow centers, cracks, or knobs—are caused by inconsistent watering. The key is to understand that potatoes are shallow-rooted and cannot tolerate a “boom-and-bust” cycle of very dry followed by very wet soil.
Here is my two-phase approach to watering:
1. The Core Principle: Consistent Moisture
- a. The Goal: Your goal is to keep the soil evenly moist throughout the growing season, like a well-wrung-out sponge. This is especially critical during tuber formation and enlargement—inconsistent moisture during this period causes hollow or knobby potatoes.
- b. The Amount: The goal is to provide 1 to 2 inches of water per week, factoring in any rainfall.
- c. The Method: I always water deeply once or twice a week, rather than giving a light sprinkle every day. This encourages the roots to seek water a bit deeper.
2. My Watering Schedule
- a. Early Stage (Establishment): From planting until tubers begin forming, keep the top 8-12 inches of soil consistently moist. This is not a time for “tough love”; the shallow roots need that moisture to establish. Don’t waterlog the soil, but don’t let it dry out completely.
- b. Critical Stage (Tuber Formation): Once your plants are well established and beginning to form tubers (typically mid to late season), watering becomes absolutely non-negotiable. Moisture stress during tuber enlargement will cause deformed potatoes.
- c. Reduce Watering Before Harvest: Near the end of summer, when the plants begin to yellow and leaves start dying, reduce watering significantly. This signals the plant to stop growing and toughen up the skins for storage. I typically stop watering entirely once the vines are fully yellow, about 2-3 weeks before final harvest.
3. Pro-Tips for Watering
- a. The Trowel Test: How do you know if you’ve watered deeply enough? Dig down 8-12 inches an hour after watering. If the soil is moist at that depth, you’re good. If it’s only wet in the top inch or two, keep watering.
- b. Sandy Soil Needs More: If you have sandy soil (as I do), you will need to water more frequently, as it drains much faster.
- c. Mulch is Your Best Friend: A 2-3 inch layer of organic mulch (like straw) is my secret weapon. It suppresses weeds, keeps the shallow roots cool, and dramatically reduces water evaporation, making your job of maintaining “consistency” far easier.
Feeding for a Big Harvest
Potatoes are heavy feeders, but this is one area where more is not always better. My approach is about precision, not power.
My most important warning is to avoid heavy fertilization. Too much nitrogen, especially late in the season, is a classic beginner mistake. It will force the plant to pour all its energy into growing beautiful, lush green leaves, but will delay or even prevent the plant from producing tubers.
My feeding plan is strategic. We already built a balanced nutrient base in the trench back in Step 3. Your plants will benefit from one or two additional nitrogen applications during the critical early growth phase.
1. The Feeding Schedule
- a. First Application: Apply the first side-dressing about 4 weeks after planting, when plants are actively growing foliage.
- b. Optional Second Application: The University of Minnesota recommends a second application two weeks later (about 6 weeks after planting) as you do your second hilling. I find this helpful for vigorous varieties or in sandy soils, but it’s optional for most gardeners.
- c. What and How Much to Feed: Apply a nitrogen-rich fertilizer such as 21-0-0 (ammonium sulfate) at a rate of about ½ pound per 100 square feet of planted area. If using a balanced organic fertilizer, follow package instructions to deliver equivalent nitrogen. Remember: less is more with potatoes—over-fertilizing causes lush foliage but fewer tubers.
2. The Correct Technique (Side-Dressing)
- a. The Method: I use a technique called “banding.” I make a small, shallow groove about 4 to 6 inches away from the plant stems on both sides of the row.
- b. Apply and Cover: I sprinkle the fertilizer into this groove, then cover it with soil and water it in thoroughly. This places the food right where the roots can find it without burning the plant.
- c. Combine with Hilling: You can combine this feeding with your hilling—simply incorporate the fertilizer as you mound soil around the plants.
3. Critical Feeding Warnings
- a. Never let fertilizer touch the plant stems. Direct contact can burn and damage your plants.
- b. Never use “Weed and Feed” products. Any fertilizer containing a weed killer is toxic and will kill your vegetable plants.
The Role of Organic Mulch
Mulch is one of the most powerful tools in my potato patch, and I use it in one of two distinct ways, depending on my goal.
1. Strategy 1: Mulch as a “Soil Topper” (The Helper)
After you have finished hilling your plants, apply a layer of organic mulch (like straw, shredded leaves, or grass clippings) on top of the soil and around the plants.
This simple act is incredibly effective, providing three major benefits: conserves water by dramatically reducing evaporation; keeps soil cool (critical since potatoes stop forming tubers above 80°F); and suppresses most weeds.
2. Strategy 2: Mulch as a “Growing Method” (The No-Dig Way)
This is a fantastic, no-dig alternative to traditional hilling. I highly recommend this if you have heavy, compacted clay soil or want an easier harvest.
Instead of hilling with soil, you hill with mulch.
- a. How to Do It: First, you plant your seed pieces very shallowly, only about 1-2 inches deep (just enough to make contact with the soil).
- b. Cover with Mulch: Immediately cover the area with a deep, 6 to 8-inch layer of loose straw or other weed-free mulch.
- c. “Hill” with More Mulch: As the potato plants grow up through the straw, continue adding more mulch as needed to keep the growing stems and developing tubers completely covered and protected from light. The mulch will settle and decompose over time, so you may need to add several inches throughout the season. Your final mulch depth may reach 10-12 inches or more.
- d. The Benefits: This method provides all the benefits of Strategy 1, plus one major bonus: an incredibly easy harvest. After the plants die back, you can simply pull back the mulch with your hands to harvest the clean potatoes lying on top of the soil.
The Art of Hilling: My Proven Schedule for a Bigger Harvest
For most plants, “support” means stakes or cages. For potatoes, support means soil. Hilling—the simple act of mounding soil up around the plant’s stems—is the single most important ongoing task in my potato patch.
Based on my experience, this process does two critical things:
- It Creates More Potatoes: It creates more underground stem length, which encourages the plant to send out more stolons, and it’s at the tip of these stolons that new potatoes form.
- It Protects the Crop: It protects the developing tubers from sunlight.
This second point is a critical safety measure. Sun exposure will turn potatoes green, producing a bitter toxin called solanine. Hilling is the 100% preventable solution.
Here is the hilling schedule I follow:
1. The First Hilling This is the most important hilling. I do this as soon as the plants are 6 to 8 inches tall. I mound loose soil up and around the stems, leaving the top cluster of leaves exposed.
2. The Second Hilling (2-3 weeks later) About 2 to 3 weeks after the first hilling, I repeat the process. I add more soil around the base, gradually building up the mound and widening it to give tubers room to grow.
3. Additional Hilling (As Needed) I monitor my hills throughout the season. If I see any potato shoulders peeking through, or if heavy rain washes away soil, I add more. Some varieties or growing conditions may need a third full hilling 2 weeks after the second.
My goal is always to build a final hill or ridge that is about 6 to 8 inches deep in total. This 6-8 inch depth is the research-backed target for maximum tuber production and green-free potatoes.
My Pro-Tip (Ongoing Maintenance): From this point on, my main job is to keep an eye on the hills. After a heavy rain, some soil can wash away. If I ever see the “shoulder” of a potato peeking through the soil, I immediately cover it back up.
Natural Pest and Disease Control
In my years of gardening, I’ve learned that the best defense against pests and diseases is a good offense. Preventing problems before they start is always easier than trying to cure them. A healthy, resilient plant is its own best protector.
Here is my complete preventative strategy.
Foundational Strategies for Prevention
1. My Number One Rule: Practice Crop Rotation This is my most important rule, and its importance cannot be overstated. I never plant potatoes (or their relatives—tomatoes, peppers, and eggplant) in the same spot for more than one year.
You should wait 3 to 4 years before planting them in the same soil again. This is the single most effective way to break the cycle of soil-borne diseases.
2. Always Start with Certified Seed This is the second critical rule. As I mentioned in Step 1, never use grocery store potatoes. Store-bought potatoes are often treated with sprout inhibitors and, more importantly, can introduce devastating diseases (like blight or scab) into your garden soil, where they can persist for years.
3. Water Wisely (The Blight Prevention Plan) Many fungal diseases, especially Early and Late Blight, thrive on wet leaves. My watering strategy is a key part of my disease prevention plan:
- I always water at the base of the plant, directly on the soil.
- I always water in the morning. This gives the sun plenty of time to dry any accidental splashes on the leaves.
4. Give Them Space Good air circulation is a powerful ally. Following the spacing guidelines I outlined earlier ensures that air can move freely between plants, helping their leaves dry quickly after rain and making it harder for fungal spores to spread.
5. Be Cautious with Traditional Remedies Some gardeners use wood ash to deter pests. However, I avoid this practice because wood ash is highly alkaline and will raise soil pH—which actually encourages potato scab disease. If you maintain the acidic to neutral pH range I recommended earlier, wood ash would work against your soil management strategy.
6. Be Smart About Companion Planting You have likely heard that planting marigolds or beans near potatoes can help them thrive. But be careful—while some pairings are backed by science to deter pests, others are just garden myths that can actually compete with your crop. I have analyzed the evidence to separate the helpful neighbors from the harmful ones. Find out what to plant (and what to avoid) here: Potato Companion Planting: Garden Wisdom vs. What Science Says
Dealing with Common Pests
Even in a well-managed garden, pests can appear. Here’s how I handle the most common ones organically.
1. Colorado Potato Beetles (CPB) This is the most notorious potato pest. I check my plants for them daily, especially on the undersides of leaves. Hand-picking is the most effective organic control.
- What to Look For: The yellow and black striped adults, the reddish-orange larvae, and the bright orange egg clusters.
- My Method: I hand-pick all three forms and drop them into a bucket of soapy water. For a small patch, floating row covers, applied at planting, can be very effective at blocking the beetles from ever reaching the plants.
2. Aphids and Flea Beetles
- For Aphids: A strong jet of water from the hose is my go-to solution. It’s fast, organic, and highly effective at dislodging small colonies.
- For Flea Beetles: These tiny black beetles chew small “shot holes” in the leaves. Floating row covers placed over young plants are the best defense.
Preventing Common Diseases
1. Potato Scab (A Soil pH Problem) This disease causes rough, scabby patches on the potato skin. It looks bad, but the potatoes are completely edible—just peel them.
- The #1 Defense: Soil pH management. Scab bacteria thrive in neutral to alkaline soil but struggle in acidic conditions. If you maintain the practical pH range of 6.0-6.5 that I recommended earlier, your best defense is to plant scab-resistant varieties (like Norland, Chieftan, or Russet Burbank). If you have a dedicated potato bed where you can lower pH to 5.2-5.5 using sulfur, you’ll have even better protection.
2. Early and Late Blight (A Moisture Problem) These are the most common fungal diseases. The best prevention is to follow the “Water Wisely” and “Give Them Space” rules I outlined above. Keeping the leaves dry is the key to keeping blight at bay.
Solving Common Problems with Potatoes
Even with the best care, you might encounter a few bumps along the road. Here are the most common issues I’ve seen in my garden and in questions from other gardeners, along with my diagnosis.
1. Problem: My seed potatoes rotted or never sprouted.
- My Diagnosis (The Cause): This is a common issue for eager gardeners. The primary cause is planting in soil that is too cold (below 50°F) and excessively wet. When soil is cold and waterlogged, the seed piece cannot heal properly and simply rots before it can sprout.
- The Solution: Wait until your soil has warmed to at least 50°F, and ensure it’s well-drained. Crucially, make sure the cut surfaces of your seed pieces are properly cured (healed over)(see Step 3). This protective layer is vital for preventing rot.
2. Problem: My harvested potatoes have green skin.
- My Diagnosis (The Cause): This is a classic issue caused by one thing: exposure to sunlight. When a developing tuber is exposed to light, it produces chlorophyll (which is harmless) and a toxic compound called solanine.
- The Solution: This problem is 100% preventable. The solution is proper and consistent hilling. Always make sure your tubers are well-covered with soil.
- My Strong Advice (Safety Warning): You must take this seriously. If it’s just a small spot, you can deeply peel away all the green parts plus a little extra. If the potato is significantly green, I strongly advise you to discard it and not eat it. This is a serious food safety issue—don’t take chances with solanine poisoning.
3. Problem: I have huge, beautiful plants, but very few (or very small) potatoes.
- My Diagnosis (The Cause): This is incredibly frustrating, and it’s usually caused by one of two things:
- 1. Too Much Heat: This is the most common culprit. Potatoes are a cool-season crop. When soil temperatures consistently exceed 85-90°F (29-32°C), the plant becomes stressed and stops forming or bulking up new tubers.
- 2. Too Much Nitrogen: This is an avoidable feeding error. A nitrogen-rich fertilizer applied late in the season encourages the plant to pour all its energy into growing lush leaves, at the expense of growing tubers.
- The Solution: The solution is prevention. Follow the feeding schedule I outlined earlier—apply nitrogen early (4-6 weeks after planting) but avoid late-season fertilization. Focus on consistent watering and proper timing to ensure the critical tuber-bulking phase happens before the intense summer heat arrives.
4. Problem: My potatoes are cracked, hollow in the center, or oddly shaped.
- My Diagnosis (The Cause): These problems are almost always caused by inconsistent conditions.
- Cracked Potatoes & Hollow Heart: These are the classic results of uneven watering. A long dry period followed by sudden heavy watering causes the potato to grow too fast and split or develop a hollow center—this is why the consistent watering strategy I outlined earlier is so critical.
- Deformed or Lumpy Potatoes: This is usually the result of growing in soil that is too compacted or rocky, forcing the tuber to grow around obstacles.
- The Solution: The key is consistency. Maintain even soil moisture, as detailed in my “Watering Strategy,” and ensure you have loose, rock-free soil, as covered in Step 2 (Soil Preparation).
5. Problem: My potatoes rotted in the ground (before harvest).
- My Diagnosis (The Cause): The cause of rot in the ground is almost always excessive moisture from poor drainage. Potatoes need consistent moisture to grow, but they cannot tolerate sitting in waterlogged, anaerobic soil. This is a common fate in heavy clay soil, as noted by UMN.
- The Solution: This goes back to Step 2 (Soil Preparation). If you have heavy clay soil, it is essential to amend it heavily with compost to improve its structure. Planting in raised rows or ridges, as I recommended, is the best insurance policy against rot, as it physically elevates the tubers, allowing excess water to drain away.
Frequently Asked Questions (FAQ)
References & Further Reading
This guide is based on research from leading agricultural extension services:
Cornell University Cooperative Extension
“Growing Guide: Potatoes“
University of Minnesota Extension
“Growing Potatoes in Home Gardens“
Utah State University Extension
“How to Grow Potatoes in Your Home Garden“
UC Agriculture and Natural Resources (UC ANR)
“Cultural Tips for Growing Potato“

