There’s something uniquely satisfying about stepping out to your garden or balcony and snipping a few fresh mint leaves. The invigorating aroma that instantly fills the air is the first reward, followed by the cool, refreshing flavor it adds to everything from a simple glass of water to elaborate summer dishes. I find that growing my own mint is one of the easiest and most gratifying gardening experiences.
I know that for many, the thought of growing mint brings up images of a garden completely overrun by a plant that just won’t quit. It has a reputation as a bit of a “plant bully,” and frankly, it has earned it!
But I’m here to tell you that with one simple rule, you can have all the joy of fresh flavor with none of the chaos. This guide is my complete, step-by-step roadmap designed to give you the knowledge and confidence to grow a lush, healthy, and perfectly contained mint plant.
By following along, you’ll go from a tiny cutting to an endless supply of fresh flavor. This is just one of the many plants I cover in my complete library of Herb and Vegetable Growing Guides, and I’m thrilled to share my passion for it with you.
Core Summary (TL;DR)
- Rule #1: Always Grow in a Container. This is the most critical advice I can give. Mint spreads aggressively through underground runners. Planting it in a pot is the only way to keep this lovable bully from taking over your entire garden.
- The Two Essentials: Sun and Water. At its core, mint is incredibly simple. Give it plenty of sunshine and consistently moist soil, and it will thrive with surprising vitality.
- Prune Aggressively for the Best Growth. Don’t be shy about harvesting! The more you snip and prune your mint, the bushier and more productive it will become. Regular trimming prevents it from becoming leggy.
Quick Facts for Growing Mint
| Factor | Details |
| Sunlight | Full sun to partial shade (6+ hours recommended) |
| Soil Type | Rich, well-draining potting mix |
| Soil pH | 6.0 to 7.0 (slightly acidic) |
| Spacing | 1 plant per 12-inch pot (at least 6-8 inches deep) |
| Days to Germination | 10-15 days (Not recommended) |
| Days to Harvest | 60-90 days from seed (Flavor may vary) |
| Planting Method | Best grown from cuttings or nursery transplants |
| Hardiness | Perennial in USDA Zones 4-11 |
When to Plant Mint
The best times to plant mint are in the spring after the danger of frost has passed, or in the fall, about 6-8 weeks before the first expected frost. Mint is incredibly resilient and can technically be planted anytime the ground isn’t frozen, but it establishes best when temperatures are consistently above 60°F (15°C).
Planting during these windows gives it the perfect start for a season of vigorous growth.
Mint Planting Calendar (USDA Zones 4-9)
How to Read This Calendar
The calendar below provides key planting dates for two different gardening styles: Aggressive (to maximize your season) and Safe (to minimize frost risk). You’ll notice the ‘Aggressive’ fall dates start later—this is a deliberate strategy to extend the harvest as late as possible.
Mint-Specific Timing Rules
- Spring Planting: The dates for spring are for planting mint transplants or rooted cuttings. They are calculated to fall within a window of 0 to 2 weeks before the average last frost date. This timing leverages mint’s impressive cold tolerance, allowing it to establish a strong root system in cool soil for a vigorous start to the season.
- Fall Planting: The dates for fall are also for planting transplants or rooted cuttings. They are set 6 to 8 weeks before the average first frost date. This gives the plant ample time to establish itself before winter dormancy, leading to a stronger, more productive plant the following spring.
| USDA Zone | Spring Planting(Aggressive) | Spring Planting(Safe) | Fall Planting(Aggressive) | Fall Planting(Safe) |
| Zone 4 | Apr 25 – May 9 | May 1 – May 15 | Aug 5 – Aug 19 | Jul 31 – Aug 14 |
| Zone 5 | Apr 16 – Apr 30 | Apr 23 – May 7 | Aug 14 – Aug 28 | Aug 8 – Aug 22 |
| Zone 6 | Apr 13 – Apr 27 | Apr 24 – May 8 | Aug 23 – Sep 6 | Aug 7 – Aug 21 |
| Zone 7 | Mar 23 – Apr 6 | Mar 25 – Apr 8 | Sep 10 – Sep 24 | Aug 30 – Sep 13 |
| Zone 8 | Mar 9 – Mar 23 | Mar 22 – Apr 5 | Sep 14 – Sep 28 | Sep 4 – Sep 18 |
| Zone 9 | Feb 14 – Feb 28 | Mar 4 – Mar 18 | Oct 5 – Oct 19 | Sep 15 – Sep 29 |
✔ Accuracy is my priority. The key planting dates in this calendar are calculated based on representative Aggressive and Safe frost date baselines established for each zone. Because your garden’s microclimate may vary, I strongly recommend that you verify your local frost dates for the most accurate timing. Learn My Methodology & Find a Frost Date Tool Here.
Understanding the Planting Windows
Spring Planting: Seizing the Cool Season
Spring planting gives your mint a long runway to establish a robust root system. The soil is warming, and the lengthening days provide ample energy.
This allows the plant to become strong and lush before the peak heat of summer, which can sometimes cause stress. A mint plant started in spring will give you bountiful harvests all season long.
Fall Planting: Your Second Harvest Opportunity
In zones with milder winters, fall is an excellent planting window. The soil is still warm from the summer, which encourages rapid root growth, while the cooling air temperatures are ideal for the foliage.
A mint plant established in the fall will focus on its root system, often overwintering and re-emerging the following spring as a larger and more vigorous plant than one newly planted.
The Danger Zone: Why Summer Heat is the Enemy
While established mint can handle summer heat with enough water, it’s not the ideal time to plant a new start. The combination of intense sun and high temperatures can scorch the leaves and stress the young root system, making it difficult for the plant to get established.
You’ll find growth is most vigorous in the milder temperatures of spring and fall.
Key Factors & Advanced Strategies
The Secret Signal: Ideal Soil and Air Temperatures
While university guides provide general timelines, I’ve found that paying attention to specific temperatures can give you an extra edge. Through my research and hands-on experience, I’ve identified several key thresholds for mint’s growth cycle:
- Waking Up: I’ve observed that the underground rhizomes can begin to stir when the soil temperature reaches just 35-40°F (2-4°C).
- Slow Growth: True growth begins once air temperatures are consistently above 60°F (15°C), though it may be slow at first.
- Optimal Growth: The plant enters its peak performance zone and grows most rapidly when air temperatures are between 68°F and 86°F (20°C to 30°C).
- Cold Hardiness: Its toughness is remarkable. Established roots can survive winter temperatures as low as 5°F (-15°C), which explains why it’s a reliable perennial in most climates.
Pro Technique: Continuous Harvesting
For a perennial herb like mint, “succession planting” isn’t about sowing new seeds every few weeks. Instead, I practice a strategy of continuous harvesting and propagation.
By regularly cutting stems, you are constantly encouraging the plant to produce new, tender growth.
If you want a truly endless supply, simply take a few 4-inch cuttings from your main plant in mid-summer and root them in water. In a couple of weeks, you’ll have brand-new plants ready to pot up, ensuring you have a fresh, vigorous supply of mint well into the fall.
Extending Your Season: Getting an Earlier Start and Later Harvest
Because mint is so cold-hardy, extending its season is simple. You can keep a pot indoors on a sunny windowsill in late winter and move it out after the last frost for a head start.
In the fall, knowing the roots can survive down to 5°F (-15°C) tells you that a little protection goes a long way. Moving your pot into a sheltered spot, like against a wall or in a cold frame, can protect it from the harshest winds and frosts, allowing you to harvest fresh leaves for weeks longer than you otherwise could.
How to Plant, Grow, and Harvest Mint: A Step-by-Step Guide
Step 1: Choose Your Variety and Starting Method
The first exciting step is to decide what kind of mint you want to grow and how you’re going to get started. Both choices will shape your gardening experience.
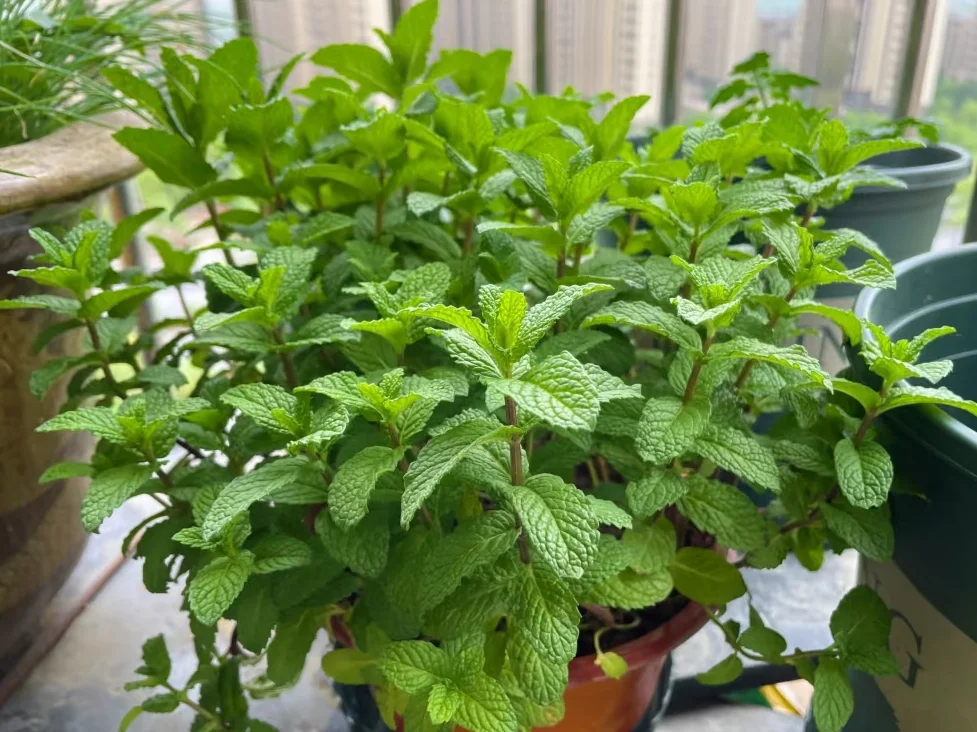
First, Choose a Flavor
Think about how you’ll use your mint, as this will guide you to the perfect variety.
- Spearmint (Mentha spicata): This is the classic, sweet mint often used in teas, sauces, and summer drinks. It has bright green, spear-shaped leaves.
- Peppermint (Mentha piperita): With a higher menthol content, peppermint has a much more potent, spicy, and cooling flavor. It’s perfect for desserts, candies, and therapeutic uses.
- Apple Mint (Mentha suaveolens): A fun variety with fuzzy, rounded leaves and a mild, fruity flavor that’s wonderful in fruit salads and iced teas.
Second, Choose Your Starting Method
For mint, how you start is critical to your success. Here are your options, ranked from what I most recommend for beginners to the most challenging.
- Buy a Nursery Plant (Most Recommended): The easiest and most reliable way to start is by purchasing a small, healthy plant from a local nursery. This plant is already established, guaranteeing you’ll get the flavor you expect, and you can start harvesting much sooner.
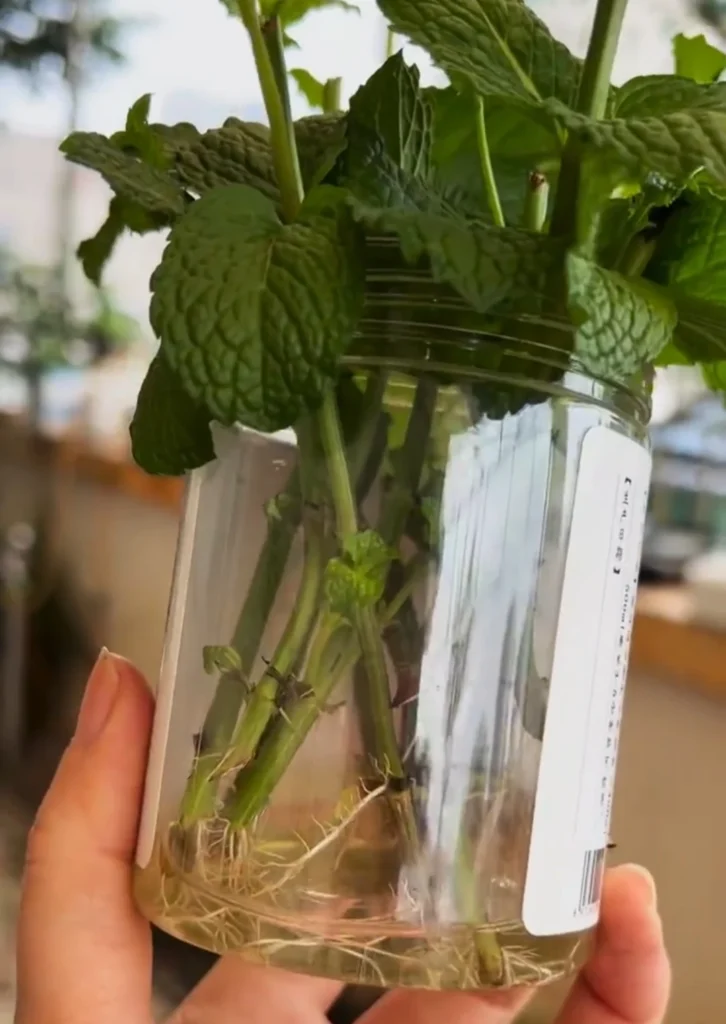
- Start from a Cutting (Also Excellent): If you have a friend with a mint plant, you’re in luck. Mint is incredibly easy to grow from cuttings. Simply snip a healthy 4-6 inch stem, remove the lower leaves, and place it in a glass of water. It will sprout new roots in as little as a week, with a near-perfect success rate. This is a fantastic and free way to get started.
- Sow from Seed (For the Adventurous Gardener): While possible, I generally advise beginners against starting mint from seed. The seeds can be slow and tricky to germinate, and more importantly, the resulting plant may not have the same flavor as its parent (a phenomenon known as growing “untrue to type”). If you enjoy a gardening challenge, it can be a rewarding process, but for a guaranteed, flavorful harvest, starting with a plant or cutting is the best path.
Step 2: Prepare the Perfect Soil and Location
This is where I implement the most important rule of growing mint: containment. Giving your mint the right home from the start is the secret to a happy plant and a happy gardener.
Choose Your Container
The key to a good container for mint is width over depth. Mint spreads via shallow, horizontal roots (rhizomes), so it appreciates having room to spread out.
A pot that is too deep can actually hold excess water and increase the risk of root rot.
- Size: Look for a pot, window box, or other container that is at least 10-12 inches (25-30 cm) wide. A depth of 6-8 inches (15-20 cm) is perfectly sufficient.
- Material: Mint isn’t fussy. Classic terracotta (clay), plastic, or glazed ceramic pots all work well.
- Drainage: This is non-negotiable. Whatever you choose, ensure it has at least one large drainage hole at the bottom to let excess water escape.
Create the Ideal Soil Mix
While mint can survive in average soil, it will truly thrive in a mix that is loose, fertile, and well-draining. Here are two excellent options:
- The Simple Method: The easiest approach is to use a high-quality, all-purpose potting mix and improve its drainage by mixing in a handful of perlite or coarse sand.
- The DIY Recipe: For a custom blend, I recommend a mix that balances moisture retention and aeration. A great recipe is 3 parts compost or leaf mold, 2 parts coarse sand, and 1 part standard garden soil or coir.
Find the Perfect Location
Mint is a sun-worshipper, and light directly translates into growth and flavor.
- Sunlight: Aim to give your mint at least 6 hours of direct sunlight each day for the bushiest growth and most intense flavor. It can tolerate as little as 4 hours, but any less and it will likely become tall, weak, and “leggy,” stretching for light.
- Placement: A south-facing balcony or a sunny spot on a patio is ideal.
- Heat Protection: In very hot climates (like USDA zones 8 and above), the afternoon sun can be scorching. In these areas, a spot that receives direct morning sun and some light shade during the hottest part of the afternoon is perfect.
Step 3: Planting Your Mint
With your container and soil ready, it’s time for the most exciting part: planting. The process is slightly different depending on whether you’re starting with a nursery plant or a fresh cutting.
For a Nursery Start (The Easiest Way)
This is the most straightforward path to a pot of mint.
- Prepare the Soil: I start by lightly watering the potting mix in the new container and letting it drain. This makes the soil welcoming for the new roots.
- Unpot with Care: Gently tip the nursery pot on its side and slide the mint plant out, trying not to pull it by the stem. For a plant that’s very tightly root-bound, I use an extra little technique: I gently tease the bottom-most roots apart with my fingers. This small step encourages them to grow out into their new home rather than continuing to circle.
- Planting: Place the root ball into the hole you’ve made in your new pot. The goal is to have the top of the plant’s soil level with the new soil line.
- Settle In: Fill the surrounding space with your potting mix, lightly firming it down to remove any large air pockets. Give the pot a final, thorough watering until you see it run out of the drainage holes. This helps settle the soil and gives the plant a good drink.
For a Cutting (The Thrifty & Rewarding Way)
There is something truly magical about creating a new plant from just a single stem. Your notes on this process were excellent, and here is the method I find most successful.
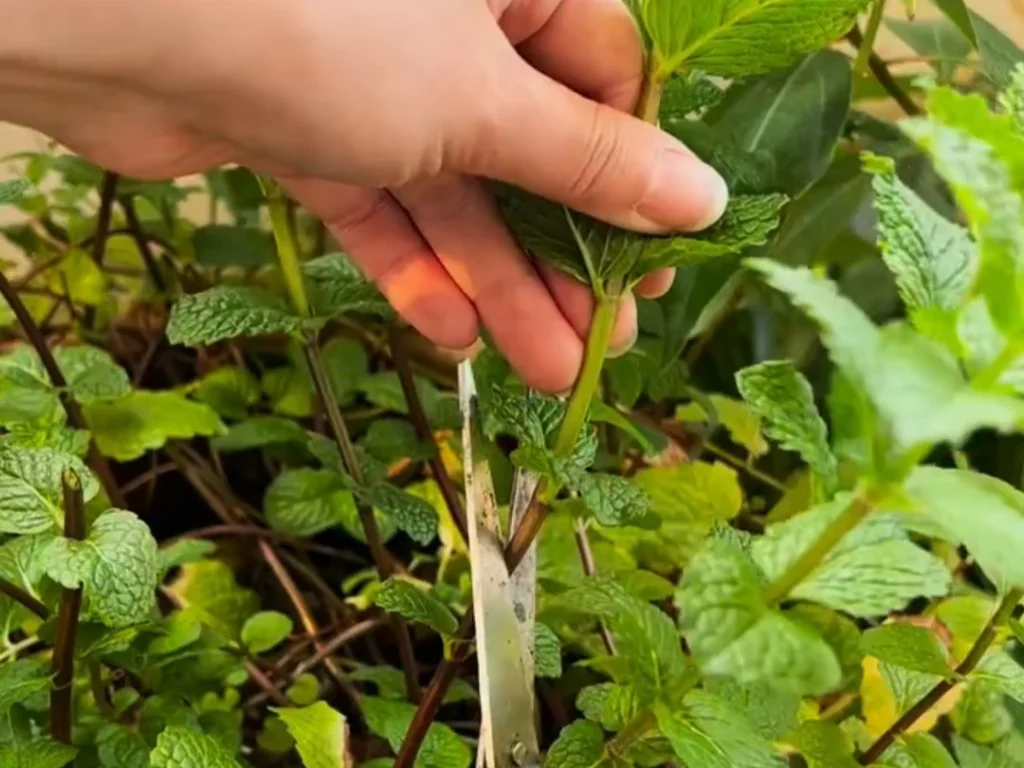
- Take a Healthy Cutting: Snip a healthy, vigorous stem from an established mint plant. I look for a piece that is about 4-6 inches (10-15 cm) long.
- Prepare the Stem: Carefully remove the leaves from the bottom half of the stem. Any leaves left under the water or soil will rot, so this is a crucial step.
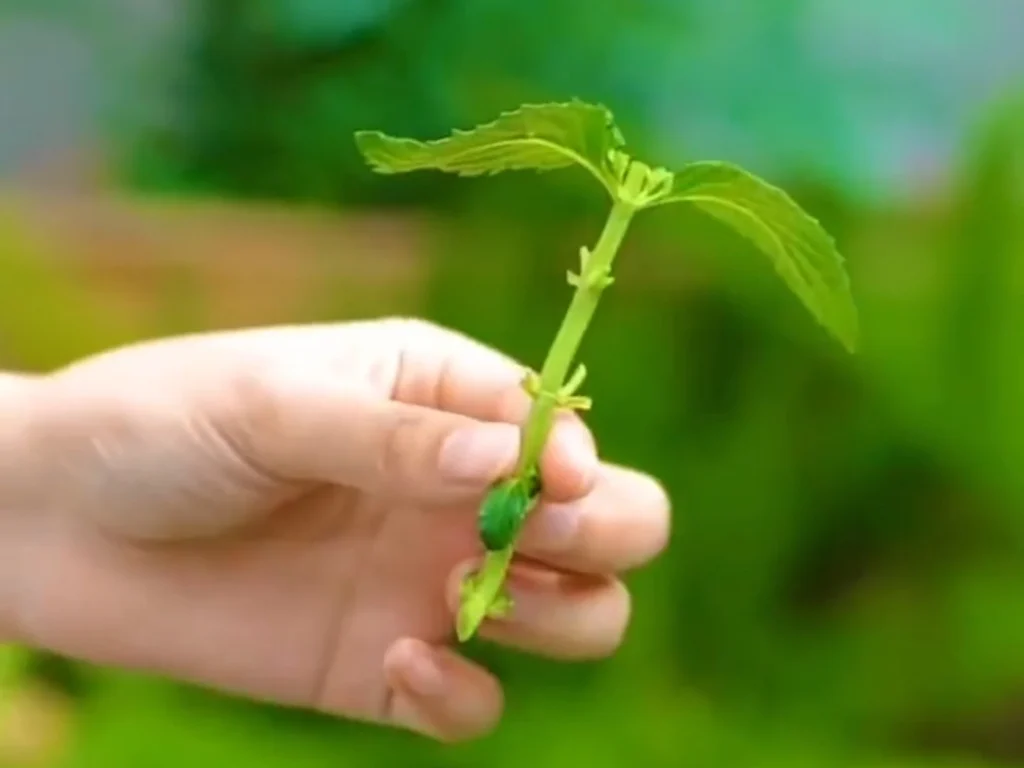
- Root it in Water: Place the stem in a glass of clean water, ensuring the leafless part is submerged. Put the glass in a spot with bright, indirect light. In just a few days to a week, you will see fine white roots begin to emerge from the stem.
- Transplant to Soil: Once the roots are about an inch long, it’s time to move your new plant to its permanent home. Plant it in your prepared container following the same method I described for nursery starts above.
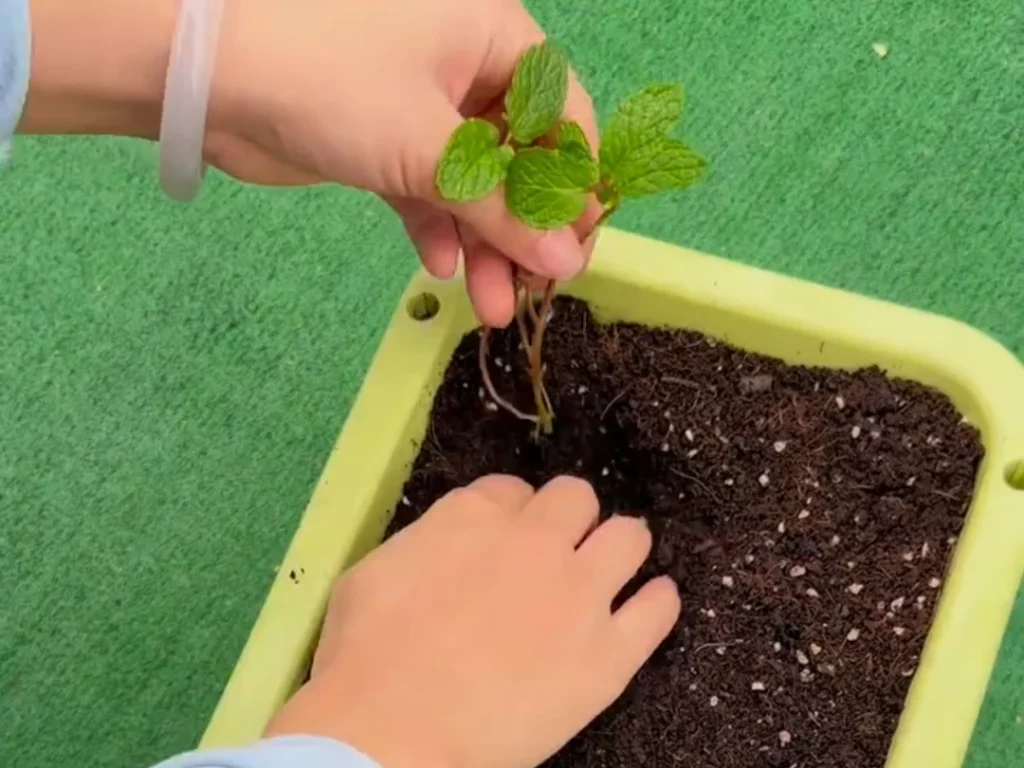
- Acclimate Slowly: A newly potted cutting can be a bit sensitive. For the first 3-4 days, I recommend keeping the pot in a shady, sheltered spot before gradually moving it into full sun. This acclimation period helps prevent transplant shock and ensures a strong start.
Step 4: Establish a Bushy Plant with Pruning and Mulch
Once your new mint plant has settled into its pot for a week or two and is showing signs of new growth, your goal is to shift from just keeping it alive to actively shaping it into a full, bushy plant.
This step is my secret to a non-stop harvest.
Thinning (If Necessary)
If your nursery pot came with several stems crowded together, I recommend thinning them to the one or two strongest ones. Simply use a clean pair of scissors to snip the weaker stems at the soil line.
This isn’t about being cruel to the plant; it’s about ensuring the remaining stems have ample airflow and resources to become strong and healthy.
The First Pruning: Your Key to a Fuller Plant
This is the most important action you can take to prevent a tall, spindly mint plant.
When your main stem reaches about 6 inches (15 cm) tall, it’s time for its first “pinch.”
- What to Do: I use my fingertips or a pair of clean snips to cut the top section of the main stem off, right above a set of leaves. You can remove the top 1-2 inches.
- Why It Works: This one simple cut removes the stem’s “apical dominance,” which is its tendency to grow straight up. In response, the plant will activate dormant buds at the leaf nodes just below your cut. Two new stems will begin to grow out from that point, creating a ‘V’ shape. By repeating this process on future stems, you are training the plant to grow out, not just up, resulting in a much bushier and more productive plant.
Apply a Layer of Mulch
After this first pruning, I like to add a layer of mulch to the top of the soil.
A 1-inch layer of organic mulch (like shredded bark, straw, or compost) does three wonderful things: it helps the soil retain moisture so you water less, it suppresses any weeds that try to sprout in the pot, and it keeps the roots cool.
Just be sure to keep the mulch from being piled up directly against the plant’s stems.
For the ongoing details of watering and feeding your established plant as it grows, I cover that in the “Expert Guide to a Healthy Harvest” section below.
Step 5: Harvesting for Peak Flavor
Harvesting is my favorite part of growing mint, and it’s a perfect example of how a plant can reward you for pruning it.
Regular harvesting is not just about gathering leaves; it’s the key to keeping the plant healthy and encouraging it to become even more productive.
When to Harvest
- Timing: You can begin harvesting as soon as your plant is established and has reached about 6-8 inches (15-20 cm) in height.
- Peak Flavor: For the absolute best flavor and aroma, I always harvest before the plant starts to flower. This is when the leaves have the highest concentration of essential oils.
- Time of Day: The ideal time to harvest is in the morning, right after the dew has dried on the leaves but before the afternoon sun can diminish their potent oils.
How to Harvest
Your harvesting method will depend on how much mint you need.
- For a Few Leaves (Light Use): If you just need a few leaves for a drink or a garnish, I recommend plucking them from the bottom of the stem, working your way up. It’s best to leave the top 3-4 pairs of young leaves in place, as they are the primary drivers of new growth.
- For Stems (A Proper Harvest): This is the best method for the plant’s health and for encouraging bushy growth. Instead of picking individual leaves, I harvest whole stems. My preferred technique is to count down from the tip of a stem to the second or third set of leaves, then make a clean snip with scissors just above that leaf pair. This leaves enough foliage on the stem for it to recover quickly and encourages two new side shoots to sprout from the nodes you left behind.
Harvesting Frequency
During the peak growing season of late spring and summer, your mint plant will be incredibly vigorous. I find that a light to moderate harvest once a week is a good rhythm.
It keeps the plant looking tidy and constantly stimulates the production of fresh, tender leaves.
As a general rule, I avoid removing more than one-third of the plant’s total foliage at any single time to ensure it always has enough energy to regrow.
Step 6: Post-Harvest Handling & Storage
Bringing your fresh-cut mint indoors is a joy. To make sure you can enjoy every last bit of it, proper storage is key.
Here are my favorite methods for keeping that vibrant flavor ready for whenever you need it.
Short-Term Storage (Up to a Week)
If you plan to use your mint within the next week, these two methods work beautifully.
- The Bouquet Method: This is my simplest go-to. I place the mint stems in a small glass with an inch of water, just like a little bouquet of flowers, and keep it on my kitchen counter. It looks lovely and keeps the leaves perfectly fresh.
- The Refrigerator Method: For slightly longer freshness, I gently wrap the fresh leaves or stems in a lightly damp paper towel. Then, I place the bundle inside a plastic bag or an airtight container and store it in the crisper drawer of my refrigerator. This method is excellent for protecting the delicate leaves.
Long-Term Storage (For the Winter Months)
When you have a truly abundant harvest, preserving it for the off-season is incredibly rewarding.
- Drying for Teas and Spices: This is the classic way to preserve herbs. I tie a small bunch of stems together with string and hang them upside down in a warm, dry, and well-ventilated area away from direct sunlight. Once the leaves are completely dry and crumbly to the touch (usually in 1-2 weeks), I strip them from the stems and store them in an airtight jar. They make the most wonderful homemade mint tea all winter long.
- Freezing for Fresh Flavor: To preserve that “just-picked” taste, freezing is the best option. I love to finely chop the fresh leaves, pack them into an ice cube tray, and top them off with just enough water to cover. Once frozen, I pop the cubes into a freezer bag. These little flavor bombs are perfect for dropping straight into iced tea, cocktails, or a pot of soup.
Expert Guide to a Healthy Harvest: Tips & Troubleshooting
Ongoing Care: Mastering Watering, Feeding, and Annual Refresh
Once your mint is established, your role shifts to providing the consistent care that will keep it lush and productive all season long.
Think of it as a simple rhythm of watering, feeding, and an annual check-up.
Watering
The golden rule for mint is to maintain consistently moist, but not waterlogged, soil.
- The Feel Test: The best way to know when to water is to use your finger. When the top inch of soil feels dry to the touch, it’s time to give the pot a thorough drink until water runs out the bottom. In my experience, mint is resilient; if it gets a little too dry, its growth may slow, but it will almost always bounce back after watering.
- Summer Frequency: During the peak heat of summer, you may need to water your potted mint every single day, sometimes even twice on the hottest days—once in the early morning and once in the evening.
- Mulch is Your Best Friend: A 1-inch layer of organic mulch on the soil surface is invaluable. It dramatically slows down evaporation, meaning you’ll water less often, and it also keeps the roots cool and happy.
- Watering Method: To prevent fungal diseases like rust, I always aim to water the soil directly and avoid wetting the leaves, especially in the evening. Keeping the foliage dry is the best practice.
Feeding
To support its vigorous growth and endless production of new leaves, mint benefits from regular feeding.
- The “Feed After You Harvest” Rule: While some university guides suggest a single spring fertilizer application is sufficient—which is great advice for in-ground mint—I find that for potted mint, which loses nutrients more quickly with watering, the “feed after you harvest” approach works best. My core strategy is to feed my mint right after a significant harvest. This replenishes the energy the plant just spent, encouraging it to quickly produce new, flavorful growth. During the peak growing season, this might mean feeding it once every 3-4 weeks.
- What to Use: I recommend a balanced, all-purpose liquid fertilizer, diluted to half the recommended strength. For those who prefer organic methods, options like liquid fish emulsion, compost tea, or a top-dressing of worm castings are all excellent choices that provide a slow, steady release of nutrients.
Annual Refresh: Pruning Roots and Replenishing Soil
Here’s a pro-tip for long-term success that you won’t always find in standard guides: the annual refresh.
Over time, the pot can become a tangled mass of roots, and the soil can become depleted.
- When to Do It: The best time for this task is in the early spring, just as new growth is beginning to emerge.
- How to Do It: I gently slide the entire plant and root ball out of the pot. Using a clean knife or spade, I slice off the outer 2-3 inches of the root mass from the sides and bottom—effectively trimming about one-third of the total root ball. Then, I place the smaller root ball back into the same pot and fill the surrounding space with fresh, high-quality potting mix. This process gives the roots new room to grow and fresh, nutrient-rich soil to explore, ensuring another season of vigorous health.
Pruning for Bushy Growth and Continuous Harvest
If there is one single secret to a happy, productive mint plant, it’s this: don’t be afraid to prune. In fact, mint thrives on being cut back.
This is the core of my care philosophy. Beyond simply harvesting, I perform two types of strategic pruning to keep my plants in peak condition.
Maintenance Pruning
Think of this as regular housekeeping for your mint plant.
Once a week during the peak growing season, I give my plant a quick inspection with the goal of improving its overall shape and health.
- What I Look For: I’m searching for any stems that are weak, spindly, yellowing, or dead. I also look for any growth that is crowding the center of the plant.
- The Goal: By snipping these less-productive stems off at their base, I’m doing two things: improving air circulation throughout the plant, which helps prevent disease, and directing the plant’s energy toward its strongest, most vibrant stems.
Renewal Pruning (The “Hard Prune”)
This technique may seem drastic, but it is the most effective way to rejuvenate a mint plant that has become tall, “leggy,” or sparse.
I do this about mid-way through the summer, or anytime the plant’s vigor seems to decline.
- How to Do It: With a clean, sharp pair of scissors, I confidently cut the entire plant back, leaving just 2-3 inches (5-8 cm) of stem above the soil line. Yes, the whole plant!
- The Follow-Up is Crucial: This hard prune sends a signal to the plant’s root system to send up a flush of fresh, vigorous new stems. To support this burst of growth, I immediately give the plant a thorough watering and a dose of liquid fertilizer (following the feeding advice from the previous section).
- The Result: Within a couple of weeks, you will be rewarded with a pot full of dense, tender, and incredibly flavorful new growth. It’s like getting a brand-new plant in the middle of the season.
Natural Pest and Disease Control
One of the best things about mint is that its strong, aromatic oils naturally repel many common garden pests. However, no plant is completely immune. In my experience, the absolute best defense is a good offense: prevention.
A healthy, unstressed plant is far less likely to attract pests or succumb to disease. The most important preventative steps are ensuring your mint gets plenty of sunlight and, crucially, good air circulation. Proper watering also plays a role; I always try to water the soil, not the crown of the plant, to prevent moisture from getting trapped.
Dealing with Common Pests
If you do spot some unwelcome visitors, here is how I handle them.
- Aphids: You might find these tiny, green or black insects clustered on tender new growth. My go-to method is to take a cotton swab, dip it in rubbing alcohol, and simply wipe the pests off the stems. For a larger issue, a spray bottle filled with water and a few drops of dish soap is also highly effective.
- Caterpillars and Larvae: Occasionally, you might find small caterpillars, like the larvae of the night moth, munching on your leaves. They can be masters of camouflage, sometimes looking just like part of a leaf vein on the underside of the foliage. The most effective control is also the simplest: I inspect my plants regularly and hand-pick any larvae I find.
- Flea Beetles: You might notice tiny, dark beetles that jump like fleas when disturbed, chewing small, irregular “shotholes” in the leaves. They are a nuisance but rarely kill a mint plant. A yellow sticky trap placed near the pot can help manage their population.
Preventing Common Diseases
Fungal diseases are the most common issue for mint, and they almost always stem from issues with moisture and air circulation.
- Powdery Mildew: This looks like a fine, white, dusty coating on the leaves and is most common in humid conditions with poor airflow—a frequent issue on enclosed balconies. The first step is to immediately prune off any affected leaves or stems to stop its spread. Then, focus on improving air circulation by thinning the plant or moving it to a breezier location.
- Rust: This is perhaps the most common mint disease, appearing as small, dusty orange-brown spots on the undersides of the leaves. It thrives on damp foliage. If you see it, remove the affected leaves immediately and be extra careful to water the soil, not the leaves, especially in the evening.
- Verticillium Wilt: Though less common in potted mint, this soil-borne fungus can cause sudden yellowing and wilting on one side of the plant. There is no cure, so prevention is everything. Always start with a sterile, high-quality potting mix, and if you ever suspect this disease, it’s best to dispose of the plant and soil to prevent any potential spread.
A Final Note on Pests & Diseases: Remember that pest and disease pressures can vary greatly by region. If you encounter a problem you can’t identify, or if the organic methods above are not effective, your best resource is your local University Extension Service. They often provide free, region-specific advice and diagnostics for home gardeners.
Solving Common Problems with Mint
Even with the best care, you might occasionally run into some issues.
The good news is that mint is incredibly resilient, and most problems are easy to diagnose and fix. Here are the most common ones I’ve encountered.
“My plant is tall and skinny with sparse leaves.”
This is a classic case of what gardeners call “legginess” or etiolation.
- The Cause: Almost certainly, your plant is not getting enough direct sunlight. It is literally stretching itself thin trying to reach for more light.
- The Solution: First, move the plant to the sunniest spot you can find—it needs at least 6 hours of direct sun. Next, don’t be afraid to perform a “renewal prune” (as I described in the pruning section above) by cutting the leggy stems back to about 2-3 inches. This will force it to regrow from the base in a much bushier, more compact form in its new, sunnier home.
“The lower leaves on my plant are turning yellow.”
Yellowing leaves are usually a sign of a problem at the root level, typically related to water.
- The Most Likely Cause: Overwatering or poor drainage. If the soil is constantly soggy, the roots can’t breathe, leading to root rot and yellow leaves.
- The Solution: First, stop watering and check the drainage hole to make sure it isn’t blocked. Allow the top 1-2 inches of soil to dry out completely before watering again. If the problem persists, you may need to repot the plant into fresh, better-draining soil.
“My mint has lost its strong, refreshing scent.”
This is a disappointing problem, but it has a straightforward fix.
- The Causes: There are two primary culprits here. The first is a lack of sunlight, which is essential for the production of aromatic oils. The second, surprisingly, is too much fertilizer. Over-feeding can cause the plant to produce a lot of fast, watery foliage with a diluted flavor and scent.
- The Solution: Ensure the plant is getting at least 6 hours of sun. If it is, then reduce your feeding frequency. Remember, mint thrives on a bit of tough love and doesn’t need to be overly pampered with fertilizer.
“My plant has become a dense, tangled mass.”
Eventually, a happy mint plant will completely fill its pot with roots. This isn’t a bad problem—it’s a sign of success!
- The Cause: The plant has become “root-bound,” meaning the roots have run out of space to grow.
- The Solution: It’s time to divide your plant! This is a perfect opportunity to create new plants for free. Simply slide the plant out of its pot, and you’ll see a dense mat of roots and stems. I use a clean knife to slice the entire root ball into two or three sections, ensuring each section has a good amount of roots and top growth. Then, I simply repot each section into its own container with fresh soil. It’s a great way to refresh your original plant and share the joy of mint with friends and neighbors.