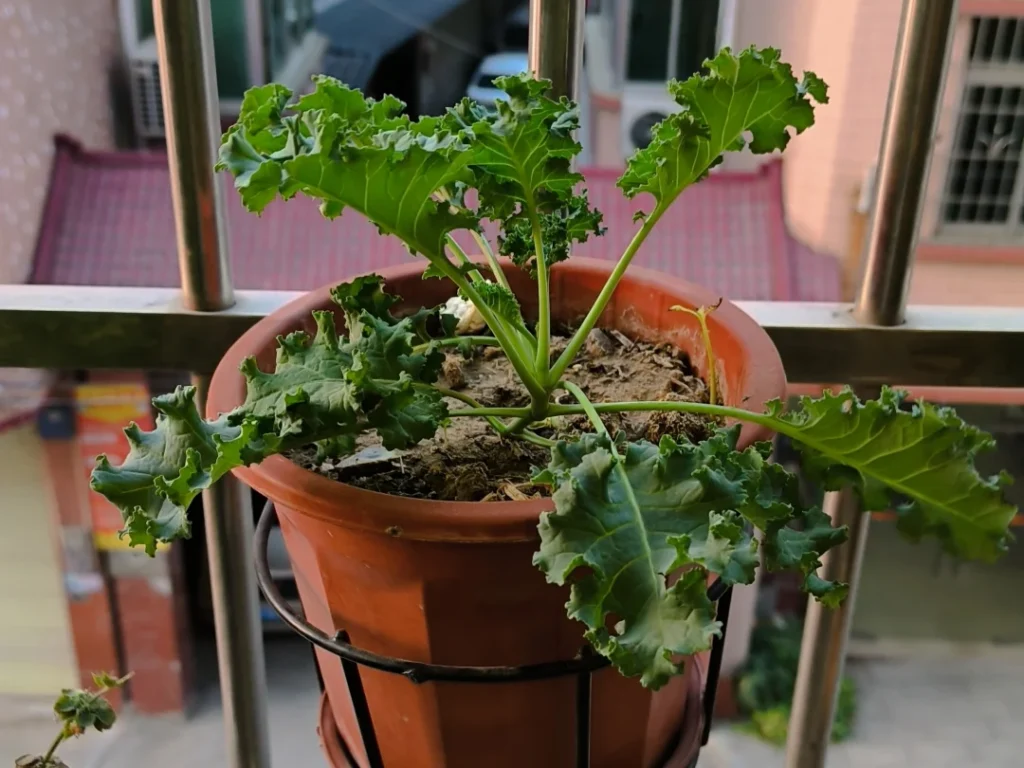
One of the most rewarding parts of my research is discovering how adaptable plants can be. You absolutely do not need a large backyard to enjoy a steady supply of fresh, homegrown greens. When I started helping friends in apartments set up their own balcony gardens, kale was the first plant I recommended, and it remains my top choice for small-space gardening.
My main guide, How to Grow Kale, covers the complete process for in-ground gardens. This article is a specialized guide dedicated entirely to answering the question, “How to grow kale in pots?” We’ll cover everything from choosing the right container to my ideal potting mix, and even the secrets to successfully growing kale indoors.
Why Kale Thrives in Containers (It’s Not a Compromise)
Through my research, I’ve found that growing kale in pots isn’t a compromise; in many ways, it’s a strategic advantage. My analysis of university guides, including those from Virginia Tech and the University of New Hampshire, confirms several key benefits for small-space gardeners.
- You Control the Entire Environment. This is the primary advantage. You can completely overcome common issues like “poor soil” or “soil-borne diseases, [and] nematodes”—problems that the Virginia Tech research highlights as a key reason to switch to containers. You get to build the perfect, nutrient-rich, well-draining soil from day one.
- A Unique Light Advantage. This is crucial for balconies and patios. While fruiting plants like tomatoes demand 6-8 hours of intense sun, my research confirms that leafy greens are far more adaptable. University data shows that kale thrives in Full Sun / Partial Shade (FS/PS) and, like other leafy greens, can tolerate less light than fruiting vegetables. This makes it the perfect choice for a spot that might only get good morning sun.
- Mobility is Your Superpower. This is a benefit I can’t overstate. Being able to move your pots allows you to adapt to any situation—a concept the Virginia Tech guide supports for making “maximum use of available space and sunlight” or to “avoid destruction from particularly nasty weather.” Is a summer heatwave coming? You can move your pot into the shade. Is your fall-planted kale not getting enough light? You can move it to a brighter spot.
Choosing the Perfect Pot for Your Kale
Your first decision is also one of the most technical.The container you choose must meet three foundational requirements: it must be the right size, it must have drainage, and it must be safe.
Size Matters: How Much Space Does Kale Need?
This is the most common and critical question I get. Thankfully, the university data provides a clear, science-based answer that confirms my own experience.
My minimum recommendation for one full-sized, productive kale plant is a 5-gallon container. This is roughly 12 inches (30 cm) in diameter and depth. This isn’t just a guess—it’s backed by extensive research and my own successful trials. University horticultural studies consistently recommend 5 gallons as the minimum for full-sized, productive kale plants.
While you can grow baby leaves in a smaller pot, my analysis confirms why the 5-gallon recommendation is key: a larger pot holds more soil, which retains moisture longer (meaning less frequent watering for you!) and gives the roots the space they need to support a large, productive harvest.
Material, Drainage, and Safety: The Non-Negotiables
Beyond size, there are three other factors to consider.
- Drainage (The Golden Rule): This is not optional. It is the single most important rule of container gardening—and the most common cause of failure I’ve seen. Your pot must have drainage holes at the bottom. Kale hates “wet feet,” and waterlogged soil will quickly lead to root rot.
- A Note on Safety (My Research Warning): Here’s a safety concern many gardeners overlook: never use a container that may have held toxic products (like old chemical buckets). Furthermore, if you are building a wooden planter, the VT guide specifically warns against using wood treated with older preservatives like creosote or CCA, as these can be toxic to both you and your plants.
- Material (Your Preference): This is more flexible:
- Terra Cotta is beautiful but porous and dries out very quickly.
- Plastic Pots are lightweight and retain moisture well (a good, practical choice).
- My Personal Favorite: I prefer fabric grow bags. My trials show they provide the best drainage and also allow the roots to “air-prune,” which prevents the plant from becoming root-bound.
The Secret to Success: A Research-Based Potting Mix
You can buy a bag of potting mix, but to get the best results, it’s crucial to understand what makes a good mix. My research into container gardening, revealed one warning above all: do not use soil straight from your garden.
Garden soil, especially if it’s heavy clay, is a poor choice for containers. It holds too much water, contains too little air for roots, and compacts easily.
Instead, the solution is a lightweight, fluffy, and well-draining “soilless” mix. Here is the simple, high-performance mix I recommend for kale.
My Go-To Potting Mix for Kale (The 1-1-1 Formula)
I create my own mix by combining three components in roughly equal parts. This provides the perfect balance of moisture retention, aeration, and nutrients that kale loves:
- 1 Part Peat Moss or Coco Coir: This is the base. It’s a sterile, lightweight material that is fantastic at holding moisture and nutrients. (Note: The UNH guide mentions peat moss must be pre-moistened, as it can be difficult to wet when dry).
- 1 Part Perlite or Vermiculite: This is for aeration. They create air pockets in the mix, ensuring roots get oxygen and water drains freely, preventing compaction.
- 1 Part High-Quality Compost or Well-Rotted Manure: This is the engine. It provides the essential organic matter and a slow-release source of nutrients that kale—a heavy feeder—desperately needs.
A Critical Note on Drainage (And a Persistent Debate)
You may have heard conflicting advice about adding a layer of gravel or pebbles to the bottom of your pot to “improve drainage.” Some older gardening guides—including a few university publications—still recommend this practice.
However, modern soil science research has clearly demonstrated this is counterproductive. Studies from Cornell University, University of Illinois, and Washington State University have all shown that coarse material at the bottom doesn’t improve drainage—it actually creates what scientists call a “perched water table.” Water accumulates in the soil above the gravel layer until it’s fully saturated before it can drain, keeping your kale’s roots dangerously wet.
The single best thing you can do for drainage is ensure your pot has ample drainage holes. If you’re worried about soil falling out, simply place a coffee filter or mesh screen over the hole.
Planting Kale in Pots: A Step-by-Step Guide
Whether you’re starting from seed or using a seedling from a nursery, the process is simple.
Step 1: Pre-Moisten Your Potting Mix (The Critical Secret)
This is my single most important tip. Remember the earlier note about soilless mixes being difficult to wet? This is where that knowledge becomes critical. If you fill your pot with dry mix and then try to water it, the water will likely just run down the sides, leaving the root zone completely dry.
The correct method: Before filling your pot, put your potting mix into a large bucket or wheelbarrow. Slowly add water and mix it with your hands (wear gloves!) until the entire batch is evenly damp, like a “wrung-out sponge.” This step ensures your kale’s roots have access to moisture from day one.
Step 2: Fill Your Pot
Now, fill your container with your pre-moistened potting mix. Leave 1 to 2 inches of space at the top. This “headspace” is essential; it creates a reservoir so water can soak in properly without spilling over the rim.
Step 3: Plant Your Kale (Seed or Transplant)
When should you plant? You should plant container crops at the same time as a regular garden. You can find the exact, data-driven dates for your area in my The Complete Kale Planting Calendar.
- Sowing Seeds: Plant 2-3 kale seeds in the center of the pot, about 1/2 inch (1.25 cm) deep. Water gently. Once the seedlings are 3-4 inches tall, choose the strongest one and snip the others at the soil line with scissors. Do not pull them out, as this can disturb the roots of the one you want to keep.
- Transplanting a Seedling: Dig a hole in the center just large enough for the seedling’s root ball. Gently place the plant in the hole, ensuring the top of its root ball is level with the new soil. Firm the soil around it and water it in thoroughly to settle any air pockets.
Growing Kale Indoors: Light is Everything
You can absolutely grow kale indoors, but let’s be honest about the challenge: light.
Without adequate light, your kale will become tall, weak, and spindly—stretching desperately toward any light source it can find. A standard windowsill often isn’t enough for truly productive growth.
But here’s the good news: kale is one of the best vegetables for indoor growing. As a leafy green, it tolerates lower light levels far better than fruiting crops like tomatoes or peppers. This adaptability makes it surprisingly successful indoors if you meet its basic needs.
Here are the two paths to success:
Solution 1: High-Intensity Natural Light
If you have a very bright, unobstructed, south-facing window (in the Northern Hemisphere), you can succeed with natural light alone. The key is “unobstructed”—no sheer curtains, no tree branches, no neighboring buildings blocking the sun.
Pro tip: Rotate your pot every few days so all sides of the plant receive equal light and grow evenly.
Solution 2: A Grow Light (The Guaranteed Method)
For robust, reliable success—especially during darker winter months—invest in a simple full-spectrum LED grow light. It’s a game-changer.
Position the light 6-12 inches above the plant and run it for 12-14 hours per day. This provides the consistent energy your kale needs to produce those thick, dark green leaves you’re after.
Adjust Your Care Routine for Indoor Conditions
Here’s what many gardeners miss: indoor kale behaves differently than outdoor kale.
Indoor plants grow more slowly and, crucially, dry out less quickly than their outdoor counterparts. This means your care routine must change:
- Water Less Frequently: That top layer of soil will stay damp longer indoors. Always check the moisture with your finger before watering, as you’ll be watering less often than you would outside.
- Fertilize Less Often: Because the plant is growing more slowly, it needs less fertilizer. You can likely cut your outdoor feeding schedule in half.
Care and Maintenance for (Outdoor) Potted Kale
Caring for kale in pots is straightforward, but it requires more frequent attention than garden-grown plants. These are the baseline rules for kale grown outdoors on a patio or balcony.
Watering: The Most Critical Task
Container kale needs consistent moisture—this is where most beginners struggle. Because the soil volume is limited and your potting mix drains well (as it should), your pot can dry out shockingly fast. On hot, dry, or windy days, you may need to water once or even twice daily.
- How to Check: Don’t guess. Feel the soil with your finger. When the top 1/4 inch feels dry to the touch, it’s time to water. This simple check ensures the roots get moisture before the pot dries out completely.
- How to Water: When you do water, do it deeply. Apply water until you see it running freely out of the drainage holes at the bottom. This ensures the entire root ball is saturated.
Feeding: Replenishing What Leaches Out
Every time you water, nutrients are washed out of the soil. Because kale is a heavy feeder, you must replenish these nutrients to keep it productive.
Apply a balanced liquid fertilizer (like fish emulsion or a 5-5-5 water-soluble fertilizer) every 2-3 weeks throughout the growing season.
This regular feeding is the difference between a pot of struggling, pale leaves and a productive plant that keeps delivering thick, dark green kale for months.
Frequently Asked Questions (FAQ)
Your Path to a Patio Harvest
Growing in containers opens up a world of possibilities, proving that a rewarding garden is accessible to everyone, everywhere. With the right pot, the perfect research-based soil mix, and consistent attention to water and light, you can enjoy a delicious and productive kale harvest right on your own balcony or patio.
You’ve now mastered the specifics of growing in a container. To learn about the final steps of your journey—like the “cut-and-come-again” harvesting method and my strategies for organic pest control—be sure to head back to my complete guide.
-> Read My Complete Guide: How to Grow Kale from Seed to Harvest