Dreaming of stepping outside to harvest your own fresh, flavorful vegetables, but feeling completely overwhelmed with where to begin? You’re not alone. The journey to creating your first vegetable garden can seem like a mountain of confusing questions, but I promise you, the path to a successful harvest is much simpler than you think.
This guide is the result of a single mission: to combine years of hands-on experience with deep research into proven horticultural science. I’ve distilled everything I’ve learned into this comprehensive, step-by-step guide. I’ll skip the jargon and focus only on what truly matters, giving you the confidence to get your hands dirty and start growing today.
Your First Garden: 5-Step Quick Start Checklist
- Find the Sun: Choose a spot that gets at least 6-8 hours of direct sunlight.
- Start Small: A 4×4 foot raised bed or a few large containers is perfect.
- Feed the Soil: Mix a generous amount of compost into your garden soil.
- Choose Easy Wins: Pick 2-3 beginner-friendly plants like Bush Beans, Lettuce, or Zucchini.
- Water Consistently: Don’t let your new garden dry out. Check the soil daily.
Chapter 1: Finding the Perfect Spot: Sun, Water, and Location
Before you buy a single seed or tool, the single most important decision you’ll make is where to plant your garden. The right spot can mean the difference between a thriving, abundant garden and a season of frustration. Let me walk through the three essential elements—Sun, Water, and Location—to ensure you get it right from day one.
Sunlight: The #1 Ingredient for a Thriving Garden
Think of sunlight as the primary food for your vegetable plants. Most vegetables, especially those that produce fruit (like the tomatoes, peppers, and zucchini you’ll be dreaming of), are sun-worshippers. To grow strong and produce a great harvest, they need at least 6 to 8 hours of direct, unobstructed sunlight each day.
How to Track the Sun in Your Yard
Don’t guess—know for sure! This simple observation exercise will guarantee you find the sunniest spot.
- Pick a sunny day. Go outside three times: once in the morning (around 9 AM), once at midday (around noon), and once in the afternoon (around 3 PM).
- Check your potential spots at each of these times. Are they receiving direct, unobstructed sunlight?
- Take note of shadows. Pay close attention to any large shadows cast by your house, fences, or nearby trees. A spot that’s sunny in the morning might be in deep shade by the afternoon.
A south-facing location is typically the best in the Northern Hemisphere. But don’t worry if you don’t have a “perfect” 8-hour spot! Many leafy greens and root vegetables, like lettuce and carrots, can still grow well with 4-6 hours of sun, especially if it’s gentler morning sun.
Water Access: Plan for Convenience
Your new garden will be thirsty, especially during hot summer weather. The closer your garden is to a reliable water source, the more likely you are to water it consistently.
Before you decide on a spot, perform this quick thought experiment: Imagine carrying a heavy 2-gallon watering can back and forth ten times on a hot July afternoon. A garden located just 10 feet from a spigot will feel like a joy; one located 100 feet away will quickly feel like a chore. Making watering easy is one of the biggest keys to staying consistent and successful throughout the season. Ideally, your garden should be within easy reach of a garden hose.
Location Pitfalls: 5 Common Mistakes to Avoid
The sunniest, most well-watered spot can still fail if it’s in a problematic location. Here are five common site-selection mistakes to watch out for:
- Too Close to Trees and Shrubs: Avoid placing your garden near large trees. Their aggressive roots will spread far into your garden bed, competing with your vegetables for water and nutrients—and your vegetables will always lose that fight.
- In a High-Wind Tunnel: Steer clear of areas that act as wind tunnels, like the narrow space between two houses. Constant, strong wind can stunt growth, damage tall plants like corn and tomatoes, and dry out the soil very quickly.
- In an Area with Poor Drainage: After a heavy rain, check on your potential spot. If you see a puddle that stays for several hours (or even days), that area has poor drainage. Most vegetable roots will quickly rot in constantly soggy soil.
- “Out of Sight, Out of Mind”: Avoid tucking your garden away in a far corner of the yard. The most successful gardens are the ones you see every day. Placing it near your patio door or a frequently used path will remind you to water, weed, and, most importantly, harvest!
- On Top of Utility Lines: Before you do any serious digging, be sure you know where any underground utility lines (water, gas, electric) are located. A quick call to your local utility company (like the “811 Call Before You Dig” service in the US) is a free and essential safety step.
Chapter 2: Choosing Your Garden Type: In-Ground, Raised Beds, or Containers?
Now that you’ve found the perfect sunny spot, it’s time to decide on the physical form your garden will take. This is an exciting step where you choose the foundation for your growing journey. The type of garden bed you select will impact your initial cost, the amount of work required, and your overall success. Let me break down the three most popular options for beginners.
Start Small, Dream Big
For a first-time gardener, a 4×4 foot (about 1.2×1.2 meters) or 4×8 foot plot is a perfect starting size. It’s large enough to grow a satisfying variety of vegetables but small enough to manage without feeling overwhelmed. Remember, the goal for your first year is to learn and build confidence. You can always expand next year!
Why is starting small the secret to success?
- It Manages Your Time: A smaller garden requires far less time for weeding, watering, and harvesting. It keeps gardening fun, not a chore.
- It Controls Your Costs: A smaller space means less money spent on soil, compost, seeds, and plants.
- It Builds Confidence: It is infinitely more rewarding to have a small, thriving, successful garden than a large, struggling, weed-filled one. A small win in your first year is the best motivation to continue for years to come.
Option 1: The In-Ground Garden
This is the most traditional method: simply digging and planting directly into your existing yard soil. It’s how gardening has been done for centuries and connects your plants directly to the earth.
- Pros (Advantages):
- Lowest Initial Cost: There are no materials to buy for a frame. Your main expenses will be any soil amendments (like compost) you need and your tools.
- More Natural Rooting: Plant roots can grow as deep and wide as they like, accessing moisture and nutrients from the native subsoil.
- Slower to Dry Out: In-ground beds hold moisture longer than raised beds or containers, meaning they can be slightly more forgiving if you forget to water.
- Cons (Challenges):
- Requires Good Existing Soil: If your native soil is heavy clay, full of rocks, or very sandy, you will need to do significant work (called “amending”) to make it fertile and loose.
- More Weeding: You’ll be in a constant battle with existing grass and weed seeds from the surrounding soil that will happily invade your garden bed.
- Can Be Harder to Work In: This method requires more kneeling and bending over, which can be tough on the back and knees.
Option 2: The Raised Bed Garden
A raised bed is essentially a large, bottomless box (often made of wood, metal, or stone) that you place on top of the ground and fill with a perfect, customized soil mix.
- Pros (Advantages):
- Perfect Soil from Day One: This is the #1 benefit. You have 100% control and can fill it with a loose, nutrient-rich soil mix, completely bypassing any issues with your native soil.
- Excellent Drainage: Excess water drains away freely, preventing waterlogged roots—a common problem for beginners working with heavy clay soil.
- Fewer Weeds: The physical barrier of the frame and the fresh, clean soil dramatically reduce weed pressure from the surrounding lawn.
- Ergonomic: The raised height means less bending over, making it much easier and more comfortable to plant, weed, and harvest.
- Cons (Challenges):
- Higher Initial Cost: You need to buy or build the frame and purchase enough high-quality soil and compost to fill it, which can be a significant upfront expense.
- Dries Out Faster: Because the soil is elevated, it warms up faster in the spring but also dries out more quickly than an in-ground bed, requiring more diligent watering.
Option 3: The Container Garden
This method involves growing vegetables in individual pots, fabric grow bags, or other containers instead of an open garden bed.
- Pros (Advantages):
- Perfect for Any Space: It’s the ideal solution for renters, or anyone with just a balcony, patio, or sunny doorstep. You can have a garden almost anywhere!
- Total Soil Control: Just like a raised bed, you control the soil completely, ensuring your plants have the perfect growing medium from the start.
- Mobility: You can move the pots around to chase the sun, protect them from unexpected bad weather, or even take them with you when you move.
- Cons (Challenges):
- Requires Frequent Watering: This is the biggest challenge. Small soil volumes dry out extremely fast. In warm weather, you will likely need to water at least once a day, sometimes more.
- Limited Growing Space: The pot size restricts the plant’s root system, which can limit its ultimate size and productivity. You must choose large pots (5 gallons or more is a good rule of thumb for most vegetables).
- Can Get Expensive: The cost of multiple, large, good-quality pots and the potting mix to fill them can add up quickly.
Making Your Decision
Feeling unsure? Let me simplify the choice with a quick comparison table and my top recommendation for beginners.
Which Garden Type is Right For You? A Quick Comparison
Garden Type | Best For… | Biggest Challenge |
In-Ground | Gardeners on a tight budget who already have decent, well-drained soil. | Requires the most work for soil preparation and ongoing weeding. |
Raised Bed | Most beginners. Offers the best control over soil, excellent drainage, and is easier to work in. | Higher initial setup cost and requires bringing in soil. |
Container | Renters, or anyone with limited space like a balcony, patio, or deck. | Pots dry out very quickly and require frequent, often daily, watering. |
My Expert Recommendation for Beginners
For most first-time gardeners aiming for a successful and enjoyable experience, I almost always recommend starting with a raised bed.
While it has a slightly higher upfront cost, the benefits are immense: you have complete control over creating perfect soil from day one, drainage is far superior, and it dramatically reduces the amount of weeding you’ll have to do. This combination makes the raised bed the fastest and most reliable path to a thriving first garden.This recommendation is based on a combination of hands-on experience and the research-driven mission that is the foundation of this website. You can learn more about this journey in My Story.
Chapter 3: The Secret to Success: Preparing Your Garden Soil
Great gardeners don’t just grow plants; they build soil. This might be the most important lesson in all of gardening. Rich, fertile, living soil is the foundation of a healthy garden, providing your plants with the nutrients, water, and air they need to thrive. Let me break down how to create the perfect foundation for your first garden.
What Exactly is “Good” Garden Soil?
Perfect garden soil, often called “loam,” has a balanced mix of three things:
- Structure: It’s loose and crumbly, not hard-packed clay or loose sand. This allows roots to grow easily.
- Nutrients: It’s rich in organic matter (like compost) that acts as a slow-release food source for your plants.
- Water Retention: It holds moisture like a sponge, but also allows excess water to drain away so roots don’t rot.
A Simple Test to Understand Your Soil
You don’t need a fancy kit to understand your soil’s basic texture. Try the “squeeze test”:
- Grab a handful of your garden soil when it’s slightly moist (not bone-dry or soaking wet).
- Squeeze it firmly in your hand.
- Open your hand.
- If it holds its shape but crumbles when you poke it, you have fantastic, loamy soil. (Ideal!)
- If it holds a tight shape and feels slick or sticky, you have heavy clay soil. (Needs improvement for drainage).
- If it falls apart immediately, you have sandy soil. (Needs improvement for water and nutrient retention).
The Golden Ingredient: All About Compost
No matter what your soil test reveals, the universal solution is compost. Compost is simply decomposed organic matter—nature’s perfect soil conditioner. It is the single best thing you can add to your garden.
- If you have clay soil, compost breaks it up and improves drainage.
- If you have sandy soil, compost helps it retain moisture and nutrients.
- For all soils, it adds essential nutrients and supports beneficial microbial life.
You can buy high-quality bagged compost from any garden center.
Simple Soil Recipes for Your Garden Type
Now, let me put it all together. Here’s how to prepare the soil based on the garden type you chose in Chapter 2.
For In-Ground Gardens
- Define and Clear Your Space: Mark out your garden area and remove all grass and weeds. The easiest way is to smother it with a layer of cardboard for a few weeks.
- Loosen the Soil: Using a sturdy garden fork or shovel, dig down and loosen the top 8-12 inches of your soil. This is hard work, but it’s crucial for root growth.
- Add Compost: Spread a 2-4 inch layer of compost over the entire surface of your loosened soil.
- Incorporate It: Gently mix the compost into the top 6 inches of your soil with your fork or shovel. Rake the surface smooth, and you’re ready to plant!
For Raised Beds & Containers
Do not use soil directly from your yard. It will compact into a brick-like substance and drain poorly in a confined space. You need a specific, lighter mix.
- The Easy Way: Buy pre-mixed bags of “Raised Bed Soil” or “Potting Mix” from a garden center. This is the fastest, most foolproof option for beginners.
- The DIY Recipe (Mel’s Mix): A classic, proven recipe for a perfect raised bed mix is to combine equal parts of three ingredients:
- 1/3 Compost: This provides the nutrients.
- 1/3 Peat Moss or Coco Coir: This helps hold moisture.
- 1/3 Vermiculite or Perlite: This keeps the soil light and airy and improves drainage.
Mix these ingredients thoroughly, fill your bed or container, and you have created the ideal growing environment for your plants.
Chapter 4: Gearing Up: Essential Tools for the Beginner Gardeners
Good news: you don’t need a crowded shed filled with expensive equipment to start a successful garden. The secret is to invest in a few high-quality, essential tools that you’ll use again and again. Prioritizing quality over quantity will make your gardening tasks easier and more enjoyable for years to come.
The Absolute Essentials: Your Day-One Toolkit
This short list covers the core tools that will handle 90% of your gardening tasks.
- Hand Trowel
- Use it for: Digging small holes for seeds and transplants, and removing individual weeds.
- What to look for: A trowel forged from a single piece of stainless steel is best, as it won’t bend or rust. Look for one with a comfortable, ergonomic grip.
- Gardening Gloves
- Use them for: Protecting your hands from dirt, scratches, and blisters.
- What to look for: Find a pair that fits you snugly. Gloves that are too bulky make it hard to feel what you’re doing. Look for a style with a water-resistant palm but a breathable fabric on the back.
- A Watering Tool
- Use it for: Providing that essential, life-giving hydration to your plants.
- What to look for: For a small garden, a Watering Can with a “rose” attachment (the sprinkler-like head) is perfect for a gentle shower. For larger gardens, a Hose with a gentle spray nozzle is a must. A nozzle with multiple settings, including “shower” or “mist,” is ideal to avoid blasting away soil and delicate seedlings.
- Hand Fork or Cultivator
- Use it for: Loosening compacted soil, breaking up clumps of dirt, and removing small rocks or roots.
- What to look for: Just like the trowel, look for a sturdy, one-piece metal construction. For a small container garden, a sturdy old kitchen fork can even work in a pinch!
- Pruners or Sharp Scissors
- Use them for: Harvesting herbs and greens, trimming away dead leaves, and cutting twine.
- What to look for: For harvesting, a simple pair of sharp scissors is often enough. For thicker stems, invest in a pair of “bypass” pruners (where the blades slide past each other like scissors). They make a cleaner cut than “anvil” pruners, which can crush plant stems.
The Next Level: Useful Tools to Add Later
Once you’ve got the basics down and are ready to expand, these tools will make your life much easier.
- Wheelbarrow or Garden Cart: Invaluable for moving bags of compost, soil, mulch, or hauling away weeds and debris.
- Garden Hoe: The best tool for quickly removing weeds from larger in-ground or raised beds. A “hula hoe” (also called a stirrup hoe) is a particularly effective and easy-to-use design.
- Plant Labels: It’s surprisingly easy to forget what you planted where! Simple wooden or plastic stakes will save you from confusion later in the season.
Chapter 5: What to Plant? The 9 Easiest Vegetables for Guaranteed Success
You’re ready for the most exciting part! As a beginner, choosing easy-to-grow plants will build your confidence and ensure a rewarding first harvest. Here are my top recommendations, categorized to help you choose.
The Fastest Growers (for Quick Wins)
Radishes
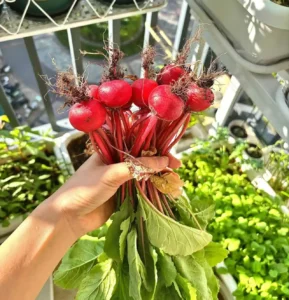
Why it’s easy: The perfect choice for impatient gardeners! Many varieties go from seed to spicy, crunchy root in under a month, providing a quick and satisfying first taste of your garden’s success.
Lettuce
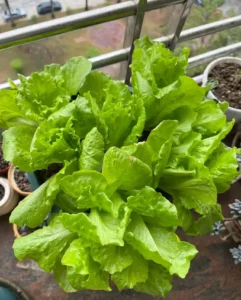
Why it’s easy: You can start harvesting outer leaves in just a few weeks without pulling the whole plant (this is called “cut-and-come-again”). It also tolerates a little shade, giving you more placement options in your garden.
Spinach
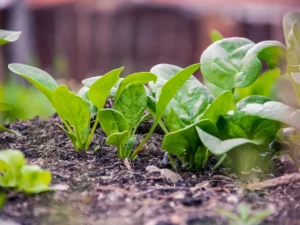
Why it’s easy: A fast-growing and incredibly nutritious leafy green. Spinach is very cold-hardy, allowing you to be one of the first to plant in spring and the last to harvest in fall.
The Most Productive (for Big Harvests)
Zucchini
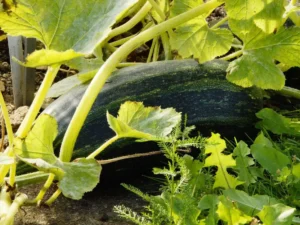
Why it’s easy: Famously productive—a single plant can provide a huge, rewarding harvest. Its speed and incredible output are a massive confidence booster for any new gardener.
Bush Beans
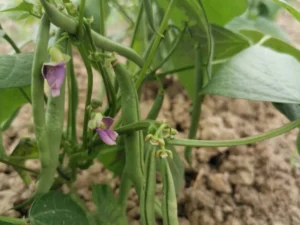
Why it’s easy: Grows incredibly fast with very few pest problems. Unlike pole beans, it doesn’t require any special trellis or support, making it a simple “plant and forget” crop.
Perfect for Patios & Pots
Cherry Tomatoes
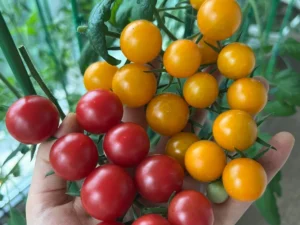
Why it’s easy: Far more forgiving and productive than larger tomato varieties. They ripen quickly and are less prone to common issues, rewarding you with handfuls of sweet, sun-warmed fruit that taste like candy right off the vine.
Kid-Friendly Favorites
Peas
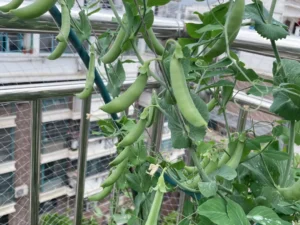
Why it’s easy: As one of the earliest spring treats, peas thrive in cool weather before many other plants get started. They are a joy to plant, watch climb, and eat straight from the vine.
Essential Culinary Herbs
While not technically vegetables, no kitchen garden is complete without a few essential herbs. They are incredibly easy to grow, take up little space, and will elevate your cooking to a new level.
Basil
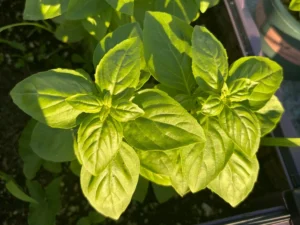
Why it’s easy: The essential summer herb. Once the weather is warm, it grows quickly and actually rewards frequent harvesting with bushier, more productive growth. The incredible aroma alone is worth it.
Mint
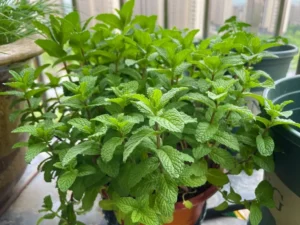
Why it’s easy: Guaranteed to grow… almost anywhere! Mint is incredibly vigorous, but this is also a warning: always plant it in a container to prevent it from taking over your garden. A foolproof and endlessly useful herb.
Want to explore even more options? Visit my complete Vegetable Growing Guides for my full library.
Chapter 6: Next Steps: Understanding Seed Packets and Planting Methods
You’ve prepared your garden bed, and now it’s time for the most exciting part: planting! Your main instruction manual for this step is the seed packet itself. It’s a treasure map to success, but the language can sometimes be confusing. Let’s decode it together and then walk through the two main ways you’ll be planting.
Decoding Your Seed Packet
Almost every seed packet will give you this critical information. Here’s what it means:
- Planting Depth: How deep to plant the seed. A good rule of thumb is to plant a seed about twice as deep as it is wide.
- Spacing: How far apart to place your seeds. This is crucial for giving each plant enough room to mature without competition.
- Days to Germination: How long it should take for the first sprouts to appear. Don’t panic if it takes a little longer!
- Days to Harvest: A helpful estimate of how long it will be from planting until your first harvest.
Method 1: Direct Sowing (The Easiest Way to Plant)
“Direct sowing” simply means planting the seed directly into your garden soil where it will live its whole life. This is the easiest and most common method for many vegetables.
Best for: Root vegetables (Carrots, Radishes), fast-growing crops (Beans, Zucchini, Lettuce), and plants with large seeds (Peas, Corn).
How to Direct Sow in 4 Simple Steps:
- Prepare the Soil: Rake the surface of your garden bed so it is smooth and level.
- Create a Furrow: Use your hand trowel, a stick, or even your finger to create a shallow trench to the depth recommended on the seed packet.
- Sow the Seeds: Lightly sprinkle the seeds along the bottom of the furrow. Try to space them out according to the packet’s instructions, but don’t worry about being perfect—you can always “thin” them later.
- Cover, Firm, and Water: Gently push the soil back over the seeds, pat it down lightly with your hand to ensure good contact, and then water the area gently with a “shower” or “mist” setting so you don’t wash the seeds away.
Method 2: Starting Seeds Indoors (For a Head Start)
Starting seeds indoors involves planting seeds in small pots inside your home several weeks before they can safely go outside. This gives slow-growing, heat-loving plants a valuable head start.
Best for: Plants that have a long growing season and are sensitive to cold (Tomatoes, Peppers, Eggplant).
What You’ll Need:
- Seed Starting Mix: A special, lightweight soil mix that’s much better for baby plants than heavy garden soil.
- Containers: Seed starting trays, peat pots, or even clean yogurt cups with drainage holes poked in the bottom.
- A Light Source: A very sunny, south-facing windowsill is a good start, but a simple, inexpensive LED shop light hung just a few inches above the seedlings is far more reliable.
- A Spray Bottle: For gentle watering.
How to Start Seeds Indoors (Simplified):
- Moisten and Fill: Moisten your seed starting mix before you put it in the containers. Fill the containers and gently firm the mix down.
- Plant the Seeds: Plant 1-2 seeds per container to the depth recommended on the packet.
- Water and Cover: Mist the surface gently, then cover the containers with a clear plastic dome or plastic wrap to create a mini-greenhouse effect that holds in humidity.
- Provide Light and Warmth: Place them in a warm spot. As soon as you see the first sprouts, remove the cover and move them under your strong light source for at least 12-16 hours a day.
- “Harden Off” Before Transplanting: This is a critical step. For 7-10 days before you plant them outside, you must gradually acclimate your indoor-grown seedlings to the outdoor conditions. Start by placing them in a shady, protected spot for just an hour, then gradually increase the time and sun exposure each day.
When to Plant? Check Your Calendar!
Now that you understand the “how,” it’s time for the “when.” The instructions on the seed packet are general; for the most accurate planting times tailored to your specific climate, be sure to use my Planting Calendars.
Chapter 7: 5 Common Beginner Mistakes to Avoid
Every experienced gardener has made mistakes—it’s a natural part of the learning process! But by understanding a few common pitfalls right from the start, you can save yourself a lot of frustration and dramatically increase your chances of a successful first harvest. Think of this as your cheat sheet to getting it right the first time.
Mistake #1: Starting Too Big
In the excitement of starting a garden, it’s incredibly tempting to plan a huge plot filled with every vegetable imaginable. The reality is that a massive first garden can quickly turn from a joy into an overwhelming chore of weeding, watering, and pest control. The most common reason people quit gardening after one season is because they took on too much.
- The Solution: Embrace the “Start Small, Dream Big” philosophy I covered in Chapter 2. A single 4×4 or 4×8 foot raised bed is the perfect size. Focus on making that small space a huge success. It is infinitely more rewarding to have a small, thriving garden than a large, neglected one. You can always expand next year!
Mistake #2: Underestimating Sunlight
A common assumption is that any open spot in the yard will do for a garden. But “Not Enough Sun” is the number-one reason for a disappointing harvest. Without enough energy from the sun, plants will be weak, spindly, produce little to no fruit, and be more susceptible to pests and diseases.
- The Solution: Be a sun detective before you dig. As I detailed in Chapter 1: Finding the Perfect Spot, your fruiting vegetables need at least 6-8 hours of direct sun per day. Do not compromise on this. If your sunniest spot only gets 4-6 hours, focus on plants that can tolerate part shade, like lettuce and carrots.
Mistake #3: Ignoring the Soil
Many beginners focus entirely on the plants they want to grow and forget that a garden’s true foundation is the soil. Planting in poor, compacted, nutrient-deficient native soil is like trying to run a marathon without any food or water. Your plants will survive for a little while, but they will never thrive.
- The Solution: Great gardeners build great soil. As I covered in Chapter 3: Preparing Your Garden Soil, amending your garden with a generous 2-4 inch layer of high-quality compost is the single most important step you can take for long-term success. It is the secret ingredient to a truly productive garden.
Mistake #4: Inconsistent Watering
Watering seems simple, but both “too much” and “too little” are common ways beginner gardens fail. A single wilting episode on a hot day can stress a plant for weeks, while constantly soggy soil will drown roots and invite disease.
- The Solution: Aim for consistency, not a rigid schedule. Use the “finger test” described in my FAQ section to check soil moisture daily. When you do water, water deeply at the base of the plants to encourage strong roots, rather than giving them a light sprinkle every day.
Mistake #5: Planting at the Wrong Time
It’s easy to get excited on the first warm day of spring and want to plant everything at once. But planting heat-loving tomatoes in cold spring soil is just as frustrating as planting cool-weather lettuce in the peak of summer. The plants will either fail to grow or perform very poorly.
- The Solution: Respect the seasons. Every vegetable has its preferred time to grow. Before you plant anything, always consult a reliable planting calendar. I’ve developed a detailed methodology to ensure my Zone-Specific Planting Calendars are as accurate and helpful as possible.
- Plan Your Season: Visit My Zone-Specific Planting Calendars to get the correct planting dates for your garden.
Chapter 8: Frequently Asked Questions (FAQ) for Beginner Gardeners
Your Journey Begins Now
Congratulations! You’ve just walked through the complete roadmap to starting your first vegetable garden. The most important lessons to remember are simple: start small, prioritize healthy soil and abundant sun, and choose easy plants to build your confidence. Gardening is a journey of learning, not a test to be passed.
Your next step is the most exciting one: choosing which seed to plant first.
Head back to my Vegetable Growing Guides directory, pick one vegetable that inspires you, and take that first step. I’ll be there to guide you through the rest.
You now hold the roadmap I wish I had when I first started gardening. There will be challenges, but that feeling of uncertainty you might have now? It’s a sign that you are about to grow. You are not alone on this path.
Happy Planting!
![]()