One of the most common debates in the gardening world is a simple math problem: If I have one large potato, should I plant it whole, or cut it into two pieces to get two plants?
For many gardeners, cutting seed potatoes is a standard practice to stretch their budget. But biologically speaking, cutting opens a wound that invites bacteria and rot.
Cutting seed potatoes into blocky chunks ensures each piece has enough energy to heal and grow.So, which method wins?
The answer depends on your soil moisture, your budget, and the size of your tuber. This guide covers the science of planting whole vs. cut potatoes, the critical “egg rule,” and the step-by-step process of curing your cut tubers to prevent rot.
Quick Answer: Whole vs. Cut Potatoes
- Whole Potatoes: Best for cold, wet soils. If you are planting early in the season, whole potatoes are your safety net. According to Utah State University, seed piece decay is significantly more common when cut tubers are planted in cool (below 45°F) or wet soils. The intact skin acts as a natural barrier against rot.
- Cut Potatoes: Best for economical gardening. By dividing large tubers, you multiply your seed stock. The University of Minnesota notes that planting seed pieces larger than 2.5 ounces yields diminishing returns. Cutting is efficient, but it requires caution: cut tubers must be “cured” (healed) before planting. Without this step, they are highly susceptible to rot, especially in soggy ground.
The “Egg Rule”: When to Cut and When to Keep Whole
You don’t need to guess. Expert sources use a simple size standard—often compared to a chicken egg—to make the decision.
1. Egg-sized or Smaller (under 2 oz): Plant Whole
Farmers call these small whole tubers “Single Drops”. According to the University of Nebraska-Lincoln, gardeners should prioritize using single drops whenever available, as they require zero prep and avoid the risk of spreading diseases via cutting knives.
However, discard any tubers smaller than 1.5 oz, as they often lack the energy to produce vigorous plants.
2. Larger than a Chicken Egg: Cut
Cornell University advises that any seed potato larger than a chicken egg should be cut into blocky pieces.
- The Logic: Cut pieces should be 1.5 to 2.5 oz each—larger pieces yield diminishing returns. Cutting a large tuber into properly-sized pieces (rather than planting it whole or cutting it into oversized chunks) gives you control over stem density.
- The Result: Pieces around 2.5 oz with closer spacing create high stem density—more stems, smaller individual potatoes, but higher overall yields. Smaller pieces with wider spacing produce fewer but larger tubers. Cutting allows you to match piece size and spacing to your harvest goals.
The Science of Cutting: Why the “Rose End” Matters
Don’t just chop the potato in half randomly. To get the best harvest, you need to respect the potato’s anatomy and what experts call its “Physiological Age”.
According to the University of Maine, “Young Seed” is characterized by strong apical dominance.
- The Science: In young tubers, strong internal inhibitors prevent the eyes on the “stem end” (the bottom) from sprouting, prioritizing the “Rose End” (Bud End).
- The Key: Each piece must have at least one eye. For young seed with strong apical dominance (often seen when greensprouting or chitting), ensure your cutting distributes eyes evenly across pieces.
- The Method: Cut into blocky pieces about 1.5 to 2 oz each. The goal is uniform size and at least one viable eye per piece.
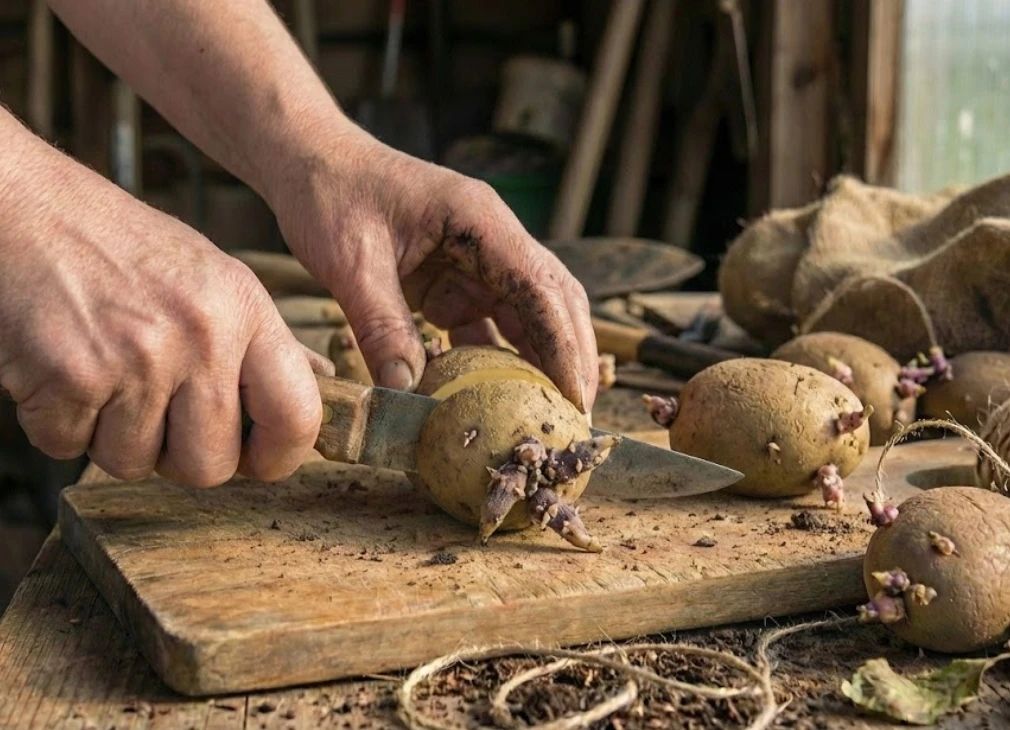
How to Cut Seed Potatoes (Step-by-Step)
Learn the expert-approved method to cut seed potatoes for maximum yield. This guide covers how to sanitize tools, identify eyes, and cut blocky 1.5–2 oz pieces to ensure vigorous growth and prevent rot.
Step 1: Sanitize Your Knife
This is non-negotiable. Diseases can spread from tuber to tuber via your blade. The standard recommendation is to dip your knife into a 10% chlorine bleach solution between cutting tubers.
Pro Tip: Dirt inactivates bleach, so change your solution often.
Step 2: Identify the Eyes
Your goal is to ensure every piece has at least one strong eye, though two eyes are preferable to guarantee growth.
Step 3: Make the Cut (“Blocky” is Best)
Slice cleanly. Ideally, you want “blocky” pieces (roughly 1.75 to 2.5 ounces) rather than thin slices.
Avoid: Thin slabs or slivers.
The Reason: Large cut surface areas force the potato to use more stored energy for wound healing, leaving less fuel for the baby plant. Keeping the cut surface area to a minimum preserves the tuber’s vigor.
The Exception: When NOT to Cut
Not all seed potatoes should be cut. You should avoid cutting seed that is “Physiologically Old”.
- What is it? Old seed is characterized by sprouts that are branched or appear hairy.
- Why? These sprouts are weak. Cutting causes further aging, and the tuber often lacks the vigor to heal the wound.+1
- Action: If you have old seed, plant it whole. If you must cut it, do so only a few days before planting to minimize stress.
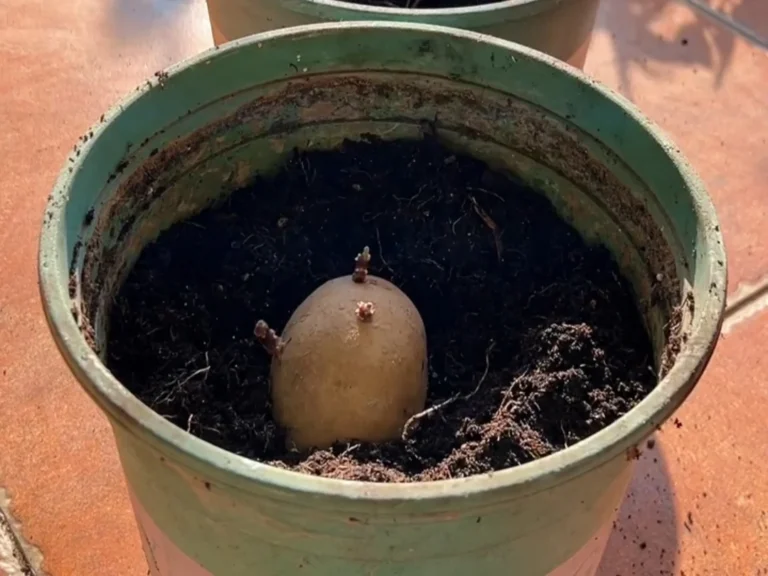
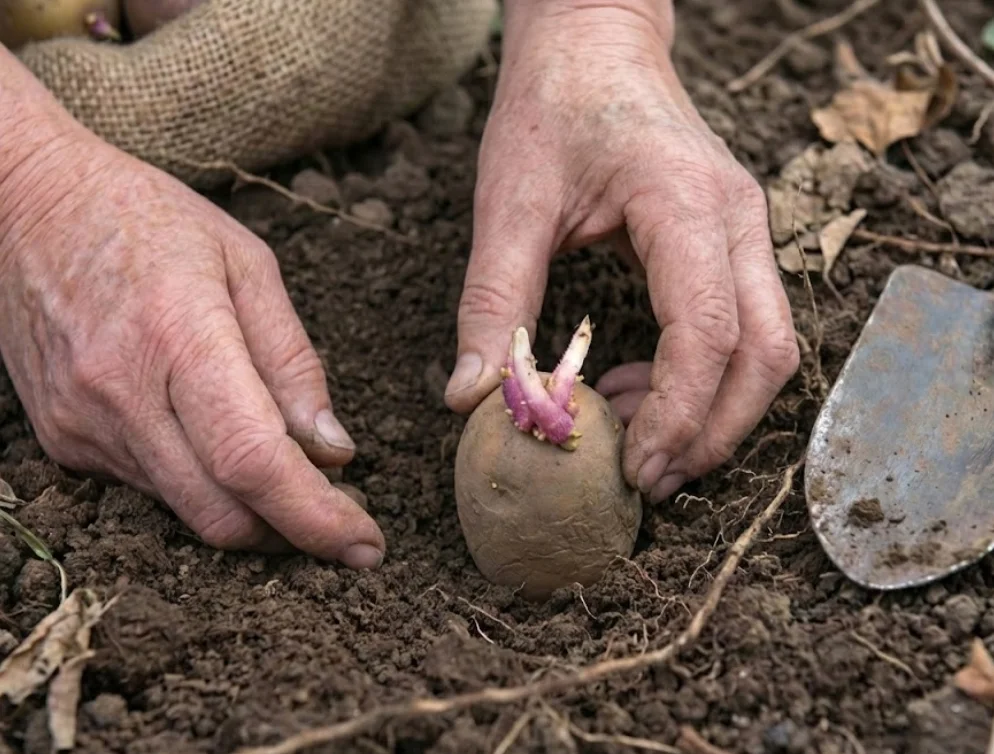
What is Curing? (And Why You Must Do It)
If you plant a freshly cut, wet potato directly into cold garden soil, it will likely rot. You need to let it “cure” first. Curing is the process of allowing the cut surface to dry and form a protective “suberin layer”. This corky layer seals moisture inside and locks decay organisms out.
How to Cure Cut Potatoes
- Temperature: Warmth speeds up healing. Keep your cut tubers between 50°F and 65°F (10-18°C).
- The “Grocery Bag” Method: A trusted trick for home gardeners is to put cut potatoes into a paper grocery bag and fold the top closed.
- Keep the bag at room temperature for 2 to 3 days.
- Shake the bag occasionally to separate pieces that might stick together.
- Timing: Allow them to cure for roughly 3 days. When the cut side feels dry and leathery, they are ready to plant.
- Optional Dusting: Some growers treat cut pieces with agricultural dust (like fir bark) to aid wound healing and prevent pieces from sticking, though proper airflow is usually sufficient for home gardeners.
Conclusion: Should You Cut?
If your seed potatoes are large and healthy, cutting is a smart way to double your harvest. Just remember the golden rules:
- Sanitize your knife.
- Ensure each piece has at least one eye (preferably two).
- Aim for blocky chunks to save energy.
- Cure for 3 days to seal the wound.
Ready to Plant? Now that your seeds are prepped and cured, it’s time to get them in the ground.
- Check the dates: When to Plant Potatoes: Exact Dates for Zones 4-9
- See the method: How to Grow Potatoes: The Complete Guide
- Plan Your Harvest: How Long Does It Take to Grow Potatoes? (A Complete Timeline)