There’s nothing quite like the aromatic scent of fresh basil filling a kitchen or the vibrant, sweet flavor it adds to a simple tomato sauce or a fresh caprese salad. It’s the fragrance of summer itself.
But I know that starting any new plant, even one as beloved as basil, can feel a little intimidating if you’re new to gardening. You might wonder if your climate is right, when the perfect moment to plant is, or how to get those beautiful, bushy plants you see in pictures.
I want you to put those worries aside. That’s why I’ve created this guide—to serve as your complete, step-by-step roadmap to success.
My goal is to demystify the entire process, sharing the knowledge I’ve gathered through meticulous research into North American horticulture. I promise that by the end of this article, you’ll have the confidence and clarity to go from a tiny seed to a bountiful harvest of fragrant basil.
It’s one of the most rewarding herbs you can grow, and a true cornerstone of my complete library of Herb and Vegetable Growing Guides for that very reason. Let’s get started.
Core Summary (TL;DR)
- Avoid Cold at All Costs: Basil has zero tolerance for cold. Never plant it outside until all danger of frost has passed and temperatures are reliably above 50°F (10°C). This is the number one rule for success.
- Maximize Sunlight: Basil’s flavor comes from the sun. Provide at least 6-8 hours of direct sunlight daily. The more sun it gets, the more aromatic the leaves will be.
- Embrace Pinching: The secret to a bushy plant is to pinch it back regularly. Constantly harvesting the top sets of leaves prevents the plant from flowering and forces it to grow wider and fuller.
- Fear “Wet Feet,” Not Dry Soil: Basil hates damp, stuffy conditions. It’s better to let the soil dry out slightly than to keep it constantly soggy. Ensure excellent drainage and air circulation to prevent root rot and disease.
Quick Facts Table
| Characteristic | Details |
| Sunlight | Full Sun (6-8+ hours/day) |
| Soil Type | Rich, well-draining, high in organic matter |
| Soil pH | 6.0 to 7.5 (Slightly acidic to slightly alkaline) |
| Spacing | 10-12 inches (25-30 cm) apart |
| Days to Germination | 5-10 days |
| Days to Harvest | 60-75 days from seed |
| Planting Depth | 1/4 inch (0.5 cm) |
When to Plant Basil
The single most important rule for planting basil is to wait until the weather is consistently and reliably warm.
Your basil can only be planted when all danger of frost has passed and the daily temperature is stably above 60°F (15°C). Planting too early in cold, damp soil will cause seeds to fail, while planting too late will not give the plant enough time to thrive before autumn’s chill arrives.
For the fastest germination, aim for a soil temperature near 75°F (24°C).
Basil Planting Calendar (USDA Zones 4-9)
How to Read This Calendar
The calendar below provides key planting dates for two different gardening styles: Aggressive (to maximize your season) and Safe (to minimize frost risk). You’ll notice the ‘Aggressive’ fall dates start later—this is a deliberate strategy to extend the harvest as late as possible.
Basil-Specific Timing Rules
- Spring Dates: These dates are for transplanting seedlings. To give this heat-loving herb the best start, they are intentionally set 1-2 weeks after the average last frost date. This crucial buffer allows the soil to warm up. (Remember to start seeds indoors 6-8 weeks prior to these dates).
- Fall Dates: These dates are for direct sowing. They are set 10-12 weeks before the average first frost date to ensure your basil has enough time to germinate in warm soil and mature for a harvest before the cold arrives.
| USDA Zone | Spring Planting(Aggressive) | Spring Planting(Safe) | Fall Planting(Aggressive) | Fall Planting(Safe) |
| Zone 4 | May 16 – May 23 | May 22 – May 29 | Jul 8 – Jul 22 | Jul 3 – Jul 17 |
| Zone 5 | May 7 – May 14 | May 14 – May 21 | Jul 17 – Jul 31 | Jul 11 – Jul 25 |
| Zone 6 | May 4 – May 11 | May 15 – May 22 | Jul 26 – Aug 9 | Jul 10 – Jul 24 |
| Zone 7 | Apr 13 – Apr 20 | Apr 15 – Apr 22 | Aug 13 – Aug 27 | Aug 2 – Aug 16 |
| Zone 8 | Mar 30 – Apr 6 | Apr 12 – Apr 19 | Aug 17 – Aug 31 | Aug 7 – Aug 21 |
| Zone 9 | Mar 7 – Mar 14 | Mar 25 – Apr 1 | Sep 7 – Sep 21 | Aug 18 – Sep 1 |
✔ Accuracy is my priority. The key planting dates in this calendar are calculated based on representative Aggressive and Safe frost date baselines established for each zone. Because your garden’s microclimate may vary, I strongly recommend that you verify your local frost dates for the most accurate timing. Learn My Methodology & Find a Frost Date Tool Here.
Understanding the Planting Windows
As a gardener, I’ve learned that understanding the “why” behind the calendar is crucial. Your goal is to give your basil the longest possible summer runway to grow.
There are dangers on both ends of the season: plant too early, and the cold, damp soil will prevent seeds from sprouting; plant too late, and the plant won’t have time to become lush and productive before the first frost of fall arrives. This is the balance you should aim for.
Spring Planting: Your Main Season
The goal of spring planting is to get your basil established and thriving as the long, sunny days of summer arrive.
To have your seedlings ready for your specific transplanting date, you should start them indoors 6-8 weeks prior to that date. This gives the seedlings a protected environment to grow strong.
When you finally transplant them into the warm late-spring soil, they are ready to take off and produce leaves for you all summer long.
Fall Planting: A Second Harvest in Warm Climates
For those of you in warmer climates (Zones 8 and up) with long growing seasons, you have a wonderful second opportunity.
You can start a new batch of basil seeds in late summer for a fall harvest. The warm soil will encourage quick germination, and the plants will mature in the milder temperatures of early autumn, providing fresh leaves until your first fall frost.
The Danger Zone: Why Frost is the Enemy
Unlike cool-season crops that can tolerate a light frost, basil cannot. It’s a true tropical plant at heart and will begin to suffer and wilt once temperatures dip below 50°F (10°C).
In fact, you may even see cosmetic damage, like leaf discoloration, once temperatures drop below 40°F (4°C), even without a true frost.
A true frost, with temperatures at 32°F (0°C), will kill the plant outright, turning its beautiful leaves black and mushy overnight. This sensitivity to cold is why waiting until the weather is reliably warm is non-negotiable for a successful basil crop.
How to Plant, Grow, and Harvest Basil: A Step-by-Step Guide
Here is my chronological guide to take you from seed to your first delicious harvest.
Step 1: Choose the Right Variety
The first step is deciding what kind of basil you want to enjoy. I’ve found that choosing the right variety is the key to delicious results, and these four are my top recommendations for a home garden:
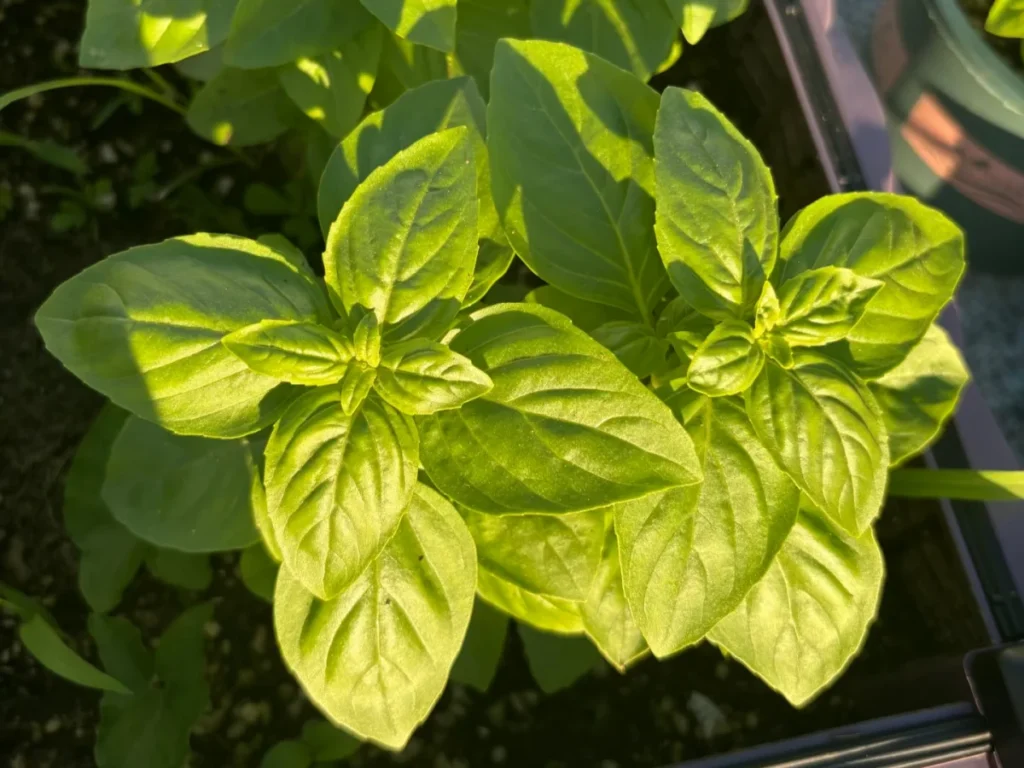
- Sweet Basil (Genovese Basil): This is the classic and most common variety. Its emerald green leaves have a fresh, sweet, and mild aroma that’s perfect for pesto, pasta, fresh salads, and even scrambled eggs. If you’re a beginner, I always recommend starting here—it’s easy to grow and incredibly versatile.
- Thai Basil: This variety has a distinct anise or licorice flavor and sturdy leaves that hold up well in cooking. It’s an essential flavor for dishes like Vietnamese pho and Thai green curry.
- Purple Basil: With its gorgeous, shimmering purple leaves, this variety is a showstopper in the garden. Its flavor has a hint of spice and clove, making it wonderful for garnishing plates, adding deep color to salads, or even infusing in olive oil to create a beautiful and flavorful finishing oil.
- Lemon Basil: Just rubbing a leaf of this variety releases an incredible, bright lemon scent. It’s absolutely superb for making refreshing iced tea or for marinating fish and chicken. In the summer, a drink with a few leaves of lemon basil is wonderfully refreshing.
My best advice for your first time? Don’t feel you have to grow them all at once. When you’re buying seeds, read the packet and see which one speaks to you.
Just starting with a single pot of Sweet Basil is a perfect way to test the waters and build your confidence.
Step 2: Prepare the Perfect Soil and Location
This step sets the foundation for a healthy plant. Get the location and soil right, and you’ve won half the battle.
Location: Give It Sun, Sun, and More Sun
I call basil a “sun-worshipper” for a reason: it needs at least 6-8 hours of direct sunlight every day. The more sun it gets, the more of those aromatic essential oils it produces, which translates directly into incredible flavor.
One expert tip: If you live in a very hot climate where summer sun is scorching (like the southern US), providing a little bit of shade during the most intense afternoon hours can prevent the leaves from wilting.
Soil: Rich, Fertile, and Well-Draining
Basil thrives in soil that is fertile and loose, but it absolutely hates being waterlogged. Here’s how to create the perfect environment, whether you’re planting in the ground or in pots.
For Planting in Garden Beds: Before you plant, it’s crucial to give your basil a strong start by mixing in a generous “base fertilizer”. This simply means enriching the soil. Work 2-3 inches of high-quality compost or well-rotted manure into the top 6-8 inches of your garden bed. This provides the long-term nutrition the plant will need all season.
For Growing in Containers: Container growing is my favorite way to manage basil.
- Choose the Right Pot: Basil is surprisingly deep-rooted for an herb, so a deep pot is better than a shallow one. Choose a container that is at least 10 inches (25 cm) in diameter and just as deep. A 5-gallon pot is a perfect size for a single, thriving plant. And I cannot stress this enough: it must have excellent drainage holes.
- Use the Right Soil: You can use a high-quality, all-purpose potting mix. To create that rich “base fertilizer” effect in the pot, I like to mix a few handfuls of compost into the potting soil, or even place a one-inch layer of composted manure at the very bottom before adding the mix.
- A Great DIY Mix: If you prefer to make your own, a fantastic, loose mix can be made from two parts compost, two parts garden soil (as long as it’s not heavy clay), and one part coarse sand or perlite to ensure perfect drainage.
Step 3: Sowing Seeds (or Planting Starts)
You have three main paths to get your basil growing: starting seeds indoors (my recommended method), sowing seeds directly outside, or buying a small plant from a nursery.
Pro Tip: Supercharge Germination by Soaking Your Seeds
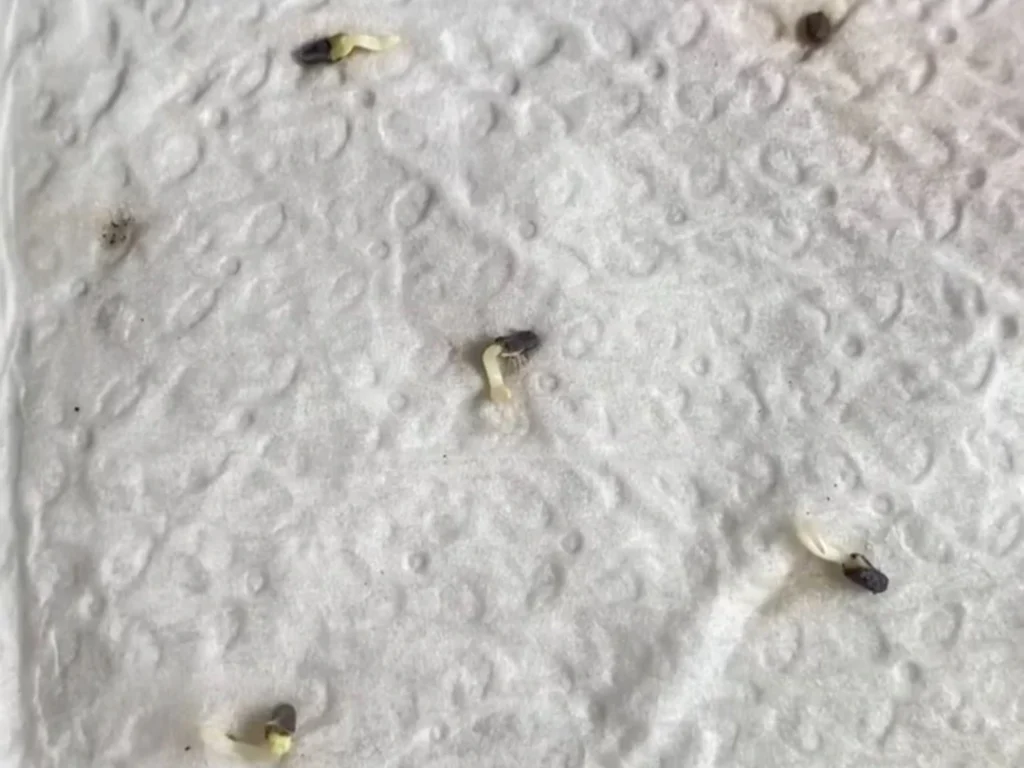
Here’s a technique I love for giving seeds a head start. About 12 hours before you plan to sow, you can soak your basil seeds in warm (around 105°F / 40°C) water.
You’ll notice something interesting: basil seeds develop a translucent, gel-like coating. This is perfectly normal!
Right before planting, it’s very important to gently rinse the seeds in a fine-mesh strainer to remove this slimy coating. While not strictly necessary with fresh seeds, this process can help speed up germination.
Starting Seeds Indoors (Recommended Method)
Starting indoors 6-8 weeks before your last frost date gives you the strongest possible start.
- Prepare Trays: Fill seed-starting trays or small pots with a light, moist seed-starting mix.
- Sow Shallowly: Place 2-3 seeds per cell and cover them with just 1/4 inch (about 0.5 cm) of fine, dry soil. A common mistake is planting them too deep, which makes it hard for the sprouts to emerge.
- Water Gently: Lightly moisten the top layer with a spray bottle so you don’t dislodge the seeds.
- Create a Mini-Greenhouse: Cover your trays with a plastic humidity dome or with plastic wrap. This is a fantastic trick to keep the soil warm and moist. If you use plastic wrap, be sure to poke a few small holes for ventilation.
- Add Warmth: Place the trays in a very warm location. The ideal soil temperature is around 75°F (24°C). Placing them on top of the refrigerator or using a seedling heat mat works wonders.
- Sprouting: Keep the soil consistently moist (but not waterlogged), and you should see sprouts emerge in as little as 5 to 10 days. Once they sprout, remove the plastic cover and place them under strong light.
Sowing Seeds Directly Outdoors
If you prefer to sow directly in the garden, wait until the soil is thoroughly warm and all danger of frost has passed.
- Create Furrows: In your prepared garden bed, create very shallow furrows (lines) about 1/4 inch deep. Space the furrows about 12-18 inches apart to give the plants room to grow.
- Water First: Gently water the furrows before you sow the seeds. This clever trick settles the soil and prevents the tiny seeds from being washed away.
- Sow Seeds: Sprinkle the seeds thinly along the moist furrow.
- Cover Lightly: Cover the seeds with 1/4 inch of fine, dry soil and gently pat it down.
- Keep Moist: Keep the area consistently moist with a gentle spray of water until the seeds germinate.
Using Nursery Starts (The Easiest Option)
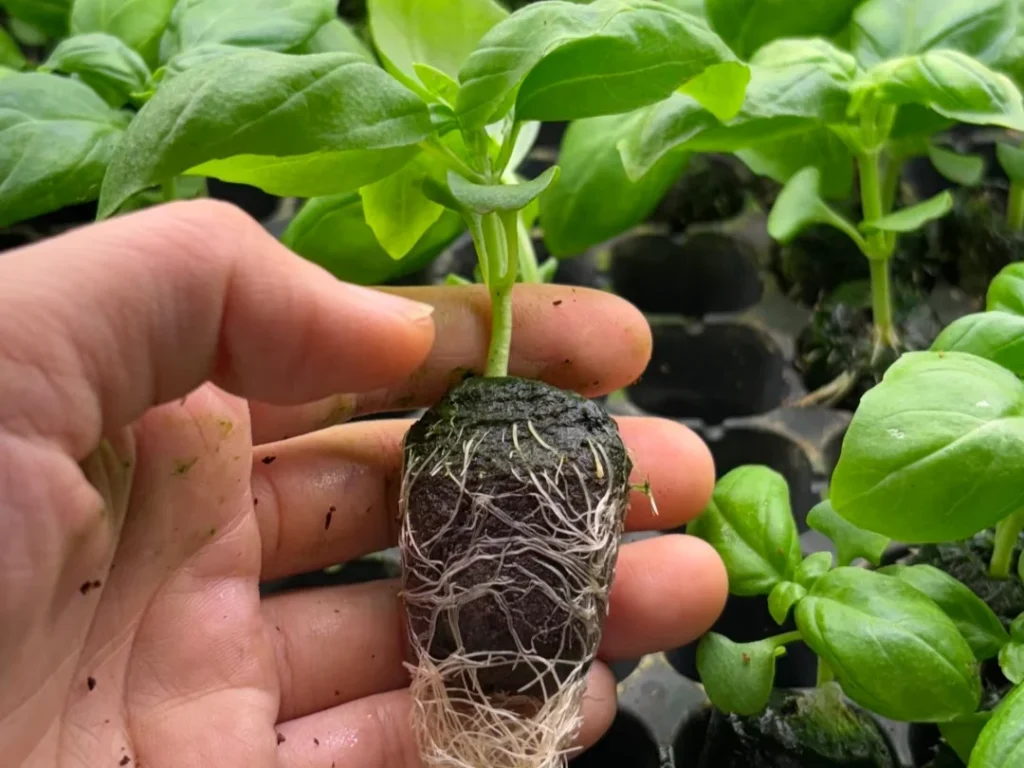
If you buy a small basil plant from a nursery, wait until after your last frost date to plant it outside. Dig a hole just as deep and slightly wider than the pot it came in. Gently remove the plant, place it in the hole, fill in the surrounding soil, and water it well to help it settle in.
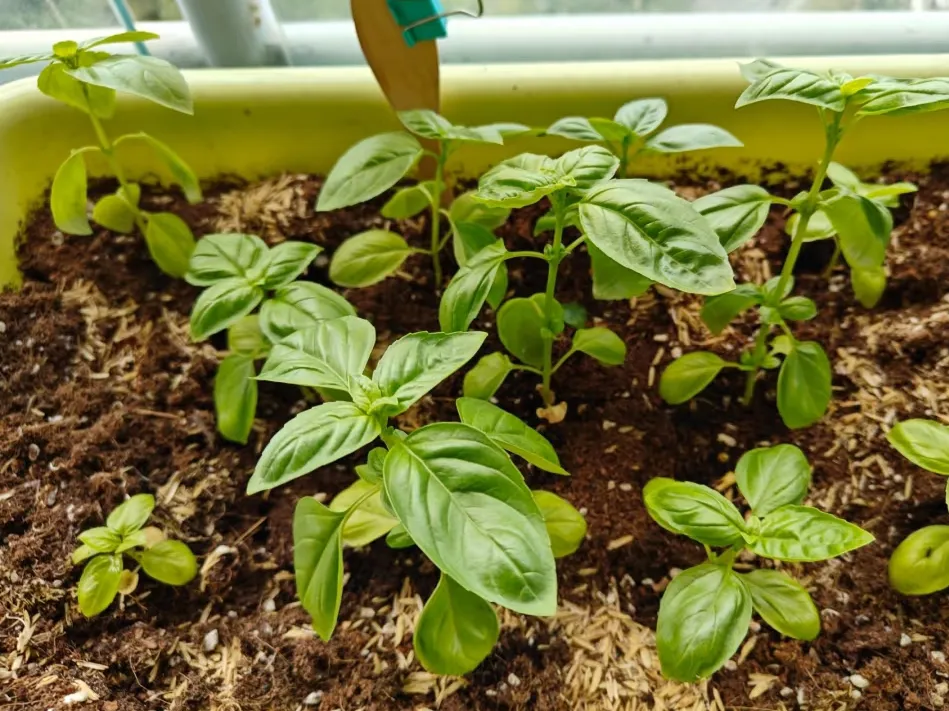
Step 4: Thinning Seedlings and Applying Mulch
This step is one of the most important in your basil’s journey. Now that you have sprouts, your job is to eliminate competition and create the perfect environment for the strongest seedlings to mature into large, healthy plants.
This involves two key actions: thinning and mulching.
Part 1: Thinning for Strength
I know it can feel painful to remove seedlings you’ve worked so hard to sprout, but I promise you, this is absolutely essential for a great harvest.
Overcrowded plants will compete fiercely for sun, water, and nutrients, resulting in weak, spindly growth for all of them. Your goal is to select the champions and give them the space they need to become bushy and productive.
When to Thin: For the very best results, I recommend a two-stage thinning process. This gradual approach is less stressful for the plants.
- First Thinning: When your seedlings are about 2-3 inches (5-8 cm) tall and have developed their first set of true leaves, perform the first thinning. Your goal is to leave seedlings spaced about 3-4 inches apart.
- Final Thinning: A couple of weeks later, when the plants have reached 4-6 inches (10-15 cm) in height, it’s time for the final thinning. Now, you will thin to the final target spacing: one healthy plant every 10-12 inches (25-30 cm). This spacing may seem wide at first, but a happy basil plant will easily fill it.
How to Thin: In each stage, choose the healthiest, most vigorous-looking seedlings to keep. For the ones you need to remove, the best method is to use a pair of small, clean scissors and snip them off at the soil line. Pulling them out by the roots can disturb the delicate root systems of the neighboring plants you want to protect.
Part 2: Applying Mulch for a Healthy Environment
Once your basil plants are established after the final thinning, the next crucial action is to apply a layer of organic mulch.
This is one of my favorite secrets to healthier soil, less watering, and almost no weeding. Mulch helps to retain precious soil moisture during hot days, suppresses competing weeds, and keeps the soil temperature stable.
- What Kind of Mulch to Use: A 1-to-2-inch layer of organic material like straw, shredded leaves, or even high-quality compost works beautifully.
- How to Apply It: Gently spread your chosen mulch on the soil surface around your basil plants. Be careful to leave a small, mulch-free circle (about an inch or two) directly around each plant’s main stem. This prevents moisture from being trapped against the stem, which can discourage rot and disease.
For the details on a consistent watering and feeding schedule from this point forward, be sure to check the ‘Expert Guide’ section below.
Step 5: Harvesting for Peak Flavor
Here is the most rewarding part, and it’s where you take an active role in shaping your plant. Remember this golden rule: for basil, harvesting is pruning. Frequent, correct harvesting is what encourages a bushy, productive plant.
- When to Start Your First Harvest: I know it’s tempting to start picking leaves right away, but patience pays off. Wait until the plant is at least 6 inches (15 cm) tall and has several sets of leaves before you make your first harvest. This ensures the plant is strong enough to recover and regrow quickly.
- The Best Time of Day to Harvest: For the highest concentration of aromatic oils, the ideal time to harvest basil is in the morning, after the dew has dried but before the sun becomes too hot. Some university extension programs also suggest evening, once the leaves are cool again. The key is to avoid harvesting in the intense heat of midday, which can cause the cuttings to wilt quickly.
- The Correct Harvesting Method: The biggest mistake I see is gardeners picking off individual leaves from the bottom or middle of the plant. This will only encourage the plant to grow taller and more spindly. The proper way is to harvest from the top down.
- Follow a main stem or a large side branch down from the top.
- Find a point where a pair of side leaves is branching off.
- Make your cut with clean scissors or your fingers about 1/4 inch above this pair of leaves.
- This signals the plant to send its energy into those two side leaves, turning them into two new main stems. By doing this, you multiply your future harvest!

- Harvesting Frequency: Basil loves a regular trim. Plan to harvest from your plant every one to two weeks. The more you harvest (correctly!), the more it will produce for you.
- A Chef’s Tip for Maximum Flavor: When you’re cooking with your fresh basil, its delicate aromatic oils are sensitive to heat. For the most vibrant flavor in hot dishes like pastas or soups, add your fresh basil at the very end, just before serving.
Step 6: Post-Harvest Handling & Storage
How you handle your basil right after picking makes a big difference in how long it lasts and how good it tastes.
- How to Wash Basil: When you bring your harvest indoors, handle it gently. The best way to wash it is to give it a quick, gentle rinse under cool water. Never soak basil leaves in a bowl of water for a long time, as this will cause their precious essential oils—and thus their flavor—to leach out into the water. Pat them dry with a soft towel or use a salad spinner.
- Short-Term Storage (1-4 Days): The best way to keep basil fresh is to treat it like a bouquet of cut flowers. Place the stems in a jar or glass with about an inch of water and leave it on your kitchen counter, out of direct sunlight. Do not store fresh basil in the refrigerator. The cold temperature is too harsh and will cause the delicate leaves to turn black within a day.
- An Expert Note on Refrigeration: This is another topic where you might find conflicting advice from reputable sources. Some guides, like that from Utah State University, suggest you can refrigerate basil for 7-10 days if you cover the jar and stems with a plastic bag. However, in my personal experience and that of most chefs, this method is very risky and often still results in blackened, damaged leaves due to the cold. For the most consistent and foolproof results in preserving the color and delicate texture of your fresh basil, I stand firmly by the room-temperature water method.
- Long-Term Storage (Months):
- Freezing (Best for Flavor): This is my preferred method for preserving that fresh summer taste. Finely chop the basil leaves and pack them into an ice cube tray. You can then either top them off with a little water or, for an even better result, with olive oil. Once frozen, pop the cubes out and store them in a freezer bag. They are perfect for dropping directly into sauces, soups, and stews all winter long.
- Drying (Easiest Method): You can also dry basil by hanging small bunches upside down in a warm, dry, well-ventilated area until the leaves are crumbly. You can also use a food dehydrator. Once fully dry, crumble the leaves and store them in an airtight jar away from light. While easy, be aware that dried basil has a much milder, different flavor profile compared to fresh or frozen basil.
Expert Guide to a Healthy Harvest: Tips & Troubleshooting
Ongoing Care: Mastering Watering and Feeding
Once your basil is established, your focus shifts from survival to promoting lush, vigorous growth. Mastering a consistent watering and feeding rhythm is the key.
My Watering Philosophy: Better Dry Than Wet
The most common way I see gardeners harm their basil is with too much love—specifically, too much water.
Basil is native to warm, sunny climates; it is somewhat drought-tolerant but has absolutely no patience for soggy, waterlogged soil. My guiding principle is simple: it is always safer to let basil get a little thirsty than it is to drown it.
- The Rule: Water your basil only when the top 1 to 2 inches of soil feel dry to the touch. When you do water, do so thoroughly until you see water escaping from the drainage holes at the bottom of the pot. This ensures the entire root zone is hydrated. Avoid shallow, frequent sips of water, as this can lead to weak root development.
- The Chopstick Trick: If you’re ever unsure, I recommend this foolproof method. Gently push a dry wooden chopstick or skewer deep into the soil near the edge of the pot. Pull it out after a few seconds. If it comes out clean and dry, it’s time to water. If it comes out dark with moist soil clinging to it, wait another day or two.
- Water the Soil, Not the Leaves: Always aim your watering can at the base of the plant. Wetting the leaves, especially in humid conditions or without good air circulation, can encourage fungal diseases like black spot or downy mildew.
Feeding for a Continuous Harvest
To keep your basil producing an endless supply of fragrant leaves, I recommend a simple but effective two-phase feeding strategy. Basil is not a heavy feeder, but it appreciates a well-timed meal, especially after you’ve harvested from it.
- Phase 1: The Growth Phase (Before the First Major Harvest) While the plant is young and focusing on growing its main frame, you can feed it every 2-3 weeks with a balanced liquid fertilizer that is rich in nitrogen. Nitrogen is what fuels leafy green growth. A standard “all-purpose” or “grow” formula works perfectly.
- Phase 2: The Harvest & Regrow Cycle (The Most Important Step) Here is the secret to a season-long supply: feed your basil after you harvest. Every time you prune or harvest a significant amount of leaves, you are asking the plant to expend a lot of energy to regrow. Give it a helping hand by providing a dose of balanced liquid fertilizer a day or two after each harvest. This replenishes its energy stores and fuels the rapid growth of new, tender leaves.
- The “Easy Button” Method: For a simpler, set-it-and-forget-it approach, you can mix a granular slow-release fertilizer into your soil at planting time. This will provide a slow, steady supply of nutrients throughout the season. You can still supplement with a liquid feed after heavy harvests if you notice growth slowing down.
My two-phase feeding strategy is designed to maximize your leaf production for a continuous, heavy harvest, which is ideal for gardeners who want a lot of basil.
It’s worth noting, however, that there is another school of thought which advises fertilizing basil more sparingly. If your garden soil is already extremely rich in compost and organic matter from the start, a more conservative approach of fertilizing only once or twice a season, as some universities recommend, can also be very effective.
I encourage you to observe your plant’s vigor and adjust based on its performance and your soil’s initial fertility.
- A Special Note for Container Gardeners: Because nutrients leach out of pots more quickly with each watering, you may need to fertilize more frequently than you would for in-ground plants. For potted basil, I recommend applying a diluted liquid fertilizer weekly during the peak of the growing season to maintain vigorous, leafy growth.
Mastering Pruning (Pinching) for a Bushy Plant
If you learn only one advanced technique from this guide, let it be this one.
A basil plant’s natural instinct is to grow straight up, produce flowers, and set seed. My goal as a gardener is the opposite: I want it to stop growing up and start growing out, turning into a lush, multi-branched ‘little shrub’ that produces an abundance of leaves.
I achieve this through strategic pruning, also known as “pinching.”
The First Pinch: Your Most Important Cut

This first cut is the most critical. It fundamentally changes the plant’s growth habit from a single stalk into a branching structure.
- When to Do It: The ideal time is when the young plant has developed its first 3 to 4 sets of true leaves (a total of 6-8 leaves) and is typically about 5-8 inches tall. Don’t be too eager; pinching too early can stress a weak seedling.
- How to Do It: Locate the very top set of new, tiny leaves at the central peak of the plant. Follow that main stem down to the next set of large, fully formed leaves below it. With clean scissors or just your fingertips, make a clean cut about 1/4 inch above this lower set of leaves.
- The Magic Result: You’ve just removed the plant’s main upward-growing tip. In response, the plant will activate two dormant buds located at the base of the leaf pair you left behind. In a week or so, you’ll see these two buds grow into two brand-new main stems. You’ve just doubled the plant’s productive capacity.
Ongoing Pruning: The Habit of Success
Now that you understand the principle, you simply repeat it.
Let those two new stems grow out until they are a few inches long and have developed a few sets of their own leaves. Then, pinch the tops off those new stems, again cutting just above a leaf pair.
Every time you pinch one stem, you get two in its place. This continuous process is how you create that amazing, full, shrub-like plant that provides a non-stop harvest.
Your Number One Enemy: Flower Buds
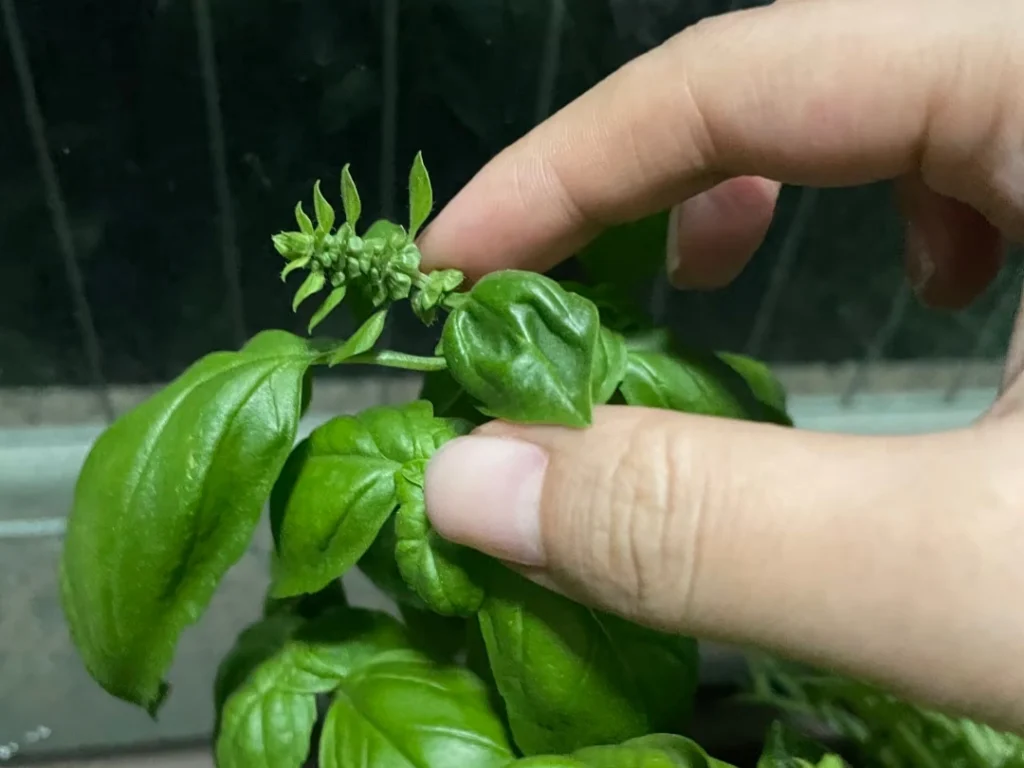
As the season progresses, your basil will constantly try to complete its life cycle by flowering. You must be vigilant and stop this at all costs.
The moment a plant directs its energy to making flowers, it sends a hormonal signal to stop producing big, flavorful leaves. Even worse, the flavor of the existing leaves can become bitter.
- What to Look For: Inspect the very top of each main stem every few days. You are looking for a dense, rectangular cluster of tiny leaves that looks different from the normal leaf growth. These are the flower buds.
- Pinch on Sight: As soon as you spot a flower bud forming, pinch it off immediately. This keeps the plant in a vegetative (leaf-producing) state, extending your delicious harvest for weeks or even months longer.
- An Expert Note on This Topic: It’s important for you to know that while the vast majority of horticultural advice strongly recommends pinching flower buds, there is some academic debate. Research from Utah State University, for example, suggests that pinching might encourage more flowers to form on side shoots, potentially reducing overall yield in some settings. However, for the home gardener, our primary goals are different: we prioritize preventing the main stems from flowering to stop the leaves from turning bitter and to keep the plant in a leaf-producing mode. Therefore, promptly pinching off flower buds remains the most reliable and recommended strategy for maintaining the highest quality and flavor in your home garden harvest.
Natural Pest and Disease Control
The best way to deal with pests and diseases is to prevent them from ever taking hold. Through my research and experience, I’ve learned that a healthy, happy basil plant grown in the right conditions is its own best defense. Prevention should always be your primary goal.
The Golden Rules of Prevention
- Promote Good Airflow: This is perhaps the most critical factor. Ensure your plants have proper spacing (at least 10-12 inches apart) so air can circulate freely around them. Good airflow helps leaves dry quickly and discourages the fungal spores that cause most diseases.
- Water the Soil, Not the Plant: As I mentioned in the watering section, always direct water at the base of the plant. Wet foliage, especially overnight, is an open invitation for common basil diseases.
- Keep the Garden Clean: Remove any yellowing or dead leaves from the plant and clear any fallen debris from the soil surface. This eliminates potential hiding spots and breeding grounds for both pests and disease.
Dealing with Common Garden Pests
Even with the best prevention, you might occasionally see a few unwanted visitors. Here’s how to handle the most common ones naturally, without resorting to harsh chemicals.
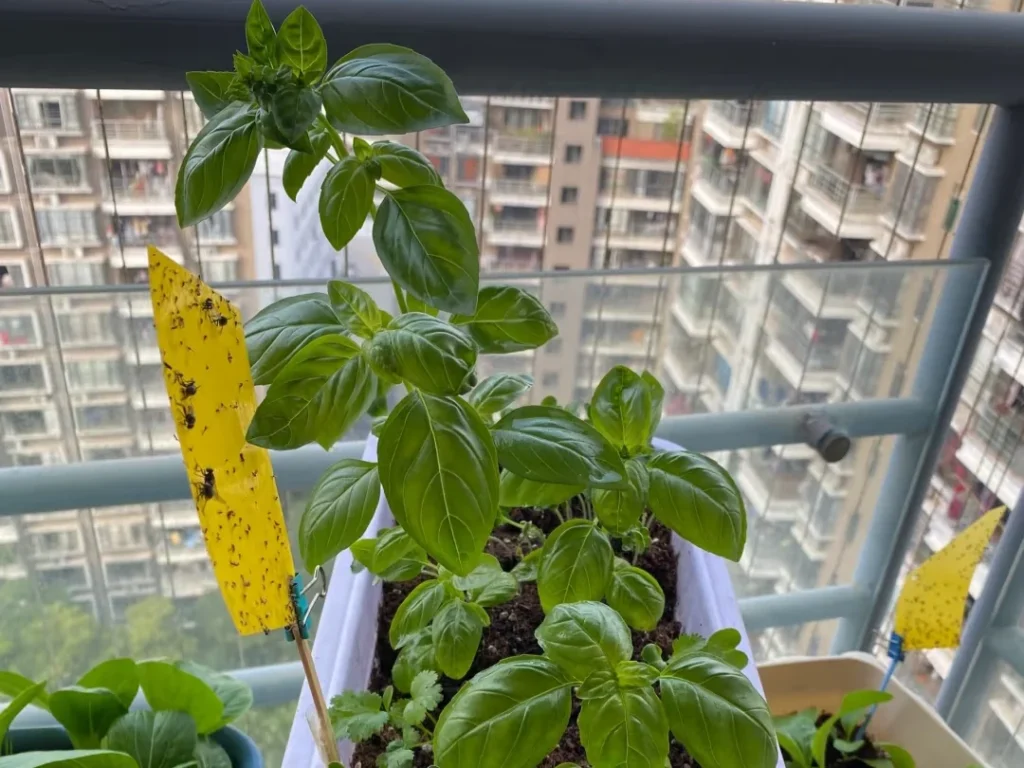
- Aphids: You’ll spot these tiny, pear-shaped insects (often green, white, or black) clustered on the tender new growth and the undersides of leaves.
- Natural Solution: For a small infestation, a strong blast of water from a spray bottle or hose is often enough to dislodge them. If they return, a thorough spray of insecticidal soap is your next step. Be sure to coat all surfaces of the leaves, especially the undersides where they hide.
- Spider Mites: These pests are incredibly tiny and hard to see, but you’ll notice their tell-tale signs: fine, silky webbing on the plant (especially on the undersides of leaves) and a stippled, faded look to the foliage. They thrive in hot, dry conditions.
- Natural Solution: Spider mites hate moisture. The same solutions for aphids work perfectly here: a strong spray of water directed at the undersides of the leaves, followed by insecticidal soap for more persistent issues.
While aphids and spider mites are the most frequent visitors, depending on your region, you might also encounter other pests like Japanese beetles, grasshoppers, or slugs.
Hand-picking is often the most effective organic control for Japanese beetles and slugs (I recommend doing this in the early morning or evening). For a severe grasshopper problem, protecting your plants with a lightweight row cover may be necessary.
Preventing Common Basil Diseases
Basil diseases are almost always related to excess moisture and poor air circulation. Prevention is truly the only effective cure.
- Downy Mildew: This is one of the most common and serious diseases for basil. You’ll notice the tops of the leaves turning yellow in patches (often bounded by the leaf veins), while the undersides develop a fuzzy, greyish-purple mold.
- Solution: Prevention is everything. Maximize air circulation by giving plants plenty of space and prune them to keep them open. If you spot it, immediately remove and dispose of all affected leaves in the trash (do not compost them) to slow the spread.
- Powdery Mildew: This disease looks exactly like its name sounds: as if someone has dusted the leaves with patches of white or grey powder. It’s most common in humid weather with poor airflow.
- Solution: Once again, good air circulation is your best defense. If you catch it very early, remove the affected leaves. For a mild outbreak, some gardeners have success with organic fungicides or even a diluted milk spray (1 part milk to 9 parts water) applied in bright sunlight.
A Final Note on Pests & Diseases: Remember that pest and disease pressures can vary greatly by region. If you encounter a problem you can’t identify, or if the organic methods above are not effective, your best resource is your local University Extension Service. They often provide free, region-specific advice and diagnostics for home gardeners.
Solving Common Problems with Basil
Sometimes, even with the best care, your basil might show signs of stress. Don’t worry! Most common problems are not caused by pests or diseases, but by environmental factors that are easy to diagnose and fix.
Here’s a quick guide to what your plant might be trying to tell you.
Problem: My basil is tall and “leggy” with small, sparse leaves.
- Likely Causes: This is a classic sign of insufficient light. The plant is literally stretching itself thin to find more sun. It can also be caused by a lack of pinching and pruning, which would otherwise encourage bushy growth.
- Solution: Move your basil to the absolute sunniest spot you have—remember, it craves at least 6-8 hours of direct sun. Immediately begin a regular pinching routine as described in the “Mastering Pruning” section above. This will redirect the plant’s energy into outward, leafy growth instead of upward stretching.
Problem: The lower leaves on my plant are turning yellow.
- Likely Causes: This is most often a watering issue. The number one cause is overwatering, which suffocates the roots and prevents them from absorbing nutrients. Less commonly, it can be a sign of a nitrogen deficiency (especially in older, potted plants) or, if the whole plant is pale yellow, not enough sunlight.
- Solution: Use your finger or a chopstick to check the soil moisture first. If it’s soggy, reduce your watering frequency immediately and make sure the pot has excellent drainage. If the soil seems fine, the plant may be hungry. Try feeding it with a dose of balanced, nitrogen-rich fertilizer as described earlier.
Problem: My entire basil plant looks wilted and droopy.
- Likely Causes: This can be confusing because it can be caused by two opposite problems: severe underwatering (simple thirst) or severe overwatering (the roots have rotted from lack of oxygen and can no longer absorb water).
- Solution: Again, the soil is your clue. If the soil is bone dry and pulling away from the sides of the pot, give the plant a deep, thorough watering, and it should perk up within a few hours. If the soil is soggy, wet, and perhaps even smells a bit sour, you likely have root rot. This is much harder to fix, but you can try to save it by repotting into fresh, drier soil and trimming away any mushy, black roots.
Problem: My leaves have white, faded, or “bleached” patches.
- Likely Cause: This is likely sun scorch, which is essentially a plant sunburn. It can happen if you move a seedling that was started indoors directly into intense, outdoor sun without hardening it off properly. It can also occur during an extreme heatwave in very hot climates.
- Solution: If you are transitioning a plant outdoors, do it gradually over a week. If the issue is a heatwave, try to protect your plant with some afternoon shade using a taller plant or a piece of shade cloth. Ensure the plant stays well-watered, as thirsty plants are more susceptible to scorch.
Problem: My basil is flowering (or “bolting”)!
- Likely Cause: This is a natural response, often triggered by stress (like heat, drought, or being root-bound) or simply the plant reaching the end of its life cycle.
- Solution: This isn’t a problem, it’s a call to action! As I detailed in the section on Mastering Pruning, you must pinch off these flower buds the moment you see them. This is not a sign of failure—it’s a normal part of basil care that keeps the plant producing delicious leaves for you.