There’s a special kind of satisfaction that comes from growing a plant so generous it can be harvested for over six months, and so tough it can shrug off temperatures down to 10°F (-12°C). For me, that plant is kale.
This incredibly resilient green doesn’t just survive cool weather—it thrives in it, offering harvests long after more delicate plants have faded. When I first started researching North American gardening to help a friend, I was immediately drawn to kale’s reputation as a nutritional powerhouse that was surprisingly easy to grow.
I know that starting a new vegetable can feel intimidating, with questions about timing, soil, and care swirling in your head. Please don’t worry. I’ve designed this guide to be your complete, step-by-step roadmap.
My goal is to give you all the knowledge and confidence you need to go from a tiny seed to a thriving, productive plant. By the time you’re done reading, you’ll be ready to enjoy your own delicious, homegrown kale.
This guide is just one part of my complete library of Vegetable Growing Guides, where I share everything I’ve learned to help you succeed.
Core Summary (TL;DR)
- Plant in Cool Weather: Kale is a cool-season crop. Your best times to plant are early spring for a summer harvest, or late summer for a fall and winter harvest. Fall-grown kale is often sweeter after a frost.
- Rich Soil & Sun: Provide at least 6 hours of sun and fertile, well-draining soil amended with plenty of compost.
- Consistent Water is Key: Keep the soil evenly moist to produce tender, sweet leaves. About 1 to 1.5 inches of water per week is ideal.
- Harvest for 6+ Months: Master the “cut-and-come-again” method to harvest from the same plant for months, achieving true “leafy green freedom.”
Quick Facts for Growing Kale
| Factor | Details |
| Sunlight Needs | Full sun (6+ hours/day); tolerates partial shade |
| Soil Type | Fertile, loamy, well-draining |
| Soil pH | 6.0 to 7.5 |
| Plant Spacing | 18-24 inches (45-60 cm) apart |
| Planting Depth | 1/2 inch (1.25 cm) deep |
| Temperature Tolerance | Hardy to approx. 10°F (-12°C); growth slows & leaves toughen above 86°F (30°C) |
| Days to Germination | 5-7 days (under ideal conditions) |
| Days to Harvest | 30-40 days (baby leaves); 55-75 days (mature leaves) |
| Key Pests | Cabbage worms, aphids, flea beetles |
| Hardiness Zones | Hardy in USDA Zones 2-9 |
When to Plant Kale
The best times to plant kale are in early spring for a pre-summer harvest or in late summer for a fall and winter harvest.
As a cool-season crop, kale’s growth and flavor are perfected by cool temperatures, while intense summer heat can cause it to become bitter and bolt (flower prematurely).
Kale Planting Calendar (USDA Zones 4-9)
How to Read This Calendar
The calendar below provides key planting dates for two different gardening styles: Aggressive (to maximize your season) and Safe (to minimize frost risk). You’ll notice the ‘Aggressive’ fall dates start later—this is a deliberate strategy to extend the harvest as late as possible.
Kale-Specific Timing Rules
Spring Planting: These dates are for direct sowing. To ensure the plants are well-established before the summer heat, they are intentionally set 2 to 4 weeks before your average last spring frost date.
Fall Planting: These dates are also for direct sowing. They are set 60 to 90 days before your average first fall frost date. Sowing during this window ensures the plants mature during the cooler temperatures of autumn, which famously improves their flavor and makes the leaves remarkably sweet after a light frost.
| USDA Zone | Spring Planting(Aggressive) | Spring Planting(Safe) | Fall Planting(Aggressive) | Fall Planting(Safe) |
| Zone 4 | Apr 11 – Apr 25 | Apr 17 – May 1 | Jul 2 – Aug 1 | Jun 27 – Jul 27 |
| Zone 5 | Apr 2 – Apr 16 | Apr 9 – Apr 23 | Jul 11 – Aug 10 | Jul 5 – Aug 4 |
| Zone 6 | Mar 30 – Apr 13 | Apr 10 – Apr 24 | Jul 20 – Aug 19 | Jul 4 – Aug 3 |
| Zone 7 | Mar 9 – Mar 23 | Mar 11 – Mar 25 | Aug 7 – Sep 6 | Jul 27 – Aug 26 |
| Zone 8 | Feb 23 – Mar 9 | Mar 8 – Mar 22 | Aug 11 – Sep 10 | Aug 1 – Aug 31 |
| Zone 9 | Jan 31 – Feb 14 | Feb 18 – Mar 4 | Sep 1 – Oct 1 | Aug 12 – Sep 11 |
✔ Accuracy is my priority. The key planting dates in this calendar are calculated based on representative Aggressive and Safe frost date baselines established for each zone. Because your garden’s microclimate may vary, I strongly recommend that you verify your local frost dates for the most accurate timing. Learn My Methodology & Find a Frost Date Tool Here.
Understanding the Planting Windows
Spring Planting: Seizing the Cool Season
The primary goal of spring planting is to get your kale seeds sown and growing early enough so the plant can mature and you can get a significant harvest before the intense heat of mid-summer arrives.
By starting seeds indoors 4-5 weeks before your last frost date, you give your plants a valuable head start.
Fall Planting: Your Second Harvest Opportunity
I believe fall is the absolute best time to grow kale. Planting in late summer allows the seeds to germinate in warm soil, but the plants mature as the air temperatures cool down.
This isn’t just an old gardener’s tale; there’s real science at play. The cold prompts the plant to convert starches into sugars, acting as a natural antifreeze and making the leaves remarkably sweet.
For purple varieties, temperatures below 50°F (10°C) also trigger intense anthocyanin production, making their beautiful colors even more deep and vibrant.
The Danger Zone: Why Summer Heat is the Enemy
Kale is not a fan of high heat. When temperatures consistently rise above 86°F (30°C), two negative things happen:
- Toughness and Bitterness: The leaves develop a tough, fibrous texture and a distinctly bitter flavor.
- Bolting: The plant’s survival instinct kicks in, causing it to prematurely send up a flower stalk to produce seeds. Once this happens, leaf production stops and the plant’s energy is redirected, effectively ending your harvest.
Key Factors & Advanced Strategies
The Secret Signal: Ideal Soil and Air Temperatures
While calendars are helpful, the real signals come from the environment itself.
- Ideal Soil Temperature for Germination: Kale seeds germinate best when the soil temperature is between 45°F and 85°F (7°C – 29°C). At around 68°F (20°C), you can expect them to sprout in as few as 5 days.
- Ideal Air Temperature for Growth: The plants thrive and produce the highest quality leaves when air temperatures are between 59°F and 77°F (15°C – 25°C).
Pro Technique: Succession Planting
Instead of planting all your kale at once, try succession planting for a continuous supply.
Sow a small batch of seeds every 2-3 weeks during your planting window. This staggers your harvest, ensuring you have a steady stream of fresh, young leaves rather than a single large harvest.
Extending Your Season: Getting an Earlier Start and Later Harvest
You can push the boundaries of the growing season with a few simple tools.
- Cold Frames or Low Tunnels: These create a mini-greenhouse effect, allowing you to plant earlier in the spring and harvest much later into the fall and even winter in many zones.
- Row Covers: A floating row cover can protect young spring seedlings from a late frost and, crucially, act as a physical barrier against pests like cabbage moths.
- Shade Cloth: If you live in a warmer climate, using a light shade cloth during the hottest parts of the day can help prevent bitterness and bolting. In addition to shade cloth, you can also try misting the leaves on very hot afternoons to provide some evaporative cooling and reduce stress on the plant.
For a complete month-by-month guide, specific tips for your climate zone, and advanced season-extending techniques, see my detailed kale planting calendar and seasonal guide.
How to Plant, Grow, and Harvest Kale: A Step-by-Step Guide
Follow these steps, and you’ll be on the fast track to a beautiful and productive kale patch.
Step 1: Choose the Right Variety
Your first decision is what kind of kale you want to enjoy! This choice can significantly impact your harvest’s success and flavor. Think about how you plan to use it and what challenges your garden might face.
- Lacinato Kale (Dinosaur or Tuscan Kale): My personal favorite for both flavor and performance. It has beautiful, dark blue-green, bumpy leaves and a deep, earthy flavor. For beginner gardeners, I highly recommend this type because it is naturally more resistant to pests like cabbage worms and is also slower to bolt (flower prematurely) in late spring, giving you a longer harvest window.
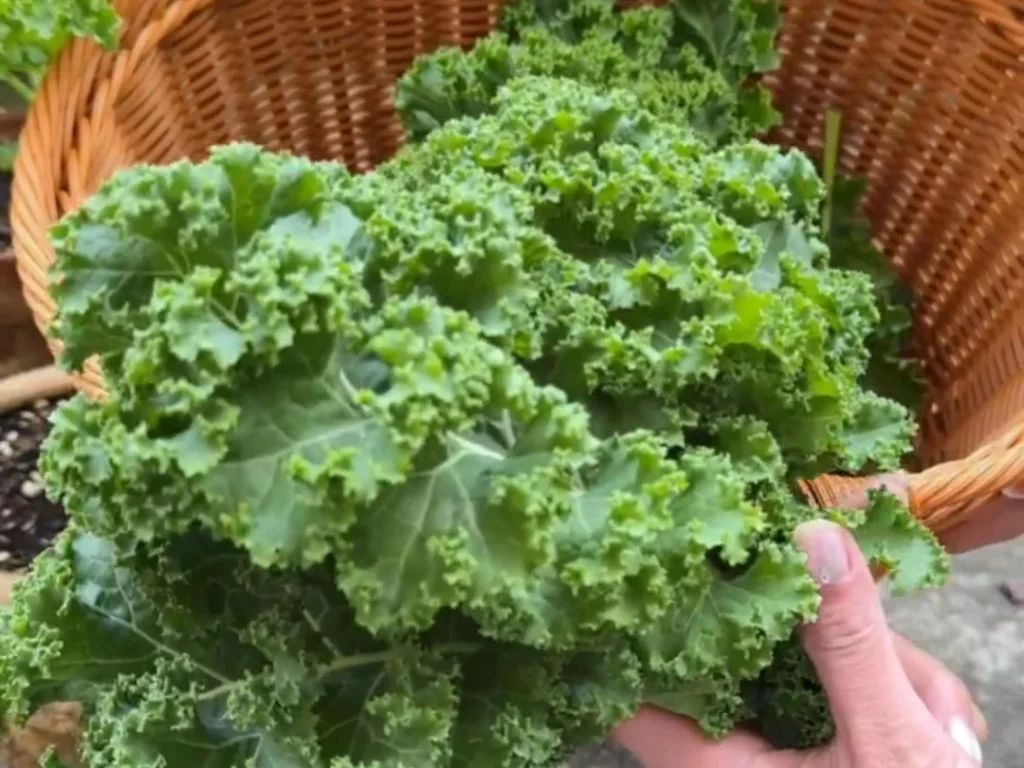
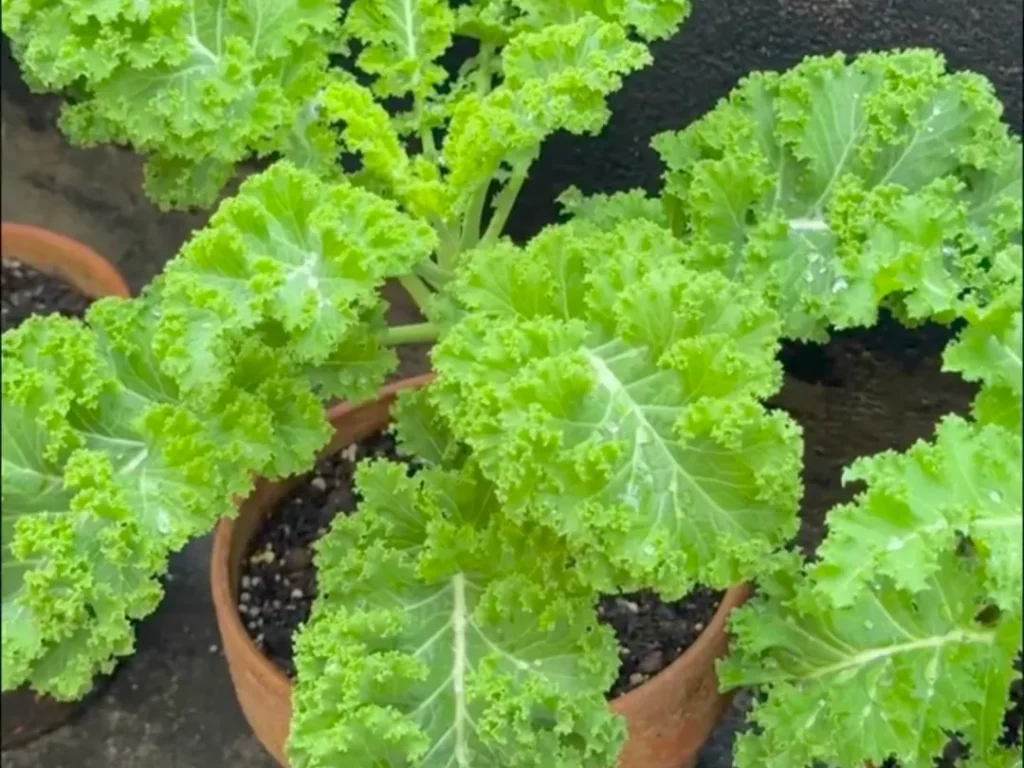
- Curly Kale (e.g., ‘Vates Blue Curled’, ‘Redbor’): This is the classic, extremely hardy type with frilly leaves. It’s fantastic for making kale chips as the edges get wonderfully crispy. For container gardeners, I suggest looking for a variety like ‘Redbor’, which has a compact growth habit (around 16 inches/40 cm tall) and stunning deep purple leaves, indicating a high anthocyanin content.
- Red Russian Kale: This variety has flat, oak-leaf-shaped leaves with beautiful red-purple stems. It’s one of the most tender and sweet varieties, especially when harvested young for salads.
- For Cooking (Soups & Stir-fries): If you plan to cook your kale often, look for a round-leaf variety like ‘Capri’. Its leaves are thicker and more tender, holding up beautifully in soups and stir-fries while providing a high dose of Vitamin A.
- For Beauty and Nutrition: For a visually stunning garden, consider ornamental varieties like the ‘Peacock’ series or those with white-edged leaves like ‘White Gull’. These are not just beautiful but also perfectly edible, often with a sweeter, milder taste perfect for fresh eating.
Pro-Tip on Sourcing: When buying seedlings, look for young plants with 4-6 true leaves and a sturdy stem base (at least 1/4 inch or 0.5 cm in diameter). If starting from seed, consider “pelleted” or “coated” seeds, which can have a much higher germination rate (up to 90%).
Step 2: Prepare the Perfect Soil and Location
Kale is a heavy feeder and needs a good foundation to thrive. Where you plant it and what you plant it in are just as important as when you plant.
Choosing Your Location
- Sunlight is Energy: Find a spot that gets at least 6 hours of direct sunlight per day. This is especially crucial for colored varieties (like purple or red kale), as insufficient sunlight can cause their vibrant colors to fade to a dull green.
- Pro-Tip for Containers: If you are growing in pots, I recommend rotating the container 180 degrees every few days. This ensures all sides of the plant get equal sun exposure, preventing it from leaning towards the light and promoting even, bushy growth.
Preparing In-Ground Garden Beds
- The Goal: The ideal soil is rich in organic matter, loamy, and well-draining, with a pH between 6.0 and 7.5.
- Standard Preparation: Before planting, I always work a generous 2-3 inch layer of compost or well-rotted manure into the top 6-8 inches of my garden bed. This provides essential nutrients and helps the soil retain moisture.
- Solving Heavy Clay Soil: If your garden has heavy, sticky clay soil, improving drainage is critical. I recommend amending it by mixing in about 30% compost or leaf mold and 20% perlite to lighten the texture and prevent waterlogging.
Creating the Ideal Potting Mix for Containers
Container gardening gives you complete control over the soil, which is a huge advantage!
- My Go-To Formula: For a thriving potted kale plant, I use a specific potting mix recipe. You can create it by combining:
- 4 parts garden soil
- 3 parts compost or leaf mold (for nutrients and moisture retention)
- 2 parts perlite (for drainage and aeration)
- 1 part well-rotted manure (like sheep manure) (as a rich, slow-release fertilizer)
- The Drainage Secret: To guarantee your kale never suffers from “wet feet” (root rot), place a 2-inch (5 cm) layer of clay pebbles (leca) or small gravel at the bottom of the pot before adding your soil mix. This creates an excellent drainage reservoir and is a simple trick to prevent one of the most common container gardening mistakes.
Step 3: Sowing Seeds and Transplanting Seedlings
This is where your kale plant’s life truly begins. You have two main options: sowing directly into the garden or getting a head start by sowing indoors.
Pro-Tips for Sowing Seeds
Whichever method you choose, a little preparation can make a big difference.
- Boost Germination: To give your seeds a head start, you can soak them in lukewarm water for 6-10 hours before planting. This helps soften the seed coat and can speed up sprouting.
- Higher Success Rate: When buying seeds, look for “pelleted” (or coated) varieties. They are slightly larger, much easier to handle, and I’ve found they often have a higher, more reliable germination rate.
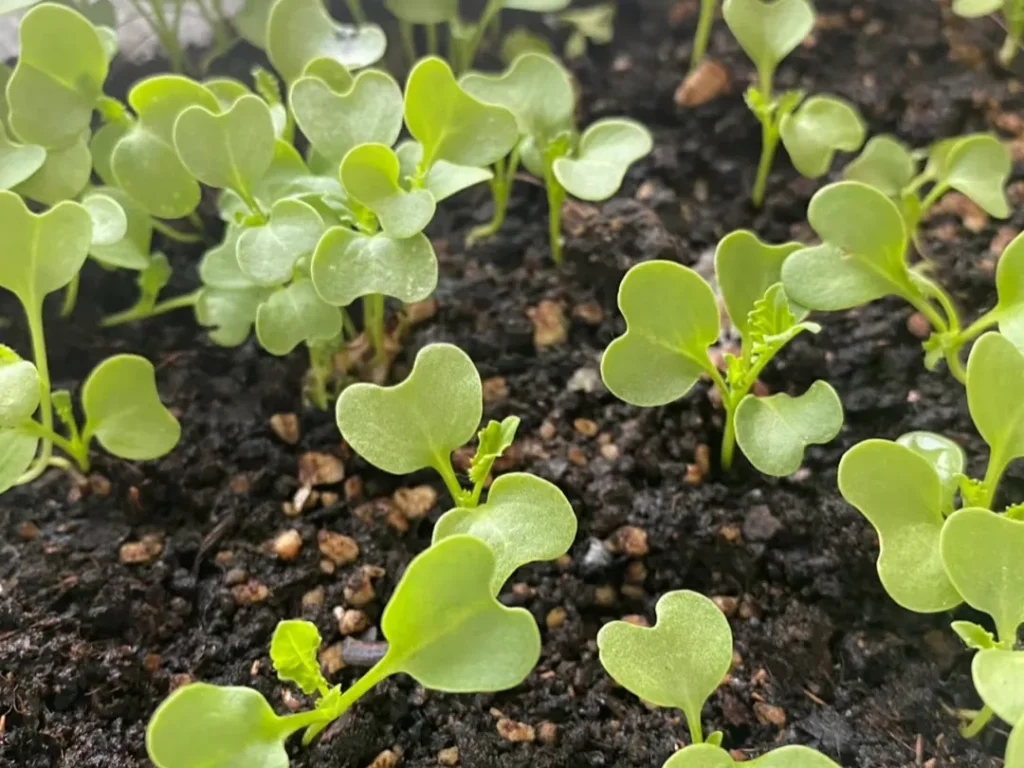
Option 1: Direct Sowing
This is the easiest method. Plant seeds about 1/2 inch deep, placing one every 3-4 inches (you will thin them out later). Water the area gently and keep the soil consistently moist until the seeds sprout.
Option 2: Starting Indoors
In spring, you can start seeds in trays 4-5 weeks before your last frost date. Place them in a sunny window or under grow lights. Before they can move to the garden, you must “harden them off” by gradually exposing them to outdoor conditions over a week.
The Art of Transplanting: Ensuring Seedling Success
How you move your seedlings into their final home is one of the most critical steps for their future health. Done correctly, they won’t even notice the move.
- The Best Time: Always try to transplant on a calm, overcast day or in the late afternoon. Never transplant in the heat of midday, as the intense sun can cause immediate and severe wilting.
- The Technique:
- Handle with Care: Gently ease the seedling out of its tray, doing your best to keep the entire root ball intact to avoid shocking the delicate roots.
- Set the Depth: Place the seedling in its new hole so the top of its root ball is level with the surrounding garden soil.
- Water In Thoroughly: After filling the hole, give the plant a deep, gentle watering right at the base. This “settling-in drink” is vital—it eliminates air pockets and ensures good root-to-soil contact.
- My Favorite Pro-Tip (The Mini-Greenhouse Trick): To virtually guarantee your seedling thrives, cover it with a clear plastic bag or a cut-off soda bottle for 2-3 days after transplanting. This creates a personal humidity dome, protecting the young plant from wind and moisture loss while its roots get established in the new soil. This simple trick dramatically reduces transplant shock.
Step 4: Thinning Seedlings and Applying Mulch
This is the crucial step that sets your young plants up for long-term success, taking them from fragile seedlings to robust, established plants.
- Why Thin? It can feel difficult to pull out healthy seedlings, but overcrowding leads to weak, spindly plants. They are forced to compete for sunlight, water, and nutrients. Thinning is an act of kindness to the remaining plants.
- How to Thin: Once your seedlings are about 3-4 inches tall and have a few sets of true leaves, you must thin them. Choose the strongest-looking seedlings and use small scissors to snip the weaker ones at the soil line (this avoids disturbing the roots of the ones you keep). Your goal is a final spacing of 18-24 inches (45-60 cm) between each plant. This spacing is not just for growth; it’s also vital for ensuring good air circulation and light penetration, which is a key strategy in preventing fungal diseases.
- Applying Mulch: After thinning, apply a 2-3 inch layer of organic mulch (like straw, shredded leaves, or wood chips) around the base of your plants, being careful not to bury the stems. This is one of the best things you can do for your garden. Mulch suppresses weeds, retains precious soil moisture, and keeps the soil cool as temperatures rise.
- Pro-Tip for Containers: For kale grown in pots, in addition to organic mulch, I love using a decorative top layer of small white pebbles or gravel. It serves the same purpose of conserving moisture, but it also keeps the soil from splashing up during watering and adds a beautiful, clean look to your balcony or patio garden.
For detailed information on the best watering and feeding schedules throughout the growing season, be sure to check out the Expert Guide to a Healthy Harvest section below.
Step 5: Harvesting for Peak Flavor and Maximum Yield
This is the moment all your hard work pays off. Kale is wonderfully generous, and with the right technique, a single plant can provide a continuous harvest for up to six months.
When to Start Harvesting
Timing is everything for getting the best texture and taste.
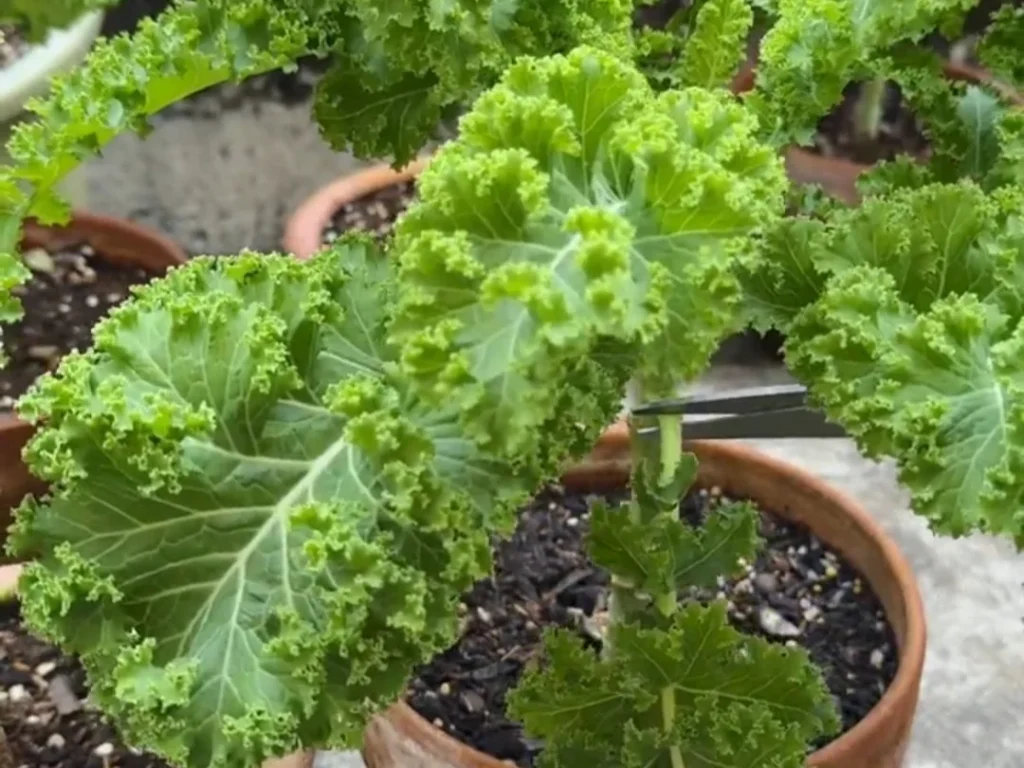
- For Tender Baby Leaves: You can begin harvesting as early as 30-40 days after sowing. The “golden window” for the most tender baby leaves is when the plant has 6-8 leaves total, with the target leaves being 4-6 inches (10-15 cm) long. At this stage, they have the lowest fiber content and are perfect for fresh salads.
- For Mature Leaves: Once leaves are larger than 8 inches (20 cm), they are ideal for cooking. Harvest them before they become old and overly tough.
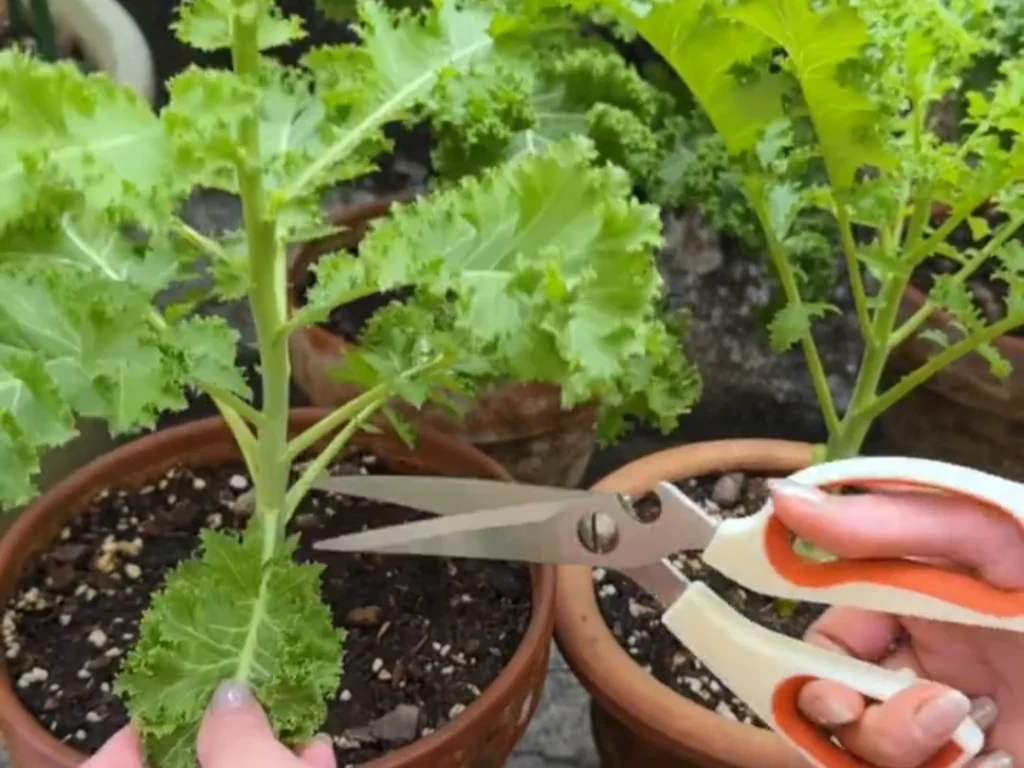
The “Cut-and-Come-Again” Method: A Detailed Guide
This is the best method for a long, sustained harvest.
- The Technique: Instead of cutting the whole plant, harvest the oldest, outermost leaves from the bottom of the stalk first. You can use pruning snips or simply snap them off cleanly with a downward push.
- The Golden Rule: Always leave the central bud (the very top center) and at least 4-5 of the youngest, top-most leaves untouched. This is the plant’s “engine” and leaving it intact signals the plant to keep producing more leaves.
Pro-Tip: Feed After You Harvest
This is the secret to creating a truly productive, long-lasting kale plant. Harvesting uses energy, so you need to replenish the supply.
After each significant harvest, give your plant a light feeding with a balanced liquid fertilizer. This simple step creates a virtuous cycle of growth and can boost the speed of new leaf development by up to 40%.
A Note on Older Leaves
If some leaves get a bit too large before you get to them, don’t worry! They are still perfect for soups and stews.
A helpful kitchen trick is to blanch them in boiling water for a minute before adding them to your dish. This softens their texture and can reduce their oxalic acid content by over 60%, improving their flavor.
Step 6: Post-Harvest Handling & Storage
To keep your kale fresh and preserve the nutrients you’ve worked so hard to grow, proper storage is key.
Short-Term Storage (Up to 1 Week)
For the best results, do not wash your kale until you are ready to use it. Moisture is the enemy of fresh greens in the fridge.
- Gently pat the leaves dry if there is any surface moisture.
- Wrap the bundle of unwashed leaves loosely in a paper towel to absorb any excess humidity.
- Place the wrapped bundle inside a plastic bag or a crisper container.
- Store it in your refrigerator’s crisper drawer. It should stay perfectly fresh for at least a week.
Long-Term Storage (Up to 1 Year via Freezing)
Kale freezes exceptionally well, locking in its flavor and nutrients for months.
Pro-Tip for Maximum Nutrition: If your goal is to freeze kale for the winter, try to harvest the leaves after they have experienced a light frost or two. Not only does this make them sweeter, but research shows it can also boost their antioxidant content, like anthocyanins in purple varieties, by up to 40%. This ensures you are preserving the kale when it’s at its absolute peak.
How to Freeze Kale:
- Wash and Prep: Thoroughly wash the leaves and remove the tough central stems.
- Blanch: Drop the leaves into a pot of boiling water for 2-3 minutes. This quick cooking step stops the enzymes that would otherwise degrade the kale’s quality in the freezer.
- Shock: Immediately transfer the blanched leaves to a large bowl of ice water. This “shocks” them, stopping the cooking process and preserving their vibrant green color.
- Dry and Pack: Squeeze out as much water as possible from the cooled leaves. You can even use a salad spinner to help. Pack the dried kale into freezer bags, removing as much air as possible before sealing. They will keep beautifully for up to a year.
Expert Guide to a Healthy Harvest: Tips & Troubleshooting
Ongoing Care: Mastering Watering and Feeding
Consistent care is what separates a good harvest from a truly great one. Once your kale is established, mastering its watering and feeding needs is the key to months of productive growth.
Mastering Watering
Consistent moisture is the secret to tender, sweet-tasting leaves.
- The Rule of Thumb: Aim to give your plants about 1 to 1.5 inches of water per week, counting both rain and irrigation.
- The Visual Cue: The best way to know when to water is to simply look at the soil. My rule is “water when the top inch of soil is dry.” For container plants, an even easier visual cue is when the soil surface begins to look pale and dry. When you water, do so deeply to encourage strong root growth.
- The Golden Rule of Watering: Always water at the base of the plant. Avoid spraying the leaves, especially in the evening. Keeping the foliage dry is your single best defense against common fungal diseases like leaf spot.
Mastering Feeding
The Standard Approach: Simple and Effective
For most home gardeners, the simplest method—and the one recommended by university programs like Cornell and Utah State—is highly effective. If you prepared your soil with plenty of rich compost (as we did in Step 2), your kale already has a fantastic start. You only need to give it a boost if you notice growth slowing down. At that point, a “side-dressing” with a nitrogen-rich organic fertilizer is all that’s required to get it back on track.
Advanced Technique: My Two-Stage Strategy for Superior Results
However, if you want to move beyond the basics and truly maximize your plant’s potential for both yield and quality, you can adopt the more precise, proactive strategy that I personally use.
- Stage 1: The Growth Phase (First 4-6 Weeks After Transplanting) During this initial period, the plant’s primary goal is to produce large, healthy leaves.
- What to Use: I recommend a weekly feeding with a balanced, high-nitrogen liquid fertilizer (look for an N-P-K ratio like 20-10-10 or similar).
- Pro-Tip for Colorful Kale: For purple or red varieties, supplementing with a fertilizer rich in phosphorus and potassium during this phase can significantly enhance their vibrant colors.
- Stage 2: The Harvest Phase (Ongoing) Once you begin harvesting regularly, the plant’s needs shift from simply getting bigger to maintaining the quality and texture of its new leaves.
- What to Use: I switch to a fertilizer that is lower in nitrogen but richer in other key nutrients, specifically one containing high potassium, calcium, and magnesium.
- The “Why”: This change is the secret to superior texture. This specific nutrient profile can increase leaf thickness by over 20% and reduce that tough, fibrous feeling by 30%. Apply this every 2-3 weeks, and always remember my tip from Step 5: a light feeding after each major harvest will keep your plant in a productive super-cycle.
Pruning for a Healthier, Bushier Plant
While kale doesn’t require the complex pruning of plants like tomatoes, two simple techniques can dramatically improve its health, shape, and productivity.
“Pinching” for a Fuller Plant
While most basic guides for kale don’t mention pruning, this is an optional but highly effective technique I recommend for getting a more compact, multi-stemmed plant instead of one long, single stalk.
- When to Do It: Perform this one-time action when your young kale plant is about 6 inches (15 cm) tall.
- How to Do It: Using clean fingers or snips, simply pinch or cut off the very top central bud—the cluster of tiny new leaves right in the center. Be sure to leave the larger, well-formed leaves below it untouched (aim to leave at least 3-4).
- The Result: This may feel counterintuitive, but removing the main growth tip stops the plant’s vertical growth. It redirects its energy to the dormant buds at the base of the remaining leaves, causing them to sprout. The result is a much bushier plant with multiple growing stems. In my experience, this can increase the number of productive stems by over 50%.
Ongoing Maintenance: Removing Lower Leaves
This is a simple, regular task that pays big dividends for plant health.
- What to Do: As your kale matures, it’s normal for the lowest, oldest leaves to turn yellow and wither. As soon as you see them, you should remove them.
- How to Do It: Simply snap them off cleanly where they meet the main stalk.
- The “Why”: Removing these dying leaves is crucial for two reasons. First, it improves air circulation around the base of the plant, making it a less inviting environment for fungal diseases and pests. Second, it allows the plant to send all its energy to producing new, vibrant leaves at the top instead of wasting resources on leaves that are already failing.
Companion Planting for a Thriving Patch
One of the most powerful, organic strategies I’ve discovered in my research for protecting kale is also the most beautiful: companion planting. The idea is to create a small, diverse ecosystem around your kale that works to naturally deter pests and attract beneficial insects.
For example, planting intensely fragrant herbs like rosemary, peppermint, or dill nearby can confuse the cabbage moth, making it difficult for her to find your kale to lay her eggs. Flowers like nasturtiums can act as a “trap crop,” luring aphids away from your main harvest.
The science and strategy behind this is a fascinating topic that deserves its own deep dive. To help you design the most effective defensive garden, I’ve compiled a complete list of what to grow (and what to avoid) planting near your kale.
-> Learn More: My Complete Guide to Kale Companion Plants
Natural Pest and Disease Control
In my garden, I think of pest control as a form of stewardship. My approach is always to create a healthy, balanced environment to prevent problems first, and then to use gentle, natural solutions when they do arise.
A strong, healthy kale plant is its own best defense. But when it needs help, here are the most common issues you might face and my favorite natural ways to handle them.
Common Pests and My Natural Solutions
Cabbage Worms (The Green Caterpillars)
These are the larvae of the innocent-looking white Cabbage White butterfly and are the most common pest on kale.
- Prevention is Best: Use Row Covers. The single most effective, chemical-free way to stop cabbage worms is to prevent the butterfly from ever laying its eggs on your leaves. I recommend covering your kale patch with a floating row cover from the day you plant it.
- Handpick in the Morning. If you don’t use a cover, inspect the undersides of your leaves regularly for tiny eggs or the worms themselves, especially in the early morning when they are most active. Simply pick them off and drop them in a jar of soapy water.
- Make a DIY Pepper Spray. If handpicking isn’t enough, I turn to a simple DIY pepper spray that acts as a powerful repellent. Steep a tablespoon of hot cayenne pepper in a quart (about 1 liter) of warm water with a few drops of natural dish soap. Let it cool, strain it through a coffee filter, and spray it on the leaves. The spicy scent makes your kale an undesirable meal.
Aphids (The Tiny Sap-Suckers)
These tiny pests cluster on the undersides of leaves and new growth.
- The Water Jet. Often, a strong blast of water from your hose is enough to dislodge a small aphid population.
- Use Yellow Sticky Traps. Aphids are attracted to the color yellow. Placing a few sticky traps near your kale, especially in a container garden, is a great way to monitor and reduce their numbers.
- My Toothpaste Water Trick. This is a very effective and gentle spray I use. Dissolve a small amount of simple, non-gel toothpaste (about a 1:50 ratio of paste to water) in a spray bottle. The minty oils and mild abrasives in the paste disrupt the aphids, and I’ve found it causes most of them to fall off within 24 hours.
- Call in the Professionals. For a truly sustainable solution in a larger garden, you can purchase and release beneficial insects like ladybug larvae, which are voracious aphid predators.
Common Diseases and Prevention
When it comes to diseases like Downy Mildew or Powdery Mildew (which show up as white, gray, or fuzzy spots on leaves), an ounce of prevention is truly worth a pound of cure. It is much easier to prevent these fungal issues than to treat them.
Here are my golden rules of disease prevention:
- Ensure Good Air Circulation. As I mentioned in Step 4, proper spacing is your best friend. Good airflow allows leaves to dry quickly, making it hard for fungal spores to germinate. For balcony gardens, a small fan can even be used to improve circulation on very humid days.
- Water the Soil, Not the Plant. This is the most important rule. Always apply water directly to the soil at the base of the plant. Wet leaves, especially overnight, are an open invitation for disease.
- Remove Infected Leaves Immediately. At the first sign of a suspicious spot, snip off the entire leaf with clean pruners. Do not place it in your compost pile; dispose of it in the trash to prevent the spores from spreading.
A Final Note on Pests & Diseases: Remember that pest and disease pressures can vary greatly by region. If you encounter a problem you can’t identify, or if the organic methods above are not effective, your best resource is your local University Extension Service. They often provide free, region-specific advice and diagnostics for home gardeners.
Solving Common Problems with Kale
Even with the best care, you might run into a few issues. Don’t worry—most common kale problems are easy to diagnose and fix. Here are some of the questions I get asked the most.
Problem: “My kale leaves are tough, fibrous, and taste bitter.”
- Likely Causes: This is almost always a sign of stress. The two most common culprits are heat (consistent temperatures above 86°F / 30°C) or inconsistent watering, which forces the plant to develop tough fibers.
- Solutions:
- During heatwaves, use a shade cloth to provide some afternoon relief.
- Ensure the soil stays consistently moist with deep, regular watering. A thick layer of mulch is a huge help here.
- Harvest leaves when they are younger and smaller, as they are naturally more tender.
Problem: “My beautiful purple kale is turning green.”
- Likely Cause: The vibrant red and purple pigments (anthocyanins) in colorful kale varieties are produced as a direct response to sunlight. If your plant is not getting enough direct sun, it will default to producing more green chlorophyll instead.
- Solutions:
- Make sure your kale is getting at least 6 hours of direct, unfiltered sunlight per day.
- If it’s in a pot, move it to the sunniest spot on your patio or balcony.
- Check for and trim any overhanging leaves from nearby plants that might be casting a shadow on it.
Problem: “My plant is tall and spindly (leggy), with yellowing lower leaves.”
- Likely Causes: This classic combination usually points to one of two things: insufficient light, which causes the plant to literally stretch towards the sun, or too much nitrogen fertilizer, which promotes fast, weak foliage growth at the expense of a sturdy stem.
- Solutions:
- First, assess the light situation. If it’s not getting 6+ hours of sun, move it.
- If light is sufficient, adjust your feeding. Cut back on high-nitrogen fertilizers and switch to a more balanced formula. This encourages stronger, more compact growth.
- Remember, it’s normal for the single oldest leaf at the very bottom to yellow and die off occasionally. This problem is about a general pattern of weak, stretchy growth.
Problem: “My plant is wilting even though the soil is wet, and the stem base looks dark.”
- Likely Cause: This is almost certainly root rot, caused by overwatering, poorly draining soil, or a pot with no drainage holes. The roots are suffocating and have started to decay.
- Solutions:
- Unfortunately, severe root rot is often irreversible. The best solution is prevention.
- To Prevent It: Always use pots with ample drainage holes. Use the well-aerated soil mix from Step 2, and add a drainage layer to the bottom of your pots. Always check that the top inch of soil is dry before watering again. For in-ground gardens, amending heavy clay is the most important task you can do.
Frequently Asked Questions (FAQ)
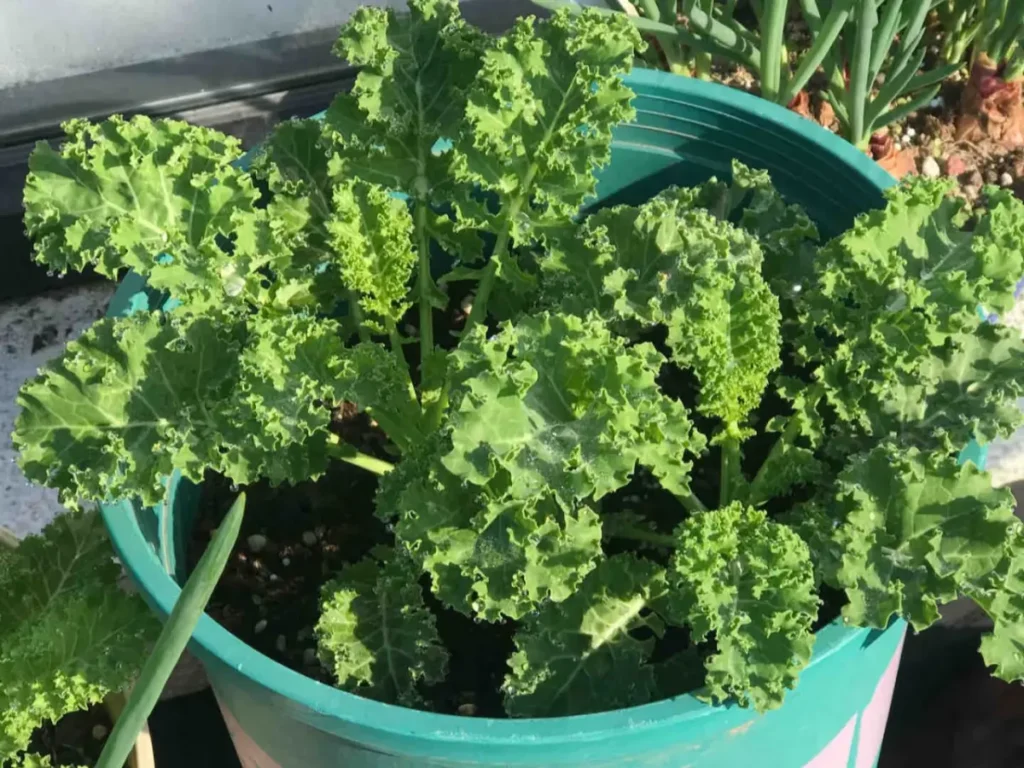
Yes, absolutely. Kale thrives in containers. If you live in an apartment, growing kale on a balcony is a fantastic option. For best results, choose a pot that is at least 5 gallons in volume (about 12 inches / 30 cm in diameter) to give the roots enough space. Be sure it has excellent drainage holes and remember that container plants dry out faster, so you’ll need to water more frequently than if it were in the ground.
No, but its main leaf-growing phase is over. You should harvest all the remaining leaves immediately, as the plant will now put all its energy into making flowers and seeds, causing the leaves to decline in quality. The wonderful bonus is that the small yellow flowers are completely edible, with a surprisingly sweet and peppery flavor—they are delicious in salads!
It’s very likely, especially in USDA Zones 6 and warmer. Kale is technically a biennial, meaning it has a two-year lifecycle. If you provide a thick layer of mulch around its base, it can often survive the winter. It will then reward you with a very early flush of new leaves in the spring before it eventually tries to flower.
Those are the tell-tale signs of flea beetles. These tiny, black, jumping insects are a common pest, especially on young seedlings in the spring. While a few holes are just cosmetic, a heavy infestation can harm the plant. The best organic defense is to cover your plants with a floating row cover from the moment you plant them.
Yes, for the best texture, you should. The central stem or rib is much tougher and more fibrous than the leafy part. The easiest way to remove it is to hold the bottom of the stem with one hand and firmly pull your other hand up along the stem, stripping the leafy parts away. The stems are edible, but they need to be chopped finely and cooked much longer than the leaves.