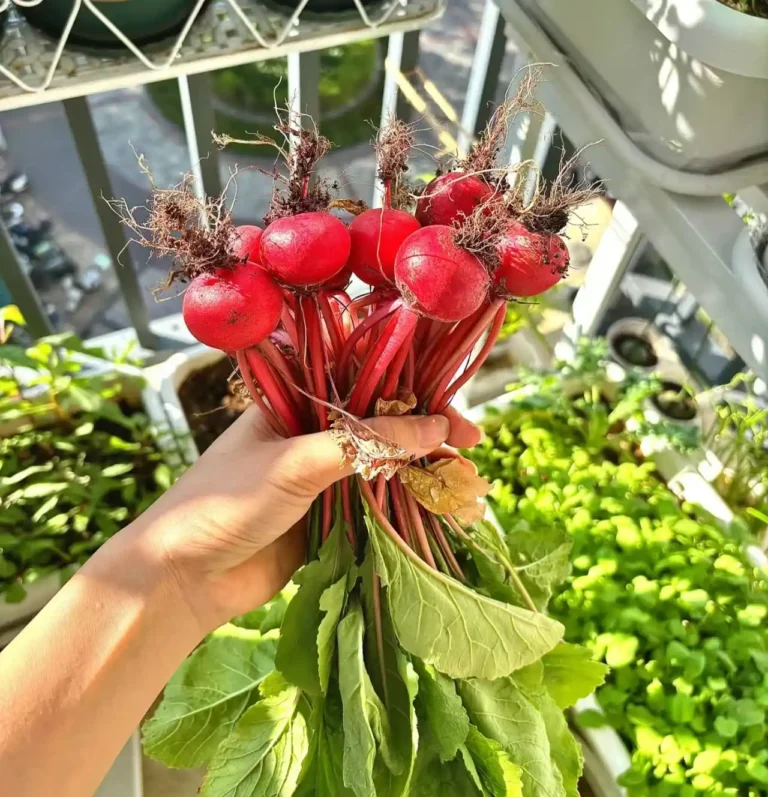
There is absolutely nothing that compares to the taste of a sun-warmed tomato picked fresh from your own garden.
That intense, sweet, and complex flavor is a reward that no grocery store can ever replicate.
I’ll never forget the pure joy of tasting my very first homegrown tomato—in that moment, all the effort became infinitely worthwhile.
I know that for a beginner, growing tomatoes can seem like a major undertaking, especially if you’re working with a small balcony or your very first garden bed. With so many varieties and so much advice on pruning and feeding, it’s easy to feel overwhelmed.
But I want to assure you, it’s not as complicated as it seems.
This guide is your complete, step-by-step roadmap. I will walk you through everything, from seed to harvest, in the clearest and most encouraging way possible.
I promise that by following it, you will have all the knowledge and confidence you need to succeed.
Growing tomatoes is one of my favorite gardening projects, which is why I was so excited to add it to my complete library of Vegetable Growing Guides to help you on this delicious journey.
Core Summary (TL;DR)
In a hurry? Here are the most critical takeaways for a successful tomato harvest:
- Timing is Everything: Plant your tomato seedlings outdoors 1-2 weeks after your area’s average last frost date. Tomatoes have zero tolerance for frost.
- Sun, Sun, and More Sun: Tomatoes are sun worshippers. Ensure your chosen spot receives a minimum of 8 hours of direct sunlight per day for the best flavor and yield.
- Support is Mandatory: The vast majority of tomato varieties require support from a cage, stake, or trellis to keep the plant upright, promote air circulation, and keep fruit off the ground.
- Water Consistently: Keep the soil consistently moist but not waterlogged. Inconsistent watering is the primary cause of problems like fruit cracking and blossom-end rot.
Quick Facts Table for Growing Tomatoes
| Attribute | Requirement |
| Sunlight | Full Sun (8+ hours/day) |
| Soil Type | Well-drained, rich in organic matter |
| Soil pH | 6.0 – 6.8 (can tolerate down to 5.5) |
| Optimal Temperature (Air) | 70-85°F (21-29°C) |
| Spacing | 12-36 inches (30-90 cm); see Step 4 for specific details |
| Days to Germination | 6-12 days |
| Days to Harvest | 50-90+ days from transplanting |
| Hardiness Zones | USDA Zones 3-11 (grown as an annual) |
When to Plant Tomatoes
Timing is the single most critical factor in tomato growing. Because tomatoes are true warm-season crops with zero frost tolerance, yet highly sensitive to extreme mid-summer heat (which sterilizes pollen), your planting window depends entirely on your climate zone.
The Basic Rule of Thumb
- For Cool Climates (Zones 4-6): Your season begins in spring. The general rule is to plant 1 to 2 weeks after your last expected frost date, but only once the soil has warmed to at least 60°F (15°C) and nighttime temperatures are reliably staying above 45°F (7°C).
- For Hot Climates (Zones 7-9): You are in a race against the extreme summer sun. You have a wider spring window—typically planting 1 to 8 weeks after the last frost to ensure plants mature before the 85°F (29°C) heat wall arrives—plus a critical second planting window in mid-summer (12-14 weeks before the first fall frost) for an autumn harvest.
Need Exact Dates? I have calculated the precise Spring and Fall planting windows for every USDA Zone (4-9), including specific “Safe” and “Aggressive” dates to match your risk tolerance.
Find your specific calendar here: When to Plant tomatoes: Exact Calendar for Zones 4-9
How to Plant, Grow, and Harvest Tomatoes: A Step-by-Step Guide
This is my chronological guide to take you from A to Z. I’ll start with the most important decision you’ll make.
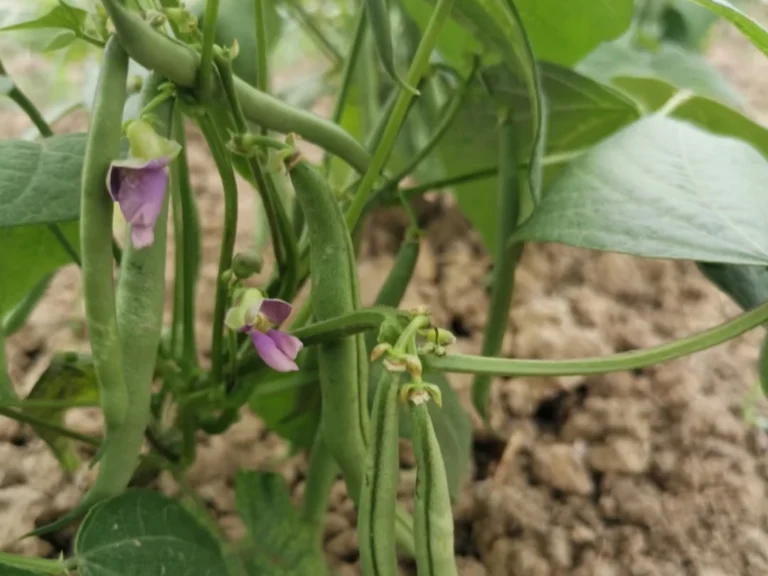
Step 1: Choose the Right Tomato Variety for YOU
Choosing the right variety is half the battle. The world of tomatoes is vast, but understanding a few key categories will empower you to pick the perfect one for your goals and garden space.
Tomato Growth Habits: The Three Types Explained
This is the most critical distinction in the tomato world. Understanding these three growth habits will help you choose the perfect plant for your garden.
- Determinate (Bush) Tomatoes: These plants grow to a fixed, compact size (usually 3-4 feet), produce their fruit in one large flush, and then are mostly done for the season. This makes them ideal for container gardening and for gardeners who want a large harvest all at once for canning or making sauce.
- Indeterminate (Vining) Tomatoes: These are the classic vining types that grow and produce fruit continuously all season long until the first frost. They can become very large (6-10 feet or more) and require substantial staking or caging. They are perfect for gardeners who want a steady supply of fresh tomatoes all summer.
- Semi-Determinate Tomatoes: As a great middle-ground, these plants are more compact than indeterminate types but will continue to produce fruit all season long. They offer the long harvest window of a vining type but in a more manageable size, making them an excellent and often overlooked choice.
🍅 Deep Dive: The Science of Tomato DNA & Pruning Knowing the definitions is just the start. Choosing the wrong growth habit for your space—or applying the wrong pruning technique—can result in stunted plants or a complete loss of yield. Before you buy your seeds, master the 2 golden pruning rules and the university-backed science behind them in my complete breakdown: Determinate vs. Indeterminate Tomatoes: Which Should You Choose
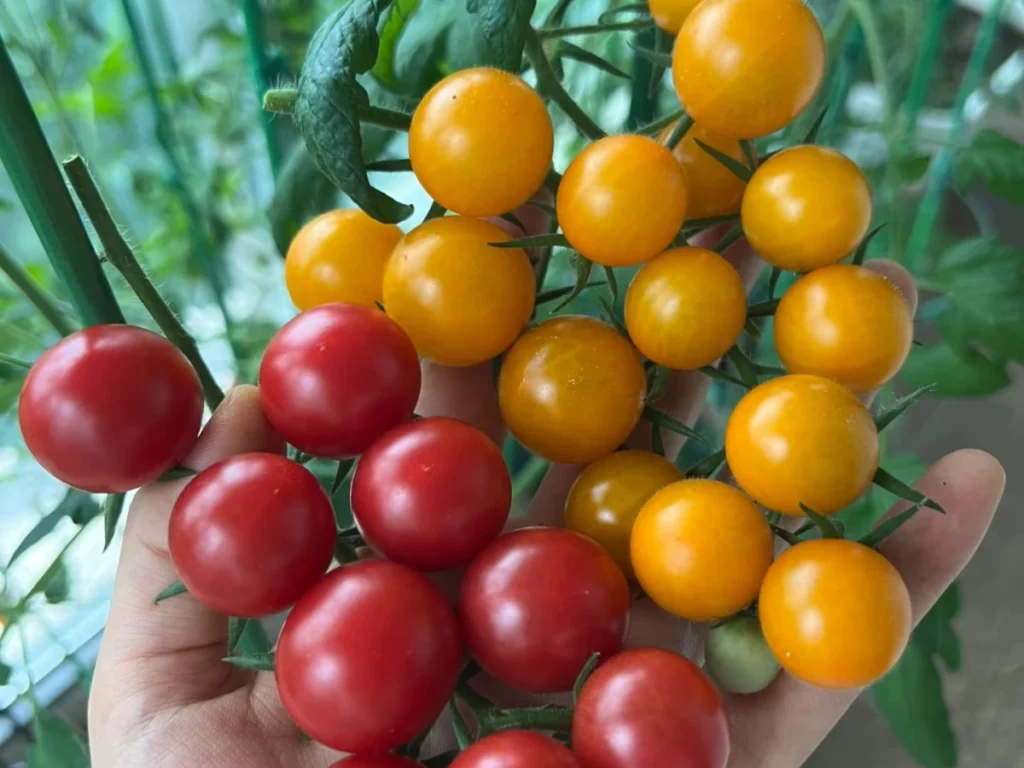
Best Varieties for Beginners & Containers (Like Cherry Tomatoes!)
If you are a first-time grower or have limited space, I wholeheartedly recommend you start with cherry tomatoes. They are vigorous, disease-resistant, and prolific, which makes them incredibly rewarding.
While classic indeterminate varieties like ‘Sungold’ and ‘Sweet 100’ are fantastic producers, for true container gardening on a patio or balcony, I suggest looking for specific ‘dwarf’ or ‘patio’ varieties.
Cultivars like ‘Red Robin,’ ‘Tiny Tim,’ and ‘Black Cherry’ are bred to stay compact while being incredibly productive in pots.
And here’s a pro-tip from my own experience: if your balcony doesn’t get a full 8 hours of sun, also look for varieties known to be more shade-tolerant; they will be far more forgiving in less-than-ideal lighting.
Best Varieties for Slicing and Sandwiches (Beefsteak & Slicers)
For that perfect burger topping or tomato sandwich, you need a Beefsteak or a large Slicer tomato. These varieties produce massive, juicy, and meaty fruit.
They are almost always indeterminate and require a long growing season and very sturdy support. Heirlooms like ‘Brandywine’ and hybrids like ‘Big Boy’ are legendary for a reason.
Best Varieties for Sauces and Canning (Paste Tomatoes)
If you dream of making your own rich tomato sauce, Paste tomatoes are your best friends. These tomatoes, like the famous ‘Roma’ and ‘San Marzano’ varieties, have a lower water content, meatier flesh, and fewer seeds. This means they cook down into a thick sauce much more quickly.
Most paste varieties are determinate, which is perfect for a large, one-time harvest.
Step 2: Prepare the Perfect Soil and Location
This step is foundational to your success, whether you’re planting in a large garden bed or a single pot on your balcony.
First, I want to discuss the universal requirement: Sunlight. I can’t say it enough: a minimum of 8 hours of direct sun. This is non-negotiable for sweet, flavorful tomatoes.
Now, I’ll explain how to prepare the soil based on where you’re planting.
For In-Ground Garden Beds
Tomatoes thrive in rich, well-draining soil. Before planting, amend your beds by digging down about 1 foot (30 cm) and mixing in generous amounts of compost.
While loamy soil provides a great balance, it’s helpful to know that heavier clay soils often produce the highest yields, whereas lighter, sandy soils warm up faster in the spring and can produce an earlier harvest.
The ideal soil pH is between 6.0 and 6.8, though tomatoes are adaptable and can tolerate soil as acidic as 5.5.”
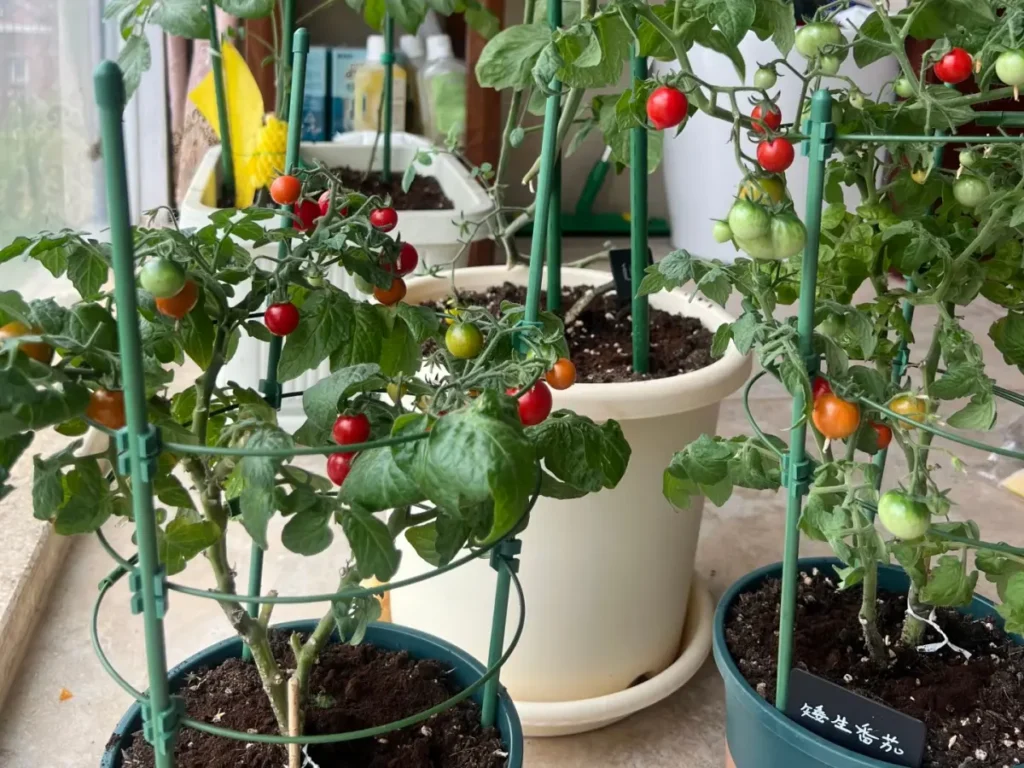
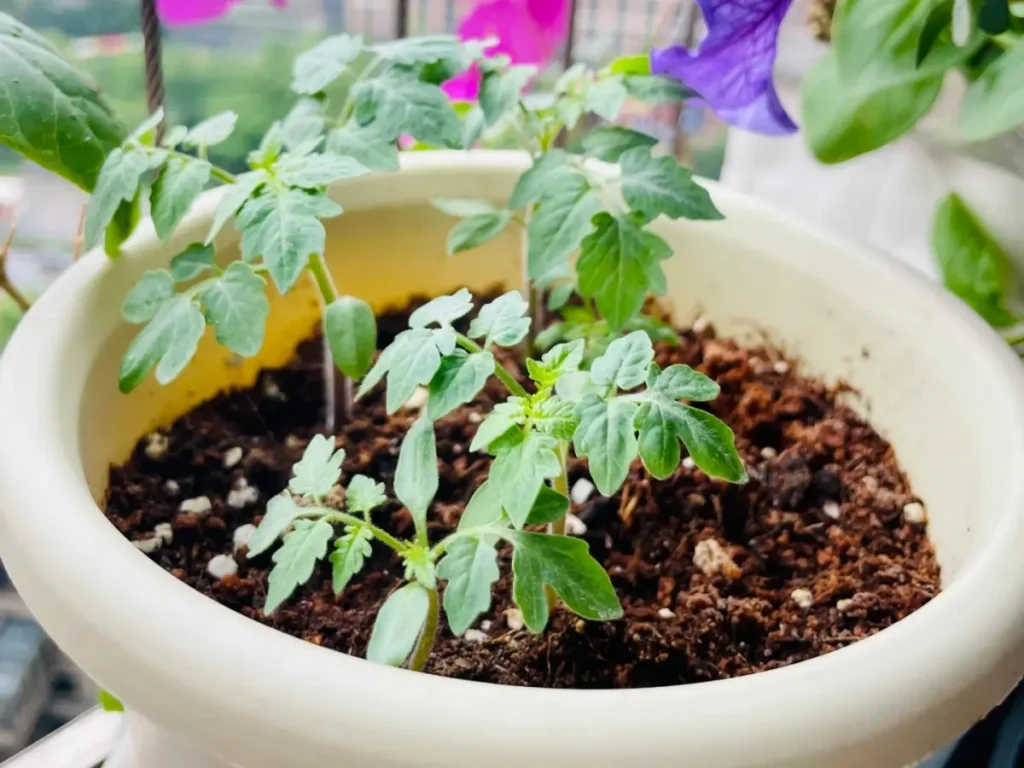
For Containers and Pots
Container gardening requires a different approach, as garden soil is too dense and won’t drain properly in a pot.
- Choose the Right Mix: Your best bet is to use a high-quality potting mix specifically formulated for vegetables or containers. These mixes are designed to be light, airy, and retain moisture without becoming waterlogged.
- My DIY Recipe: If you prefer to mix your own, a simple and effective recipe I use is two parts peat moss (or coco coir) to one part vermiculite. Then, I amend this base with about 5-10% of good quality compost or worm castings to provide a slow release of nutrients.
- Expert Tip—Skip the Gravel Layer: Here’s a crucial tip that goes against a lot of old advice: do not add a layer of gravel or pottery shards to the bottom of your pot. It may seem like this improves drainage, but it actually creates a “perched water table” that forces water to pool in the soil just above the gravel layer, which can lead to root rot. It also needlessly takes up valuable space that your tomato’s extensive root system could be using. A quality potting mix and a pot with adequate drainage holes are all you need.
Step 3: Sowing Seeds (or Planting Starts)
You have two main paths to getting a tomato plant in your garden.
While direct sowing in the garden is possible in some regions with very long, warm growing seasons, the vast majority of successful tomato cultivation relies on transplanting young plants. This gives them a crucial head start.
You can either buy these young plants (a “start”) from a nursery, or grow your own from seed. I’ll walk you through both.
Option A: Planting Nursery Starts
This is the most straightforward path for beginners. When choosing, look for sturdy, short, dark green plants.
A great rule of thumb from the University of Minnesota is to choose a plant with a stem that is at least the diameter of a pencil.
Avoid tall, spindly plants or any that already have flowers or fruit on them. Plan to plant it outdoors after all danger of frost has passed, after “hardening it off” for a week (see FAQ).
Option B: Starting From Seed
Growing from seed is incredibly rewarding and gives you access to a much wider world of tomato varieties. It’s a process that requires a little patience and attention to detail, but my method will give you a huge advantage.
- Timing: Sow seeds indoors 6 to 8 weeks before transplanting outside.
- Step B1: The Pro-Germination Trick (Sprouting). From my own years of experience, I can tell you that pre-sprouting your seeds makes a world of difference. It dramatically increases success rates and speeds up the process.
- First, soak your tomato seeds in a cup of warm (not hot) water for a few hours. This softens the seed coat.
- Next, place the soaked seeds on a damp paper towel. Fold the towel over to cover them, place it inside a ziplock bag or a small container, and seal it to retain moisture.
- Place the bag in a consistently warm spot. According to horticultural research from Cornell University, the best temperature range for tomato seed germination is between 75-90°F (24-32°C). From my own testing, I’ve found the absolute sweet spot for the fastest, most uniform sprouting is right in the 82-86°F (28-30°C) range. A seedling heat mat is the perfect tool for this, but the top of a refrigerator or a warm electronics cabinet can also work. Check daily. In 2-4 days, you should see tiny white roots emerge.
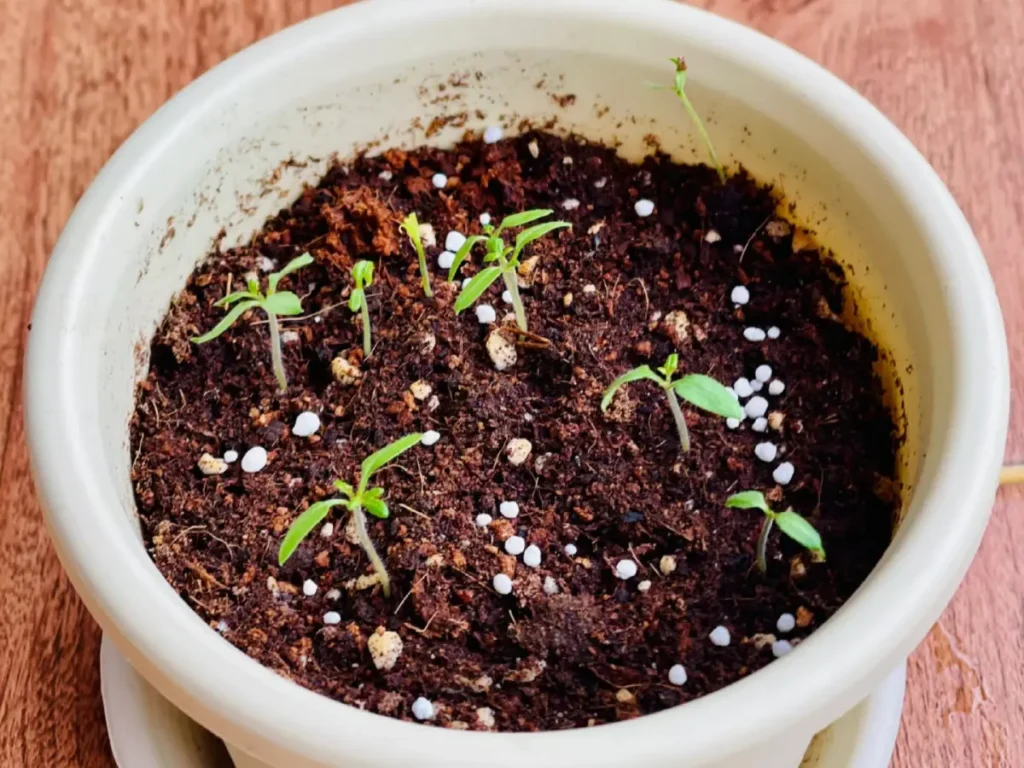
- Step B2: Sowing. Once the seeds have sprouted, they are ready for soil. Fill your small pots or seedling trays with a damp, high-quality seed-starting mix. Gently place one sprouted seed in each cell, root-tip down if possible. Cover them with a precise layer of soil, about 1/8 inch (0.3 cm) deep. Tomato seeds are small and planting too deep is a common mistake.
- Step B3: Post-Sowing Care. Place the trays back on the heat mat and cover them with a humidity dome or plastic wrap to keep the moisture in. As soon as the green shoots emerge from the soil, remove the cover and place them under a strong light source (like a grow light) for 14-16 hours a day. This immediate, strong light is crucial to prevent them from becoming tall and spindly (“leggy”).
The Deep-Planting Trick (For All Tomatoes)
Whether you grew your own seedling or bought one, this is the single most important planting technique for tomatoes.
When you are ready to move your seedling to its final pot or garden bed, plant the seedling deep enough so that the final soil level is just below the lowest set of leaves. I sometimes even dig a small trench and lay the seedling down sideways, gently curving the top up.
Why? The tiny hairs on a tomato’s stem will magically transform into new roots (called adventitious roots). By burying the stem, you are creating a much larger, stronger, and more robust root system for your plant, which will pay dividends all season long.
Step 4: Thinning Seedlings and Providing Support
Once your young plants are established, this transitional step ensures they have the space and structure needed for vigorous growth. It involves two distinct but equally important actions.
Thinning Your Seedlings for Stronger Growth
If you sowed seeds directly in your garden or have multiple seedlings in one pot, you must thin them.
Once your seedlings have developed two or three sets of true leaves, choose the strongest-looking seedling and snip the others at the soil line. This vital step ensures each plant has adequate space. Proper spacing is critical for air circulation and disease prevention.
The correct distance depends entirely on the tomato type:
- Determinate (Bush) types: Space plants 12 to 24 inches apart.
- Indeterminate (Vining) types with stakes or trellises: Space plants 14 to 20 inches apart.
- Indeterminate (Vining) types without stakes (in cages or sprawling): Space plants 24 to 36 inches apart.
Providing Essential Support
Next, and just as important, is providing support. You must set up your support system either at the time of transplanting or very shortly after to avoid damaging the plant’s expanding root system later.
As a rule of thumb, it’s best to have your supports in place by the time the plant is about 8-12 inches (20-30 cm) tall.
- Tomato Cages: This is the easiest method. Simply place the cage over the young plant, pressing the legs firmly into the soil. The plant will grow up through the cage, using the rings for support. For a sturdy homemade cage, you can bend a 6-foot long piece of concrete reinforcing wire mesh into a cylinder about 22 inches in diameter.
- Stakes: This classic method works well for vining tomatoes. Drive a sturdy stake (at least 6 feet tall for indeterminate types, and about 1.5 inches square for sturdiness) a few inches away from the plant’s stem. As the plant grows, you will loosely tie the main stem to the stake with soft twine or fabric strips. Here’s a great tip I’ve learned: water your plant thoroughly an hour or so before you insert a stake. This softens the soil and minimizes any stress or damage to the roots.
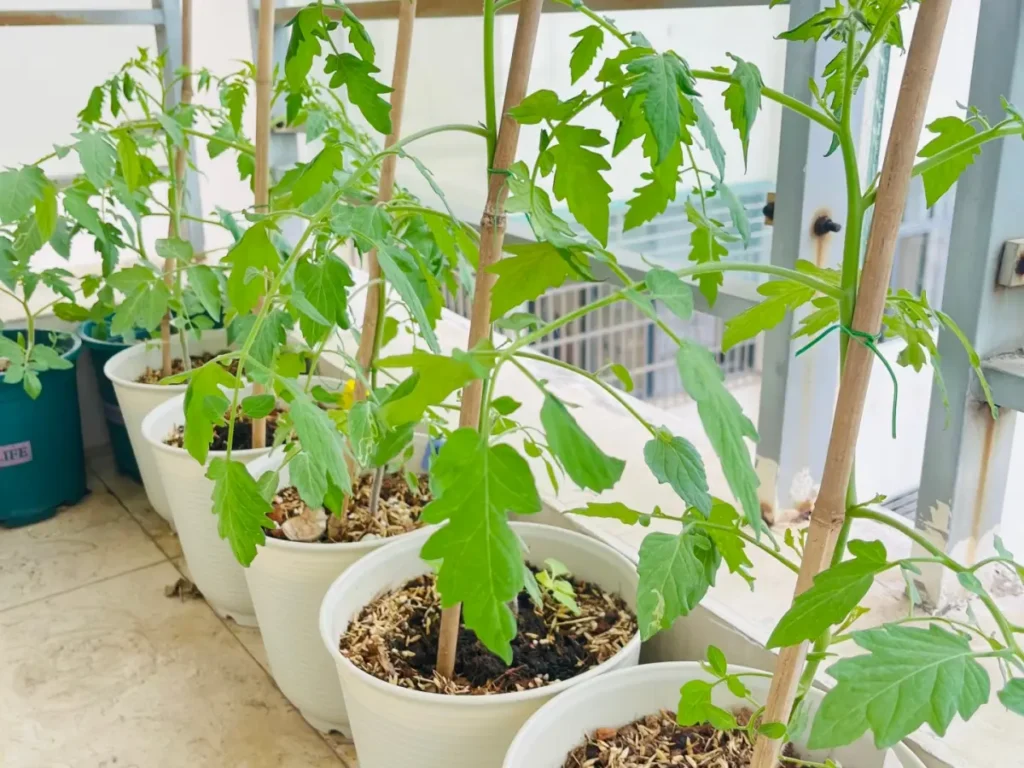
- Trellises: If you’re growing several plants in a row, a trellis system is an efficient way to support them.
Step 5: Harvesting for Peak Flavor
This is the moment all your hard work has been leading up to. Harvesting a tomato at its absolute peak of ripeness is the key to unlocking that incredible homegrown flavor.
It involves more than just waiting for it to turn red; it’s about observing and even managing the plant for the best results.
A Pre-Harvest Tip for Sweeter Fruit
Here is an expert technique I use to improve the final flavor of my tomatoes.
As a cluster of tomatoes begins to ripen, transitioning from green to its final color, I strategically prune one or two of the large fan leaves that are directly shading that fruit cluster.
Be careful not to overdo it—the plant still needs plenty of leaves for energy production. Just removing the most obstructive leaves allows direct sunlight to reach the ripening fruit. This sun exposure helps the tomatoes develop a higher sugar content (brix), a richer flavor, and a deeper, more uniform color.
Knowing When and How to Pick
Your senses are your best guide to a perfect harvest. Look for these four signs:
- Color: The tomato should be fully and deeply colored for its variety (whether that’s red, yellow, orange, or purple).
- Feel: It should feel heavy for its size and be firm but with a slight, gentle give when you squeeze it. It should not be rock-hard or mushy.
- Sheen: The skin will often lose its dullness and take on a healthy, waxy sheen.
- Aroma: Lean in close to where the stem meets the fruit. A truly ripe tomato will have that unmistakable, rich, earthy tomato scent.
When it’s ready, don’t just pull the fruit, as this can damage the vine. The best method is to gently hold the stem with one hand and, with the other, lift the tomato up and give it a slight twist. It should pop right off at its natural joint. Alternatively, a clean pair of pruners works perfectly.
For indeterminate (vining) varieties, harvesting promptly is crucial. Picking a ripe tomato sends a hormonal signal back to the plant, encouraging it to produce more flowers and ripen the next wave of fruit. Consistent harvesting doesn’t just give you a steady supply—it leads to a much bigger yield over the entire season!
Step 6: Post-Harvest Handling & Storage
Your journey with your tomatoes doesn’t end at the harvest—it continues in the kitchen! Proper handling after picking ensures you enjoy every bit of that flavor you worked so hard to cultivate.
The Golden Rule: Counter, Not Cooler
This is the most important piece of advice I can give you: never, ever put your fresh, ripe tomatoes in the refrigerator.
The cold temperature is a thief of flavor; it breaks down the delicate acids and aromatic compounds that give homegrown tomatoes their magic, resulting in a mealy, tasteless fruit. Furthermore, as I’ve learned from experience, the high humidity in a fridge can promote moisture on the skin, accelerating the rotting process.
For the best flavor and a good shelf life of several days, simply place your ripe tomatoes on the counter, out of direct sunlight, in a cool and well-ventilated spot. For slightly longer storage at room temperature, I find that removing the small green stem can sometimes help prevent moisture from collecting and causing mold.
How to Ripen Green Tomatoes Indoors
It’s a common dilemma: the season is ending, a frost is coming, and your plants are still loaded with green tomatoes. Don’t let them go to waste! You can ripen them beautifully indoors.
- First, The Maturity Test: Not every green tomato will ripen off the vine. Here’s a test I use to see if they’re mature enough: sacrifice one medium-sized green tomato and slice it in half. If the gel surrounding the seeds is developed and the seeds move out of the way of your knife, then tomatoes of that size and larger will ripen. If the seeds are tiny and you slice right through them, they are too immature and will likely rot before they ripen.
- The Ripening Method: The best way to ripen them is to harness the power of ethylene, a natural ripening gas. Place your mature green tomatoes in a cardboard box or a paper bag, and for best results, add a ripe banana or an apple to the container. Close it up (but don’t seal it airtight) and keep it at room temperature. Check every day or two and remove the tomatoes as they ripen.
- A Note on Flavor: Be aware that indoor-ripened tomatoes will have a wonderful flavor, but they will taste more like a high-quality grocery store tomato than a sun-ripened one from the vine.
Long-Term Storage for Your Bounty
When you have more tomatoes than you can eat fresh, it’s time to preserve that taste of summer.
- Freezing: This is my favorite easy method. Simply wash, dry, and remove the stems from your tomatoes, then place them whole into freezer bags. They will last for at least six months. When you need them for a winter soup or sauce, you can pull them out and use them directly from frozen—they are fantastic for cooking and the skins will slip right off after a minute in warm water.
- Canning & Sauces: This is the classic way to preserve a large harvest. The process typically involves blanching the tomatoes to easily remove the skins, then cooking them down into a sauce or diced tomatoes before processing them in sterilized jars.
- Other Ideas: Get creative! Consider roasting them with herbs and freezing them in olive oil, making your own tangy sun-dried (or oven-dried) tomatoes, or even cooking up a batch of sweet and savory tomato jam.
Expert Guide to a Healthy Harvest: Tips & Troubleshooting
Ongoing Care: Mastering Watering, Mulching, and Feeding
Once your tomato plant is established, your focus shifts to the consistent care that ensures a healthy plant and an abundant harvest. These three elements—watering, mulching, and feeding—are the pillars of that success.
Mastering Your Watering Technique
Tomatoes need deep and consistent moisture. Inconsistent watering is the primary cause of problems like blossom-end rot and cracked fruit.
- How to Check If It’s Time to Water: Instead of watering on a rigid schedule, let the soil tell you what it needs. The best way is the finger test: poke your finger about two inches into the soil near the base of the plant. If it feels dry at that depth, it’s time to water. A wooden chopstick works great for this, too.
- The Best Time to Water: Always try to water in the morning on a sunny day. This gives the foliage the entire day to dry out if any water splashes on it, which is one of the most effective ways to prevent the spread of common fungal diseases. Avoid watering in the evening.
- The Expert Signal: For a pro-level observation, look at the very tips of your tomato leaves in the early morning. If you see tiny water droplets—a phenomenon called guttation—it’s a sign the plant is perfectly hydrated and its vascular system is working well.
- Where to Water: Remember to always water the soil at the base of the plant and avoid wetting the leaves.
The Magic of Mulch
Applying a 2-3 inch layer of organic mulch (like straw, shredded leaves, or compost) around your plants is a game-changer.
It conserves soil moisture so you have to water less, suppresses weeds, and keeps the soil cool in hot weather. Crucially, it also creates a barrier that prevents soil-borne pathogens from splashing up onto the plant’s lower leaves during watering.
A Strategic Feeding Schedule
Tomatoes are heavy feeders, but how and when to fertilize them is a topic of much expert debate. Some methods advocate for high-nitrogen fertilizers, but I find that approach can be risky for beginners and often leads to more leaves than fruit.
💡 Deep Dive: The Ultimate Tomato Feeding Guide
To avoid the “all leaves, no fruit” trap and ensure your plants have the exact nutrients they need at every growth stage, you need a precise feeding strategy. Discover the exact N-P-K ratios to look for, my favorite organic options, and the critical difference between vegetative and fruiting stage feeding in my complete breakdown: The Best Fertilizer for Tomatoes: When, How, and What to Feed Them
The conservative, targeted strategy I recommend below is simple, reliable, and ensures balanced growth for a bountiful harvest.
- At Planting Time: The compost and any organic slow-release fertilizer mixed into your soil at planting time should be enough to get the plant started.
- First Feeding (Side-Dressing): Wait to apply extra fertilizer until the first fruits are about one inch in diameter. This is the signal that the plant is now heavily investing in fruit production. Gently work about 1/2 cup of a balanced granular fertilizer (like a 5-10-5 or 10-10-10 formula) into the soil around the base of the plant, being careful not to disturb the roots, and water it in well.
- Second Feeding: Apply a second and final feeding of the same amount when you begin to harvest your first ripe tomatoes. This two-application strategy provides all the nutrients the plant needs without encouraging excessive, unproductive leafy growth.
Pruning and Training Your Plants
Properly pruning and training your tomato plants is one of the most impactful things you can do to promote a healthier plant and a more abundant, higher-quality harvest. The strategy, however, is completely different depending on the type of tomato you are growing.
Pruning and Training Vining Tomatoes (Indeterminate)
For vining types like most cherry and beefsteak tomatoes, pruning is an ongoing weekly task that channels the plant’s energy into producing fruit instead of excess foliage.
- Removing Suckers: This is the most important pruning task. “Suckers” are the small new shoots that grow in the “V” between the main stem and a side branch. If you let them grow, they will turn into large, energy-hogging branches, creating a dense jungle of leaves that reduces air circulation and fruit production. My method is to pinch or snip off any suckers that are smaller than a pencil. This focuses all the plant’s energy into its main stems, leading to bigger and better fruit.
- Pruning Lower Leaves: Once the plant is well-established and has a few sets of fruit developing, I always prune off the lower leaves from the bottom 12 inches (30 cm) of the main stem. This has three huge benefits: it dramatically improves air circulation around the base of the plant, prevents soil-borne diseases from splashing onto the foliage, and sends a signal to the plant to concentrate its energy on ripening the fruit above.
- Topping the Plant (Advanced Tip): This is a pro technique to maximize your final harvest. About 30 days before your average first frost date, I recommend “topping” your indeterminate tomato plant. This simply means snipping off the very top growing tip of each main stem. This action forces the plant to stop growing taller and redirects all of its remaining energy into ripening the fruit that is already on the vine.
A Note on Pruning Bush Tomatoes (Determinate)
For bush types like most paste tomatoes (e.g., ‘Roma’), the rule is simple: do very little to no pruning.
You should not remove the suckers. The reason is that determinate tomatoes produce their fruit on the ends of these very branches; if you prune them off, you are literally cutting away your future harvest.
The only pruning I recommend for these plants is to remove any lower leaves that are physically touching the soil, which helps prevent disease. Other than that, let them grow into their natural bush shape.
Natural Pest and Disease Control
In my garden, the best defense is always a good offense. A healthy, stress-free plant is naturally more resistant to pests and diseases.
The most effective pest control strategy starts with the preventative care I’ve already discussed: choosing resistant varieties, ensuring good air circulation through proper pruning, watering the soil instead of the leaves, using a protective layer of mulch, and practicing crop rotation (avoiding planting tomatoes in the same spot year after year).
When problems do arise, I always reach for a natural, organic solution first.
Dealing with Common Tomato Pests
- Tomato Hornworms: These large green caterpillars are easy to spot. The best control is to simply pick them off by hand. This pest is frequently controlled by natural enemies. If you see a hornworm with small white cocoons on its back, leave it be! It has been parasitized by a beneficial wasp and will soon become a nursery for more of these garden helpers.
- Aphids: These tiny sucking insects often cluster on new growth. A strong blast of water from your hose can often dislodge them. For persistent infestations, use insecticidal soap.
- Whiteflies: The single most effective way to prevent whiteflies is to carefully inspect any new plants before you buy them. Do not purchase a plant if you see any signs of these tiny white insects, especially on the undersides of leaves. If they appear later, treat them as you would aphids.
- Spider Mites: These minuscule pests thrive in hot, dry conditions. You’ll notice their fine webbing and yellow stippling on the leaves. Insecticidal soap is the best treatment—be sure to thoroughly coat the undersides of the leaves.
My Go-To DIY Preventative Sprays
While there are many great organic products available, I often rely on these simple, homemade sprays for my weekly preventative routine. They are gentle on the ecosystem and surprisingly effective.
- My Go-To Garlic Spray: Garlic is a fantastic natural repellent and has broad antifungal and antibacterial properties. To make it, I mince 3-4 cloves of garlic and let them steep in a quart (about 1 liter) of water overnight. The next day, I strain out the garlic pieces, add a single drop of natural dish soap (which helps the spray stick to the leaves), and it’s ready for my spray bottle.
- Simple Vinegar Solution: This is my go-to for preventing fungal issues. The recipe couldn’t be easier: I mix one part standard white vinegar to 100 parts water. This gentle acidic solution helps create an environment where fungal spores, like those that cause powdery mildew, struggle to take hold.
How to Use Them: I apply these preventative sprays every 7-10 days, and always re-apply after a heavy rain. A crucial rule for any spray, homemade or not: always test it on a single leaf 24 hours before you spray the entire plant to ensure there is no adverse reaction.
A Final Note on Pests & Diseases: Remember that pest and disease pressures can vary greatly by region. If you encounter a problem you can’t identify, or if the organic methods above are not effective, your best resource is your local University Extension Service. They often provide free, region-specific advice and diagnostics for home gardeners.
Solving Common Problems with Tomatoes
Even with the best care, you might encounter a few bumps in the road. Here is my guide to diagnosing and fixing some of the most common issues that can pop up, from the seedling stage to the final fruit.
Problem: Leggy, Spindly Seedlings
- Symptom: Your indoor-started seedlings are very tall, pale, and thin, and they flop over easily.
- Cause: This is almost always caused by insufficient light. The seedlings are desperately stretching to find a stronger light source. Excessively warm temperatures can also contribute to this rapid, weak growth.
- Solution: Immediately provide a much stronger light source. If you’re using a grow light, lower it to just a few inches above the tops of the seedlings. If you can provide a gentle breeze with a small fan for an hour a day, this will also help the stems grow stronger.
Problem: Stunted Growth After Transplanting
- Symptom: Your healthy seedlings were planted in the garden a week ago, but they haven’t grown at all and may even look a bit purplish.
- Cause: The most common reason for this “transplant shock” is soil that is too cold. As I mentioned earlier, tomato roots cannot function properly below 60°F (15°C), so the plant is essentially in a holding pattern, unable to absorb nutrients.
- Solution: Patience is the key. As the soil warms, the plant should resume growth. This is a perfect illustration of why waiting for the right soil temperature is one of the most important rules for growing tomatoes.
Problem: Catfacing (Malformed, Puckered Fruit)
- Symptom: The blossom end of the fruit is puckered, scarred, and severely malformed.
- Cause: This is typically caused by incomplete pollination due to cold weather (below 55°F / 13°C) when the plant was setting its first blossoms.
- Solution: The best solution is prevention. Don’t transplant your tomatoes out into the garden too early in the spring. Later fruit on the plant, which forms in warmer weather, is usually unaffected.
Problem: Blossom-End Rot
- Symptom: A dark, sunken, leathery rotten spot appears on the bottom of the fruit.
- Cause: This is a calcium deficiency, but it is almost never caused by a lack of calcium in the soil. It is caused by inconsistent watering, which prevents the plant from properly absorbing the calcium that is already there.
- Solution: Maintain a consistent soil moisture level. Water deeply and regularly, and use a thick layer of mulch to prevent the soil from drying out too quickly between waterings.
Problem: Fruit Cracking
- Symptom: Circular or vertical cracks appear on the skin of ripening tomatoes.
- Cause: This happens when the fruit’s interior grows faster than its skin can stretch, usually after a sudden, heavy downpour or an inconsistent watering schedule (a long dry spell followed by a deep watering).
- Solution: While you can’t control the rain, the best prevention is to maintain consistent soil moisture so the plant is never overly thirsty.
Problem: Blossom Drop
- Symptom: The plant’s yellow flowers dry up and fall off before they can turn into a fruit.
- Cause: This is a sign of plant stress. The most common culprits are temperature extremes (nights below 55°F/13°C or days above 90°F/32°C), insufficient light (less than 6-8 hours of direct sun), or a nutrient imbalance (often, too much nitrogen fertilizer, which encourages leaf growth at the expense of flowers).
- Solution: Ensure your plant is getting enough sun and that temperatures are within the ideal range. If you suspect you’ve been over-fertilizing with nitrogen, flush the soil with a deep watering and switch to a bloom-formula fertilizer that is higher in phosphorus and potassium. If you are unsure which ratios to use, read my comprehensive guide on The Best Fertilizer for Tomatoes: When, How, and What to Feed Them to correct nutrient imbalances and rescue your harvest.
Frequently Asked Questions (FAQ)
For most varieties, a 5-gallon (20-liter) pot is the absolute minimum, but bigger is always better.
Tomatoes have extensive root systems. A larger pot holds more soil, which in turn holds more moisture and nutrients. This creates a more stable environment for your plant, leading to better health and a much larger harvest.
For larger indeterminate varieties, I personally recommend aiming for 10 gallons or more if you have the space.
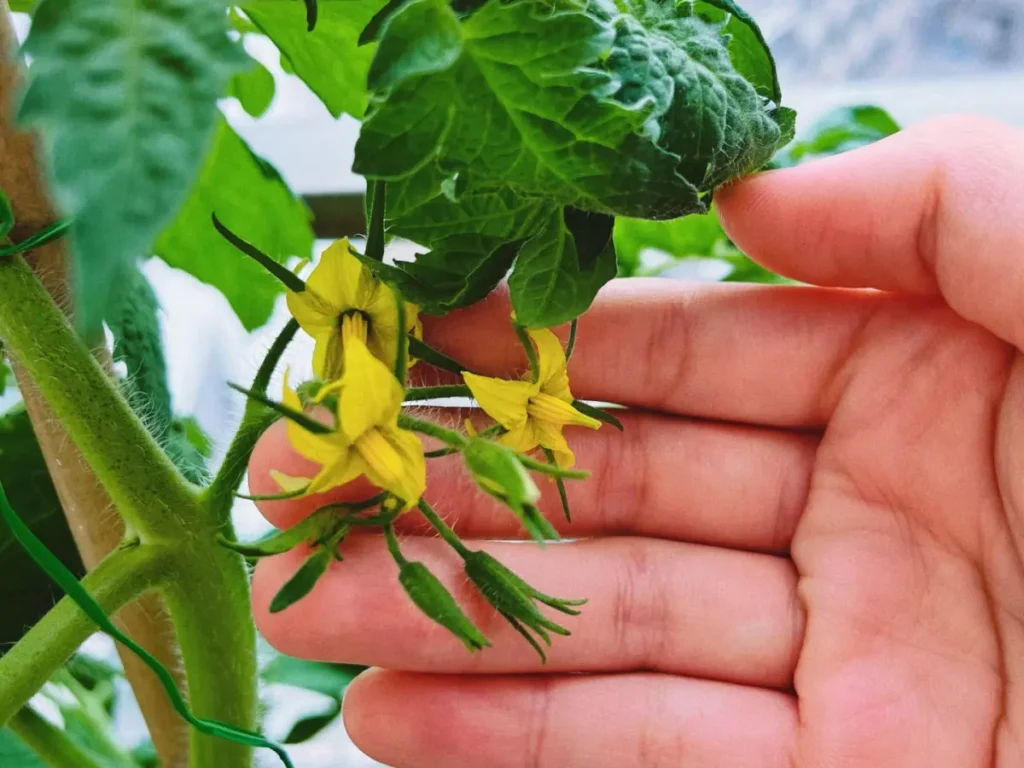
While tomatoes are self-pollinating, actively helping them along is highly recommended, especially in protected areas like balconies with little wind.
In a garden, wind and buzzing bees do the work of shaking pollen loose inside the flower.
On a calm balcony, you may need to step in. Once a day, gently tap or flick the flowering stems, or lightly vibrate the back of the flowers with an electric toothbrush. This simple action can dramatically increase the number of flowers that turn into fruit.
If it’s just the very bottom leaves on a large, otherwise healthy plant, this is usually normal and nothing to worry about.
As a tomato plant matures, it naturally prioritizes sending energy to its new growth and ripening fruit. The oldest leaves at the bottom often get less sunlight and the plant will naturally shed them. This is called senescence. Simply prune these yellow leaves off to improve air circulation.
However, if the yellowing is spreading rapidly up the plant, refer to the “Common Problems” guide above to check for nutrient or disease issues.
The short answer: For 7-10 days, gradually acclimate seedlings to outdoor sun and wind. You can do this by either reducing water and fertilizer or by slowly increasing their time outdoors.
There are two main schools of thought on this. The most common method involves physically moving your seedlings outdoors for increasing amounts of time each day. However, a method supported by Cornell University suggests the best way is to gradually reduce your watering and stop fertilizing about a week before planting out. I prefer this method because it avoids exposing young plants to cold stress, which can sometimes lead to deformed fruit (catfacing) on early blossoms.
Choose a determinate (bush) variety if you want a compact plant for a container or a single large harvest for canning. Choose an indeterminate (vining) variety if you have more space and want a steady supply of tomatoes all season long.
Think about your goals. If your main aim is to make a big batch of sauce, a determinate variety that ripens all at once is perfect. If you dream of walking out to your garden to pick a few fresh tomatoes for your salad every other day all summer, an indeterminate variety is what you need.
Yes, you can, but for the best results, only save seeds from heirloom or “open-pollinated” varieties. Seeds saved from heirloom tomatoes will grow “true to type,” meaning the plant you grow next year will be the same as its parent.
However, many modern tomatoes are “hybrids” (often labeled F1). While these plants are fantastic, their seeds are genetically unstable and will not produce the same quality of fruit in the next generation.
So, if you plan to save seeds, start with heirlooms!