Hello, fellow gardener! I’m Yun, the founder of The Planting Key.
There’s a special kind of satisfaction in the crisp snap of a freshly picked green bean, a sound that promises a delicious, garden-fresh meal.
Bush beans are one of the most rewarding vegetables for a new gardener—they’re productive, relatively fast, and don’t demand a lot of complicated care.
I know that starting a new vegetable can feel like a big undertaking, filled with questions about timing, soil, and care. But I want you to know that you absolutely can do this.
Think of this guide as your complete, friendly roadmap. I’ve poured all my research into creating a clear, step-by-step plan that will walk you through every stage, from choosing the perfect seed to enjoying your first bountiful harvest.
By following along, you’ll have the confidence and knowledge to succeed.
This guide is just one part of my mission to make gardening accessible to everyone. If you’re inspired to try other vegetables, you can explore my complete library of Vegetable Growing Guides for more in-depth tutorials.
Core Summary: Key Takeaways
- Wait for Warmth: Plant seeds directly in the garden only after all danger of frost has passed and the soil has warmed to at least 60°F (15°C).
- Full Sun is Non-Negotiable: Bush beans need at least 6-8 hours of direct sunlight per day to produce a strong crop.
- Go Easy on Nitrogen: Beans are legumes that create their own nitrogen. Amending your soil with compost is great, but avoid high-nitrogen fertilizers, which will give you lots of leaves but very few beans.
- Harvest Often: The more you pick your beans, the more the plant will produce. Harvest every 1-2 days once they start maturing to encourage a continuous crop.
Bush Beans: Quick Facts Table
| Attribute | Details |
| Sunlight | Full Sun (6-8+ hours/day) |
| Soil Type | Rich, well-draining loamy soil |
| Soil pH | 6.0 to 6.8 (Slightly acidic) |
| Planting Method | Direct sow seeds in the garden |
| Seed Spacing | 2-4 inches apart |
| Row Spacing | 18-24 inches apart |
| Planting Depth | 1 inch |
| Days to Germination | 7-14 days |
| Days to Harvest | 50-60 days from planting |
| Support Needed? | No |
When to Plant Bush Beans
The single most important factor for timing your bush bean planting is waiting for warm soil. As a general rule, plant bush bean seeds directly in the garden 1 to 2 weeks after your average last frost date in the spring. They are a warm-season crop and will not tolerate frost. For a second harvest, you can plant a fall crop about 12-14 weeks before your average first frost date in autumn.
Bush Beans Planting Calendar (USDA Zones 4-9)
How to Read This Calendar
The calendar below provides key planting dates for two different gardening styles: Aggressive (to maximize your season) and Safe (to minimize frost risk). You’ll notice the ‘Aggressive’ fall dates start later—this is a deliberate strategy to extend the harvest as late as possible.
Bush Beans-Specific Timing Rules
Spring Planting: These dates are for direct sowing seeds into your garden. They are intentionally set 1 to 2 weeks after the average last frost date to ensure the soil is warm enough for reliable germination and all danger of frost has passed.
Fall Planting: These dates are also for direct sowing seeds. They are calculated to be 12 to 14 weeks before the average first frost date. This window allows the beans to sprout in warm summer soil and gives them enough time to mature for a full harvest before the cold weather arrives.
| USDA Zone | Spring Planting(Aggressive) | Spring Planting(Safe) | Fall Planting(Aggressive) | Fall Planting(Safe) |
| Zone 4 | May 16 – May 23 | May 22 – May 29 | Jun 24 – Jul 8 | Jun 19 – Jul 3 |
| Zone 5 | May 7 – May 14 | May 14 – May 21 | Jul 3 – Jul 17 | Jun 27 – Jul 11 |
| Zone 6 | May 4 – May 11 | May 15 – May 22 | Jul 12 – Jul 26 | Jun 26 – Jul 10 |
| Zone 7 | Apr 13 – Apr 20 | Apr 15 – Apr 22 | Jul 30 – Aug 13 | Jul 19 – Aug 2 |
| Zone 8 | Mar 30 – Apr 6 | Apr 12 – Apr 19 | Aug 3 – Aug 17 | Jul 24 – Aug 7 |
| Zone 9 | Mar 7 – Mar 14 | Mar 25 – Apr 1 | Aug 24 – Sep 7 | Aug 4 – Aug 18 |
✔ Accuracy is my priority. The key planting dates in this calendar are calculated based on representative Aggressive and Safe frost date baselines established for each zone. Because your garden’s microclimate may vary, I strongly recommend that you verify your local frost dates for the most accurate timing. Learn My Methodology & Find a Frost Date Tool Here.
Understanding the Planting Windows
Spring Planting: Seizing the Warm Season
The main goal of spring planting is to get your seeds in the ground as soon as the soil is warm enough for them to germinate quickly and reliably. By planting after the last frost, you give the plants the entire early summer to establish themselves and produce beans before the most intense heat of mid-summer arrives.
Fall Planting: Your Second Harvest Opportunity
A fall crop is one of my favorite gardening secrets! The soil is already very warm from the summer, which means your bean seeds will sprout incredibly fast. The plants will then grow and mature as the air temperatures become milder, which can lead to beans with an excellent, sweet flavor. The key is to plant early enough so you can get a full harvest in before your first fall frost shuts down production.
Pro Tip for Precision Planting: To calculate your final possible planting date, find the “Days to Harvest” on your seed packet, add 14 days for germination, then count backward from your average first frost date. It’s wise to add an extra 1-2 weeks as a safety buffer.
The Danger Zone: Why Summer Heat is the Enemy
While beans love warmth, extreme heat can stress the plants. This can cause them to drop their flowers before they have a chance to turn into beans, a phenomenon called “blossom drop.” This becomes a serious risk when temperatures consistently exceed 86°F (30°C), as the heat interferes with pollination and pod formation. This is why timing your planting to avoid having the plants flower during the hottest part of the year is so important.
Key Factors & Advanced Strategies
The Secret Signal: Ideal Soil and Air Temperatures
More important than any date on a calendar are the actual temperatures in your garden. Paying attention to these signals will tell you exactly when the time is right.
- Ideal Soil Temperature for Germination:60°F (15°C). Planting in soil cooler than this is a gamble; the seeds may rot before they have a chance to sprout.
- Ideal Air Temperatures for Growth: Bush beans are sensitive to air temperature, which affects their growth at different stages.
- Optimal Growth Range: The absolute sweet spot for vigorous leafy growth is 64°F to 72°F (18°C to 22°C).
- Ideal Flowering & Podding Range: To get the most beans, aim for the crucial flowering and pod-setting period to happen when temperatures are between 64°F to 77°F (18°C to 25°C).
- Critical Temperature Thresholds: Be aware that consistent temperatures below 55°F (13°C) will significantly slow growth, while temperatures above 86°F (30°C) will cause blossom drop.
Pro Technique: Succession Planting
Bush beans produce their crop over a relatively concentrated period of 2-3 weeks. To get a continuous supply of fresh beans all summer long, practice succession planting.
- What it is: Instead of planting all your seeds at once, sow a new, smaller batch of seeds every 2 to 3 weeks.
- Why it’s great: Just as your first set of plants begins to slow down, your next batch will be ready to start producing. This simple technique turns a single large harvest into a steady, manageable supply for your kitchen.
Extending Your Season: Getting an Earlier Start and Later Harvest
- For an Earlier Start: You can warm up the soil in your garden bed a week or two early. A great technique used by professional growers is to cover the planting area with black plastic mulch for a couple of weeks before planting; the black plastic absorbs solar radiation and heats the soil beneath it. You can also use a cold frame for the same purpose.
- For a Later Harvest: In hot climates, if your plants are struggling in the late summer heat, you can use a shade cloth to filter the intense afternoon sun. This can reduce stress and help the plants continue producing into the fall.
How to Plant, Grow, and Harvest Bush Beans: A Step-by-Step Guide
Follow these steps chronologically to take your bush beans from seed to table with confidence.
Step 1: Choose the Right Variety
The first step is deciding what kind of bean you want to eat! Bush bean varieties offer a wonderful range of colors and flavors, but the right choice for a successful garden goes beyond just taste. Here’s how to read a seed packet like a pro and select a variety that is set up for success from day one.
- What to do:
- Start with Reliable Varieties: If you’re unsure where to begin, you can’t go wrong with time-tested favorites like ‘Blue Lake 274’ (a classic green bean), ‘Golden Wax’ (a beautiful yellow bean), or ‘Royal Burgundy’ (a striking purple bean that turns green when cooked).
- Look for These Key Traits: Beyond the name, look for these characteristics on the seed packet or in the online description. They are signs of a great, beginner-friendly variety:
- High Disease Resistance: This is arguably the most important trait. Look for varieties labeled as resistant (often marked with codes like “R” or “HR”) to common bean diseases like Mosaic Virus (BVM) or Anthracnose. This single choice can prevent many future problems.
- Compact or Bushy Habit: The description should confirm it’s a “bush” type. This means it will grow into a sturdy, compact plant that doesn’t need a trellis or staking, making it perfect for small gardens and containers.
- Early Maturity: Check the “Days to Harvest” number on the packet. Varieties that mature in 50-55 days are considered “early.” This not only means you’ll get to enjoy your harvest sooner, but it also provides a wider window for succession planting a second crop.
- Why it’s important: Selecting a variety that is naturally resilient, compact, and suited to your garden’s timeline sets the foundation for a successful, low-stress harvest. It’s about working smarter, not harder, right from the very first choice you make.
Step 2: Prepare the Perfect Soil and Location
Beans are not overly fussy, but giving them the right conditions will pay off with a much larger harvest. This step is all about creating the perfect foundation.
- What to do:
- Choose a Sun-Drenched Spot: Find a location in your garden that receives at least 6-8 hours of direct, unfiltered sunlight per day.
- Loosen the Soil: Use a garden fork or tiller to loosen the soil to a depth of about 8-10 inches. This makes it easy for young roots to grow deep.
- Enrich with Compost: Mix in a generous 2-3 inch layer of rich, well-rotted compost or manure. This is the single most important ingredient for happy beans.
- Consider Micronutrients Like a Pro: Just like people need vitamins, plants need micronutrients. A common cause of beans flowering but not producing pods is a lack of Boron. To prevent this from the start, use a high-quality, diverse compost or mix in a balanced, all-purpose organic granular fertilizer that specifically lists micronutrients like Boron (B) on the label.
- Why it’s important: Full sun powers the plant’s growth and bean production. Loose soil allows roots to establish easily. Compost provides the essential slow-release nutrients beans need without being too high in nitrogen (excess nitrogen leads to lots of leaves but few beans). Proactively adding a source of micronutrients sets your plants up for a healthy, productive flowering stage, preventing problems before they even start.
Step 3: Sowing Seeds
Bush beans are best planted directly in the garden where they will grow, as their sensitive roots don’t respond well to being transplanted. Following these steps will give your seeds the best possible start.
- Optional Pre-Sowing Tip: Soak Your Seeds To give your seeds a head start and speed up germination, you can soak them in room-temperature water for 4-8 hours before planting (but no more than 12 hours). This simple step softens the hard seed coat and signals to the seed that it’s time to wake up and grow.
- What to do:
- Plant the Seeds: Plant your bean seeds about 1 inch deep. You have two reliable strategies for spacing:
- Strategy A (Standard): Plant one seed every 3 inches. You will thin them out later to the final desired spacing.
- Strategy B (Insurance Policy): To guarantee you don’t have large empty spots in your row, plant two seeds together every 6 inches. You will later select the stronger of the two seedlings to keep.
- Set Your Rows: Space your rows about 18-24 inches apart from each other. This gives you room to walk between them for weeding and harvesting, and ensures the mature plants have good airflow.
- Water Thoroughly: After planting, water the area thoroughly but gently. This settles the soil around the seeds, ensuring good seed-to-soil contact which is essential for triggering germination.
- Plant the Seeds: Plant your bean seeds about 1 inch deep. You have two reliable strategies for spacing:
- Pro Tip: Boost Growth with an Inoculant For an extra advantage, especially if you’ve never grown beans in that particular patch of soil before, consider treating your seeds with a legume inoculant before planting. This is a powder containing beneficial bacteria (Rhizobia) that form a partnership with the bean roots, helping them capture nitrogen from the air much more effectively. It’s an inexpensive and easy step that many expert gardeners swear by for healthier, more productive plants.
- Why it’s important: Planting at the correct depth ensures the seedling has enough energy to push to the surface. Proper spacing is crucial for air circulation, which is your best defense against fungal diseases. Soaking seeds and watering wisely gives them the perfect conditions to germinate successfully, greatly increasing your success rate.
Step 4: Thinning Seedlings, Feeding, and Applying Mulch
This is a critical step to ensure your plants aren’t competing with each other for resources, giving them a strong start for the growing season. This is the moment they transition from fragile seedlings to established plants.
- What to do:
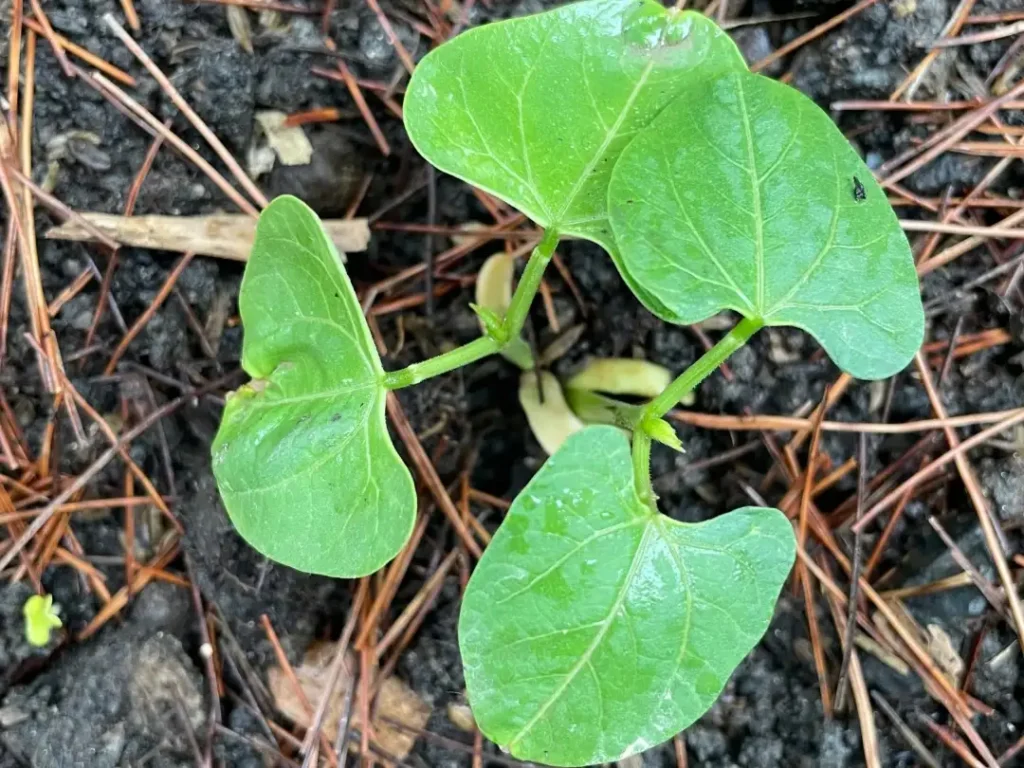
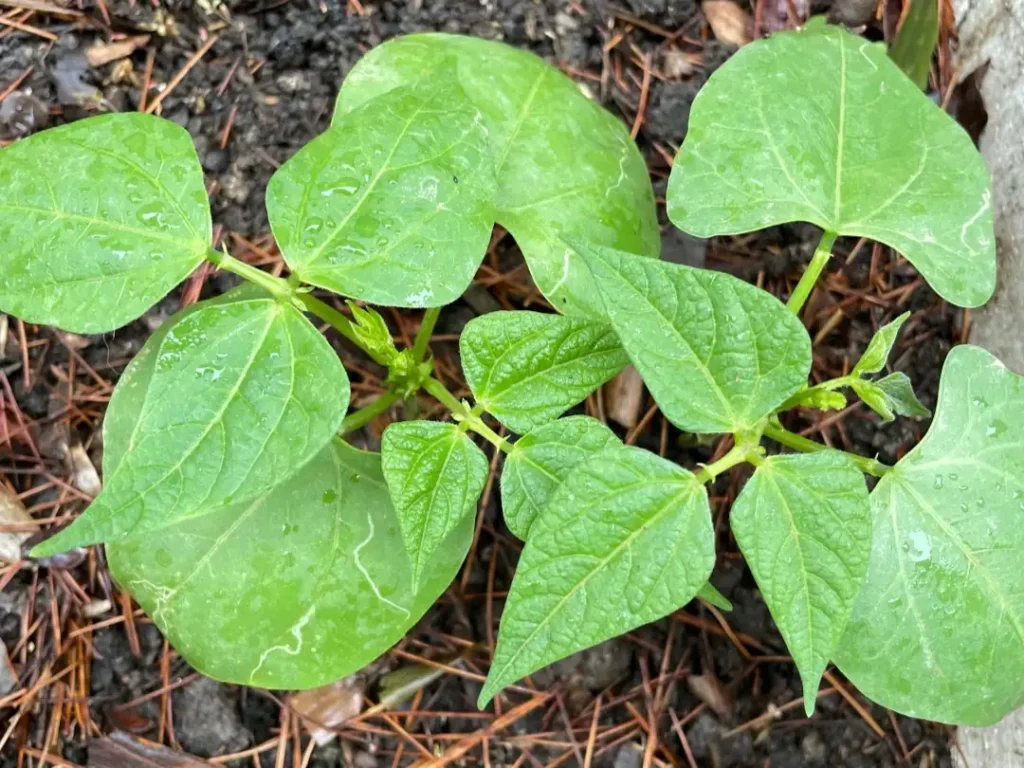
- Thin Your Seedlings: Once your seedlings are about 3-4 inches tall and have developed their first set of “true leaves” (the second set of leaves that appear, which look like miniature bean leaves), it’s time to thin them.
- How to Thin: Choose the strongest, healthiest-looking seedling in each spot and remove the others. The best way to do this is to snip the unwanted seedlings at the soil line with a pair of small scissors. This avoids disturbing the delicate roots of the plant you want to keep. Your final spacing should be about 4-6 inches between each plant.
- Why Thin: This might feel difficult, but it’s essential. Crowded plants will compete for sunlight, water, and nutrients, resulting in a smaller harvest for everyone. Giving each plant proper space is key to its success.
- Give Them Their First Gentle Feeding: Right after thinning, your plants are ready for their first nutrient boost.
- How to Feed: Use a half-strength, balanced liquid fertilizer. An organic option like fish emulsion or any fertilizer where the three N-P-K numbers are low and roughly equal (e.g., 2-3-2) is perfect. Avoid high-nitrogen fertilizers at all costs.
- Why Feed Now: This gentle feeding provides a small boost to help the newly thinned plants establish strong roots and leaves without encouraging excessive leafy growth at the expense of future beans.
- Apply a Layer of Mulch: After feeding, apply a 2-3 inch layer of organic mulch (like straw, shredded leaves, or grass clippings) around the base of the plants. Be careful not to pile the mulch directly against the plant stems.
- Why Mulch: Mulching is a gardener’s secret weapon. It suppresses weeds, helps the soil retain precious moisture so you water less, and keeps the soil temperature stable.
- Thin Your Seedlings: Once your seedlings are about 3-4 inches tall and have developed their first set of “true leaves” (the second set of leaves that appear, which look like miniature bean leaves), it’s time to thin them.
- Why it’s important: This three-part step—thinning, feeding, and mulching—officially graduates your seedlings into robust young plants. You’ve given them space to grow, a gentle meal to get started, and a protective blanket to keep them happy and hydrated.
This initial care sets a fantastic foundation. For guidance on the ongoing watering and feeding schedule throughout the entire growing season, please see the ‘Expert Guide to a Healthy Harvest‘ section below.
Step 5: Harvesting for Peak Flavor
This is the moment you’ve been waiting for! Timing your harvest correctly is the key to tender, flavorful beans.
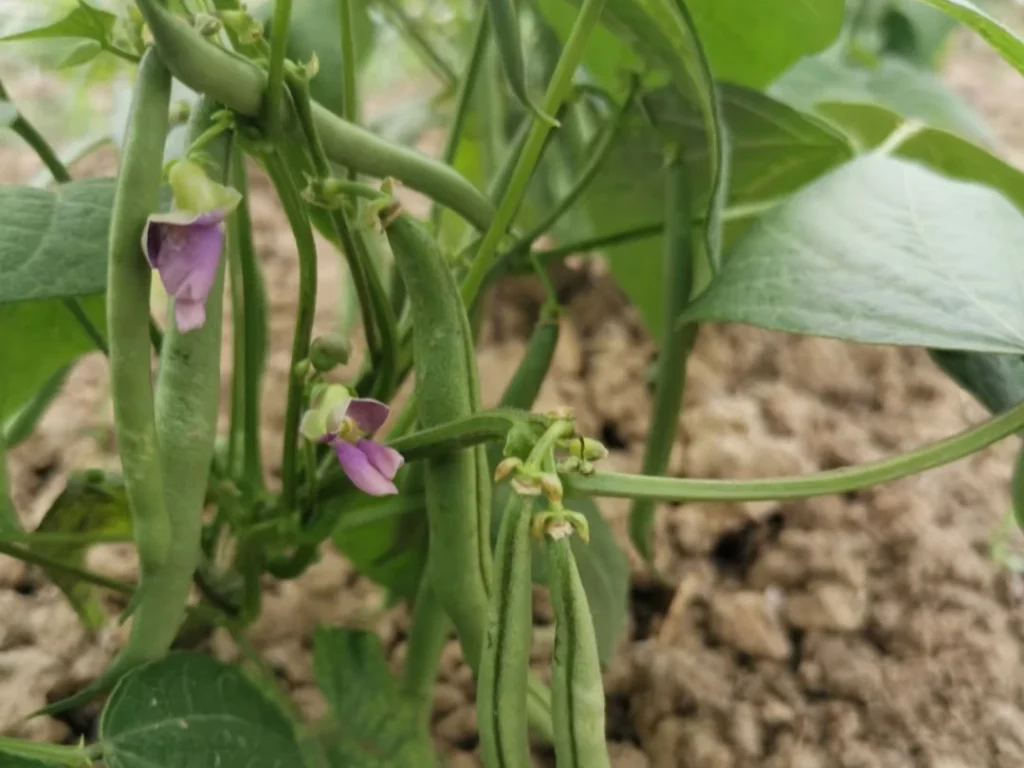
- What to do: Begin checking for ready beans about 50-60 days after planting. Harvest when the pods are firm, crisp, and generally the thickness of a pencil. The beans inside should not be visibly bulging through the pod. Use two hands to harvest: one to hold the stem, and the other to gently pull the bean off. This prevents you from accidentally uprooting the plant.
- Why it’s important: If you wait too long, the pods will become tough and stringy. Harvesting frequently—every day or two—sends a signal to the plant to produce even more flowers and beans, dramatically increasing your total yield.
Step 6: Post-Harvest Handling & End-of-Season Strategy
Your harvest basket is full—congratulations! Now let’s talk about how to keep your beans fresh and, just as importantly, what to do with the plants when the season winds down to set yourself up for future success.
- Storing Your Harvest:
- Short-Term Storage: For the best flavor and texture, use your beans as soon as possible. To store them for a few days, place unwashed, dry beans in a plastic bag or an airtight container in your refrigerator’s crisper drawer. They should stay fresh for about a week. Important: Wait to wash them until right before you cook, as excess moisture encourages mold and spoilage.
- Long-Term Preservation: Bush beans are fantastic for preserving the taste of summer. They are excellent for freezing, canning, or making delicious pickled “dilly beans.” When canning, it is critical to follow scientifically tested canning methods and use a pressure canner to avoid the serious risk of botulism poisoning.
- End-of-Season Plant Strategy: As you notice the main production slowing down, you have two great options, depending on your climate and goals.
- Option A (For Longer Seasons): Push for a Final Harvest If your heavy harvest is finishing but you still have several weeks before the first expected frost, you can try to coax one last, smaller harvest from your plants. Give the plants a good dose of a balanced liquid fertilizer and ensure they are deeply watered. This can sometimes stimulate new side-shoot growth and reward you with a final flush of tender beans.
- Option B (Enriching Next Year’s Soil): The Final Cut When your plants are truly finished producing (or when frost is just around the corner), it’s time to put them to bed. This is one of the most satisfying moments of gardening, as you’re already preparing for next year’s success. Using pruners or scissors, cut the bean plants off at the soil level, but leave the entire root system in the ground.
- Why it’s important: Proper storage ensures your hard-earned harvest doesn’t go to waste. Choosing the right end-of-season strategy is just as crucial. Pushing for a second harvest maximizes your yield for the current year, while leaving the nitrogen-rich roots in the ground provides a free, natural source of fertilizer that will improve your soil’s health for whatever you plant there next season.
Expert Guide to a Healthy Harvest: Tips & Troubleshooting
Ongoing Care: Mastering Watering, Mulching, and Feeding
Once your plants are established, your role shifts to providing consistent care to support them through the demanding process of flowering and producing a heavy crop.
- Watering: Go Beyond the Basics with an Expert Rhythm
- The Foundation: As a baseline, your plants need about 1 inch (2.5 cm) of water per week, from either rain or your hose. To prevent fungal diseases, always water at the base of the plants (avoiding the leaves) and preferably in the morning so any splashes can dry in the sun.
- The Expert Strategy: “Dry for Flowers, Wet for Pods” This is a professional grower’s secret for maximizing how many flowers turn into beans.
- During Peak Flowering: If you see lots of flowers but the plants seem slow to produce actual pods, let the soil dry out a little more than usual between waterings. This mild, temporary stress signals the plant to focus its energy on setting fruit.
- Once Pods Form: As soon as you see a large number of tiny pods developing, switch gears. Now is the time to ensure the soil stays consistently moist (but not waterlogged). This steady supply of water is crucial for helping the pods grow plump, crisp, and juicy.
- Mulching: Your Best Friend for Moisture and Weed Control
- If you haven’t already, maintaining a 2-3 inch layer of organic mulch (like straw, shredded leaves, or pine straw) is one of the best things you can do. It helps maintain that consistent moisture I just talked about, suppresses weeds, and keeps the plant’s roots cool.
- Feeding: Fueling the Harvest
- While bush beans grown in soil rich with organic matter often don’t require additional fertilizer, gardeners aiming to maximize and extend their harvest can provide a gentle feeding after peak picking periods to replenish nutrients.
- After the “first feeding” you provided back in Step 4, your fertilizing strategy now shifts to fueling the main event: bean production.
- The Schedule: Feed Based on Production. Instead of fertilizing on a fixed calendar, let the plant’s output guide you. A fantastic rule of thumb used by seasoned gardeners is to feed your plants with a liquid fertilizer after every two to three major harvests.
- The Right Fuel (The Nitrogen Nuance): Remember how I strictly avoided high-nitrogen fertilizer at the start? That was to prevent the plant from growing all leaves and no flowers. But now that your plant is a busy bean factory, it needs a balanced diet—including nitrogen—to create all those protein-rich pods. At this stage, a balanced, all-purpose liquid fertilizer (where the three N-P-K numbers are roughly equal, like 5-5-5) is the perfect fuel to keep production high without causing unwanted leafy growth.
Solving Common Problems with Bush Beans
Even with the best care, you might encounter a few hiccups along the way. Don’t worry—most common bean problems are easy to diagnose and fix. Here’s your troubleshooting guide.
Problem: My plants are huge and leafy, but have very few flowers or beans.
- Cause(s): This is the classic sign of a nitrogen overdose. The plant is so happy with the abundant nitrogen supply that it’s putting all its energy into growing lush, beautiful leaves rather than producing flowers and beans.
- Solution(s):
- Stop all fertilizing immediately.
- Be patient. The plant will eventually use up the excess nitrogen in the soil and should begin to shift its focus back to flowering.
- In the future, always remember that beans create much of their own nitrogen and are very sensitive to over-fertilizing. Stick to balanced, low-nitrogen options only when needed.
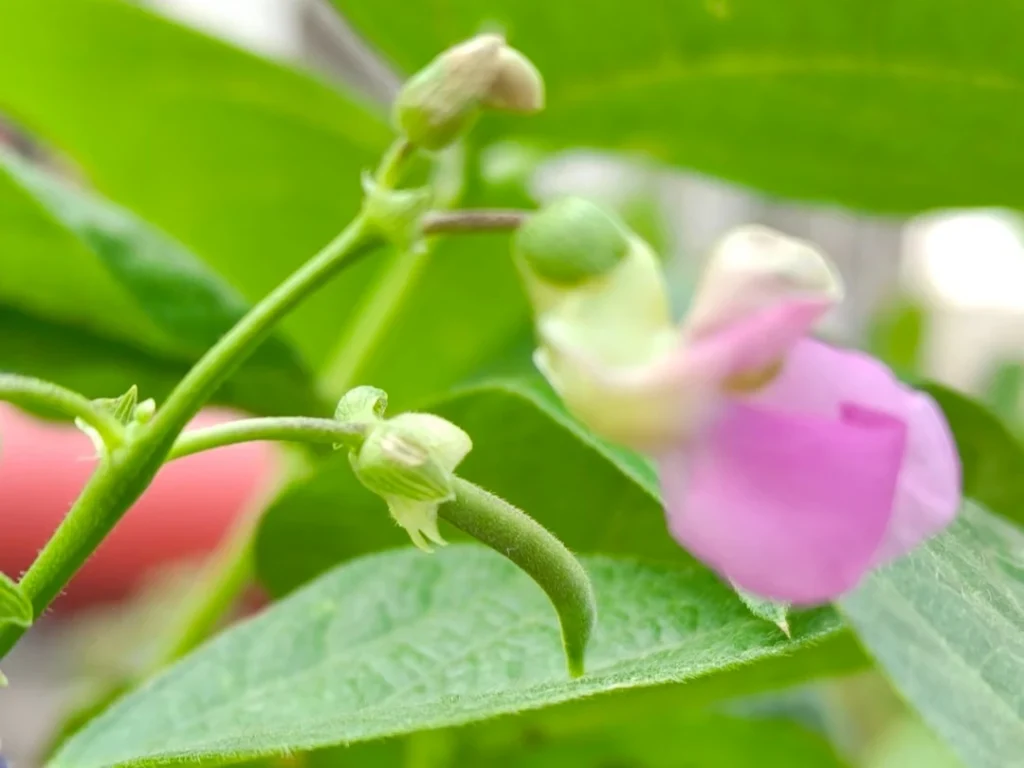
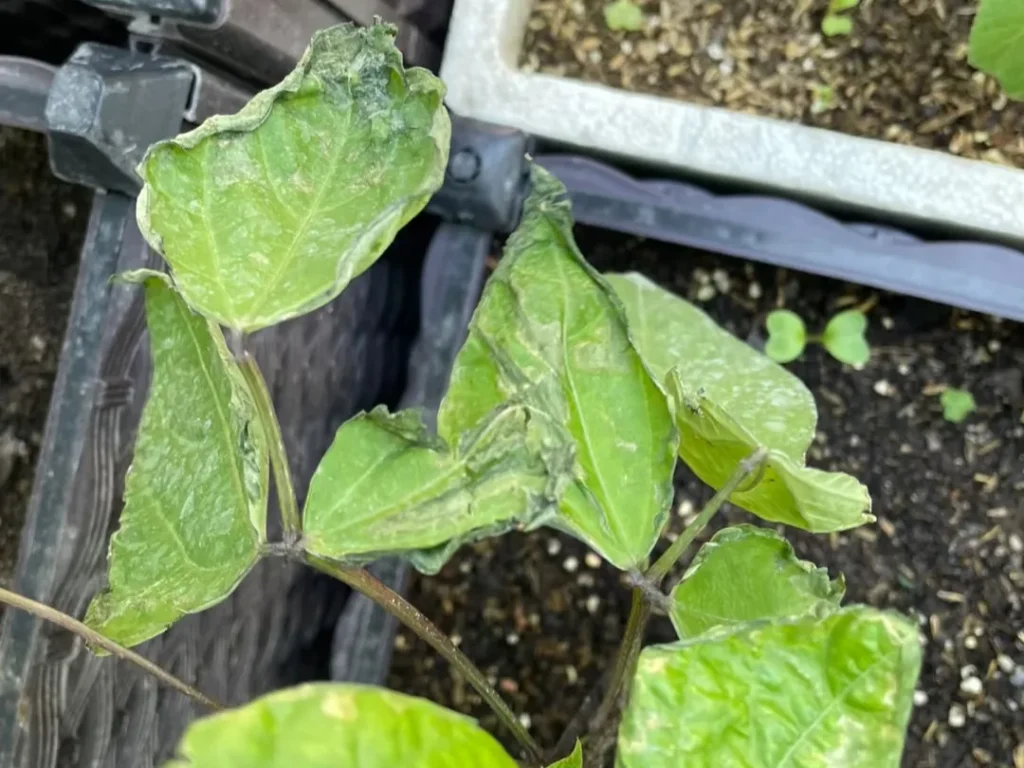
Problem: My plants are flowering, but the blossoms dry up and fall off before making beans.
- Cause(s): This frustrating issue, known as “blossom drop,” can be caused by a few different environmental stressors:
- Heat Stress: As I covered, temperatures consistently above 86°F (30°C) are a major cause.
- Inconsistent Watering: The soil swinging from bone dry to soaking wet disrupts the plant’s stability.
- Nutrient Deficiency: A lack of key micronutrients, most commonly Boron (B), is a frequent and hidden cause of blossom drop.
- Solution(s):
- For heat and water issues, review the advice in the “When to Plant” and “Ongoing Care” sections. Proper timing and consistent watering are your first and best lines of defense.
- To address a potential nutrient deficiency as a quick fix, you can spray the leaves (a “foliar feed”) with a liquid seaweed or kelp fertilizer, which are naturally rich in a wide range of micronutrients.
- Remember, the best cure is always prevention. As I discussed in Step 2: Prepare the Perfect Soil, adding a source of micronutrients to your soil before you even plant is the expert’s way to avoid this problem entirely.
Problem: The lower, older leaves on my plants are turning yellow, but the veins are staying green.
- Cause(s): This specific pattern—yellowing between the veins—is a tell-tale sign of Magnesium (Mg) deficiency. It appears on the lower leaves first because the plant, needing magnesium for new growth, will pull it from its oldest leaves.
- Solution(s):
- The quickest and most effective fix is an Epsom salt spray. Mix one tablespoon of Epsom salt (magnesium sulfate) into one gallon of water until it is fully dissolved.
- In the cool of the morning or evening, spray the leaves of the affected plants with the solution.
- Repeat this every 1-2 weeks until the new growth appears healthy and green.
Problem: My harvested beans are tough, fibrous, and “stringy.”
- Cause(s): This is almost always caused by one simple thing: you are harvesting them too late. Once the seeds inside the pod begin to fully mature and swell, the pod itself diverts its energy and its cell walls become tough.
- Solution(s):
- This is an easy fix! Start harvesting sooner and check your plants more frequently.
- As a reminder from Step 5, the perfect time to pick is when the pods are firm, crisp, and about the thickness of a pencil, before the seeds inside create significant bulges in the pod.
Natural Pest and Disease Control: Prevention is Your Best Medicine
The best way to deal with pests and diseases is to prevent them from ever taking hold. A healthy, unstressed plant grown in a thriving garden ecosystem is its own best defense. Most problems can be completely avoided by following good gardening practices from the start.
Preventative Strategies: The Foundation of a Healthy Garden
Think of these practices as building a strong immune system for your garden.
- Start with Resistant Varieties: As I highlighted in Step 1, choosing varieties that are naturally resistant to common diseases is your single most powerful preventative action.
- Practice Crop Rotation: This is a cornerstone of organic gardening. Avoid planting beans (or other legumes like peas) in the exact same spot for at least three years. This simple rotation breaks the life cycle of soil-borne diseases that can build up over time.
- Ensure Good Airflow: Proper spacing, as discussed in Step 3, allows air to circulate freely around your plants, drying leaves quickly and making it difficult for fungal diseases like rust to develop.
- Keep the Garden Clean: Remove and dispose of (do not compost) any leaves that look diseased as soon as you spot them. At the end of the season, remove all plant debris from the garden bed to deny pests and pathogens a place to overwinter.
- Avoid Working with Wet Plants: This is a crucial expert tip. Bacterial diseases can spread rapidly from plant to plant on water droplets. Avoid touching, pruning, or harvesting your beans when the leaves are wet from rain or morning dew.
Dealing with Common Pests
If pests do appear, act quickly with these simple, organic-friendly methods.
- Mexican Bean Beetles: These look like coppery-brown ladybugs, but they are a pest, not a friend. Both the adults and their spiny, yellow larvae will chew a lace-like pattern into leaves.
- Control: The most effective method is to hand-pick them (and crush the clusters of yellow eggs you find on the undersides of leaves) and drop them into a bucket of soapy water. For larger infestations, a thorough spray of Neem Oil can be effective.
- Aphids: These are tiny, pear-shaped insects that cluster on new growth and the undersides of leaves, sucking the plant’s sap.
- Control: Often, a strong blast of water from your hose is enough to dislodge them. If they return, spray them directly with insecticidal soap.
Identifying and Managing Common Diseases
For diseases, prevention is paramount, as cures are often nonexistent.
- Rust: You’ll first notice this as small, rust-colored or orange-brown pustules, usually on the undersides of the leaves.
- Management: This is an airborne fungal disease. Good airflow from proper spacing is the best prevention. If caught very early, remove the infected leaves. In severe cases that threaten the whole crop, an organic-listed copper fungicide can be used as a last resort.
- Bacterial Blight: This appears as small, water-soaked spots on the leaves that quickly enlarge into irregular brown patches, often with a yellow “halo” around them.
- Management:There is no cure for bacterial blight. The only strategy is prevention: use certified disease-free seed, avoid working with wet plants, and remove and destroy infected plants immediately to prevent spread. Do not save seeds from any plant that shows these symptoms.
- Root Rot: If your plants are wilting and the leaves are turning yellow even though the soil is moist, you may have root rot. The base of the stem might look mushy or discolored.
- Management: This is caused by soil-borne fungi that thrive in waterlogged conditions. There is no cure for an infected plant. Prevention is the only solution: ensure your soil is very well-draining (as discussed in Step 2) and be careful not to overwater.