Hello, I’m Yun, founder of The Planting Key.
Is there any vegetable more satisfying for a new gardener than the radish? I think not!
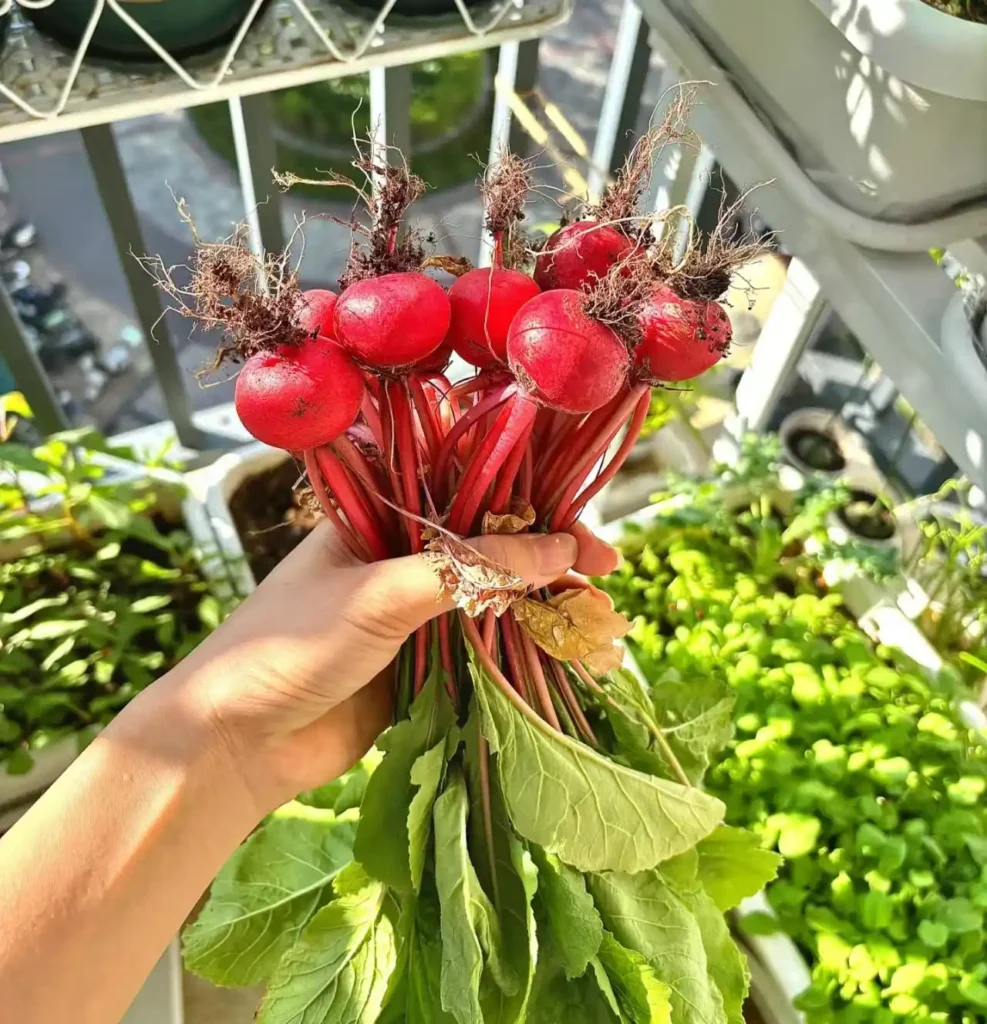
There is a special kind of magic in pulling a perfectly crisp, jewel-toned root from the soil just a few weeks after planting a tiny seed. It’s the garden’s version of instant gratification.
Here at The Planting Key, my complete library of Vegetable Growing Guides is designed to help you find that gardening joy, and today, I’m starting with one of the fastest and most rewarding plants you can grow.
I know that starting a garden can seem overwhelming. You worry about getting the timing right, the soil, the watering—it can feel like a lot to learn.
My own passion for North American horticulture grew from a simple desire to help a friend succeed, and now I want to help you.
This guide is your complete, step-by-step roadmap. I promise that if you follow along, you’ll have all the knowledge and confidence you need to go from a tiny radish seed to a delicious, crunchy harvest.
Let’s grow something wonderful together!
Key Takeaways
For those in a hurry, here’s what you need to know to grow great radishes:
- Plant in Cool Weather: Radishes thrive in the cool conditions of spring and fall. Sow seeds as soon as the soil can be worked in spring, and again in late summer for an autumn harvest. Avoid planting in the peak heat of summer, which makes them woody and spicy.
- Grow Fast with Consistent Water: The secret to a crisp, mild-flavored radish is uninterrupted, rapid growth. This is achieved with even, consistent moisture. Letting the soil dry out is the number one cause of poor texture and overly hot flavor.
- Direct Sow in Loose Soil: Radishes are root vegetables that despise being transplanted. Always plant seeds directly in the garden in soil that is loose, and free of rocks and clumps to allow their roots to swell freely.
- Harvest Promptly: Don’t leave them in the ground for too long! Check them as soon as they reach the size noted on your seed packet. Radishes become tough, pithy, and unpleasant if allowed to grow oversized.
Radish Quick Facts
| Attribute | Details |
| Sunlight | Full Sun (6+ hours/day). Can tolerate light shade, especially in warmer weather to prevent bolting. |
| Soil Type | Loose, well-drained, sandy loam. Avoid heavy clay and rocky soil. |
| Soil pH | 5.8 to 6.8 (Slightly acidic is ideal) |
| Planting Method | Direct Sow Only. Do not start indoors. |
| Sowing Depth | 1/4 to 1/2 inch (0.6 to 1.25 cm) for spring types; up to 1 inch for larger winter types |
| Seed Spacing | 1 inch (2.5 cm) apart |
| Row Spacing | 12 inches (30 cm) apart |
| Days to Germination | 3-10 days. Radishes are famously fast to sprout. |
| Days to Harvest | 21-35 days for most common spring varieties. |
When to Plant Radishes
The single most important factor for growing delicious radishes is timing. They are a cool-season crop. Planting them in the heat of summer is the number one mistake beginners make, resulting in spicy, woody roots and plants that “bolt” (focus on producing flowers and seeds instead of tasty roots).
The best time to plant radishes is in the early spring and late summer/early autumn.
- For a spring harvest: Plant seeds as soon as the soil can be worked. The ideal window is typically 4-6 weeks before your average last frost date. Some horticultural guides, like from Utah State University, suggest a more cautious window of 2-3 weeks before the last frost, which may be better for regions with a slower spring warm-up. You can continue to sow a new batch every 10 days until the weather begins to get consistently hot.
- For a fall harvest: Plant seeds 4-6 weeks before your average first frost date in the fall. The soil is still warm, which encourages quick germination, and the roots will mature in the cooling weather of autumn, making them incredibly crisp and sweet.
Radish Planting Calendar (USDA Zones 4-9)
How to Read This Calendar
The calendar below provides key planting dates for two different gardening styles: Aggressive (to maximize your season) and Safe (to minimize frost risk). You’ll notice the ‘Aggressive’ fall dates start later—this is a deliberate strategy to extend the harvest as late as possible.
Radish-Specific Timing Rules
Spring Dates: These dates are for sowing seeds directly into your garden. To give this cool-season crop the best possible start, they are intentionally set 4 to 6 weeks before the average last frost date. This crucial window ensures the radishes can mature in the cool, moist conditions they love, long before the summer heat arrives.
Fall Dates: These dates are also for sowing seeds directly into the garden. They are intentionally set 4 to 6 weeks before the average first fall frost date. This timing is ideal because it allows the seeds to germinate quickly in warm soil, while the roots mature during the cool, flavor-enhancing days of autumn.
| USDA Zone | Spring Planting(Aggressive) | Spring Planting(Safe) | Fall Planting(Aggressive) | Fall Planting(Safe) |
| Zone 4 | Mar 28 – Apr 11 | Apr 3 – Apr 17 | Aug 19 – Sep 2 | Aug 14 – Aug 28 |
| Zone 5 | Mar 19 – Apr 2 | Mar 26 – Apr 9 | Aug 28 – Sep 11 | Aug 22 – Sep 5 |
| Zone 6 | Mar 16 – Mar 30 | Mar 27 – Apr 10 | Sep 6 – Sep 20 | Aug 21 – Sep 4 |
| Zone 7 | Feb 23 – Mar 9 | Feb 25 – Mar 11 | Sep 24 – Oct 8 | Sep 13 – Sep 27 |
| Zone 8 | Feb 9 – Feb 23 | Feb 22 – Mar 8 | Sep 28 – Oct 12 | Sep 18 – Oct 2 |
| Zone 9 | Jan 17 – Jan 31 | Feb 4 – Feb 18 | Oct 19 – Nov 2 | Sep 29 – Oct 13 |
✔ Accuracy is my priority. The key planting dates in this calendar are calculated based on representative Aggressive and Safe frost date baselines established for each zone. Because your garden’s microclimate may vary, I strongly recommend that you verify your local frost dates for the most accurate timing. Learn My Methodology & Find a Frost Date Tool Here.
How to Plant, Grow, and Harvest Radishes: A Step-by-Step Guide
Step 1: Planning Your Radish Patch
A little planning goes a long way and ensures your radishes have everything they need from day one.
- Sub-point: Choosing the Right Radish Variety (Spring vs. Winter)
- What to do:For beginners, start with a classic spring radish variety like ‘Cherry Belle’, ‘French Breakfast’, or ‘Easter Egg’.
- Why it’s important: Spring radishes are the fast-maturing types (20-35 days) that are easiest to grow. They are perfect for the cool weather of spring and fall. Winter radishes, like Daikon, take much longer to mature and are best planted for a fall harvest once you have some experience.
- Sub-point: Selecting the Perfect Location (Sunlight requirements)
- What to do: Choose a spot in your garden that receives at least 6 hours of direct sunlight per day.
- Why it’s important: This is perhaps the most direct factor affecting the yield and taste of your radishes. Ample sunlight provides the energy for efficient photosynthesis. The more effective the photosynthesis, the more energy the plant stores, allowing the fleshy taproot underground to swell faster and fuller. Insufficient light leads directly to poor texture and a lower yield. Remember, for a cool-weather-loving crop like radishes, plentiful sunshine is the best partner for healthy growth!
Step 2: Preparing the Soil for Perfect Roots
This is arguably the most crucial physical step. The quality of your soil directly determines the quality of your radishes.
- Sub-point: Loosening and Amending the Soil
- What to do: The ideal soil is a deep, fertile, and well-draining sandy loam. Work the soil in your chosen area to a depth of at least 8 inches (about 20 cm). For container growing, a widely accepted rule of thumb for container gardeners is to choose a pot that is at least 8-10 inches deep. Whether in a garden bed or a pot, be sure to mix in a 2-3 inch layer of mature compost to boost soil fertility.
- Why it’s important: Radishes grow very quickly and need a soft, nutrient-rich environment right from the start. A deep layer of soil allows the taproot to grow downwards without obstruction, while compost not only provides essential nutrients but also greatly improves soil structure, helping it retain moisture while still draining well.
- Sub-point: Ensuring Proper Drainage and Removing Obstacles
- What to do: As you work the soil, carefully remove all stones, clumps of dirt, and old plant roots. For container gardening or small plots, I even recommend sifting the soil through a screen to ensure it’s perfectly fine and uniform.
- Why it’s important: This is the key to determining your radishes’ “good looks” and “perfect figure.” Any obstacles in the soil, like stones, will impede the vertical growth of the taproot, causing the radish to become deformed or forked. Furthermore, heavy, poorly draining clay soil will not only hinder the root’s expansion but can also result in a rough skin, which seriously affects its quality. Only a loose, obstacle-free “home” will allow your “radish babies” to grow straight and plump!
Step 3: Sowing Radish Seeds
Radishes are one of the easiest vegetables to plant from seed.
- Sub-point: When to Plant (Best seasons and succession planting)
- What to do: Sow your seeds during the cool seasons. The ideal growing temperature is between 5°C and 25°C (41°F to 77°F). You can start sowing as soon as daytime temperatures are consistently above 8°C (about 46°F). For a continuous harvest, sow a new small batch of seeds every 10-14 days.
- Why it’s important: Although radishes are cold-tolerant, they do not like heat. In high temperatures (above 25°C or 77°F), they are prone to stop their root development and bolt (send up a flower stalk), which results in a spicy flavor and a woody texture. By using “succession planting,” you can stagger your harvest, ensuring you have a steady supply of the freshest, most tender radishes throughout the entire spring or fall.
- Sub-point: How to Sow: Depth and Spacing (Emphasize direct sowing is best)
- What to do: Soak the seeds in warm water for a few hours to speed up germination. Then, plant the seeds 1 inch (2.5 cm) apart at a depth of 0.5-1 cm (about 1/4 to 1/2 inch). After sowing, use a watering can with a fine spray to water the soil thoroughly.
- Why it’s important: Radishes have a taproot system, which means they have a single main root that cannot be disturbed. For this reason, you must direct sow them; transplanting is almost certain to fail. Soaking the seeds is a pro tip that helps them “wake up” faster. Keeping the soil moist after sowing is crucial, as seeds need a warm, damp environment to germinate—the optimal germination temperature is between 20-25°C (68-77°F). In fact, radishes are quite adaptable and will germinate well in any soil temperature between 55-85°F (13-29°C). If the weather is still cool, you can even cover your pot with a clear plastic bag to retain heat and moisture, creating a perfect little greenhouse for germination.
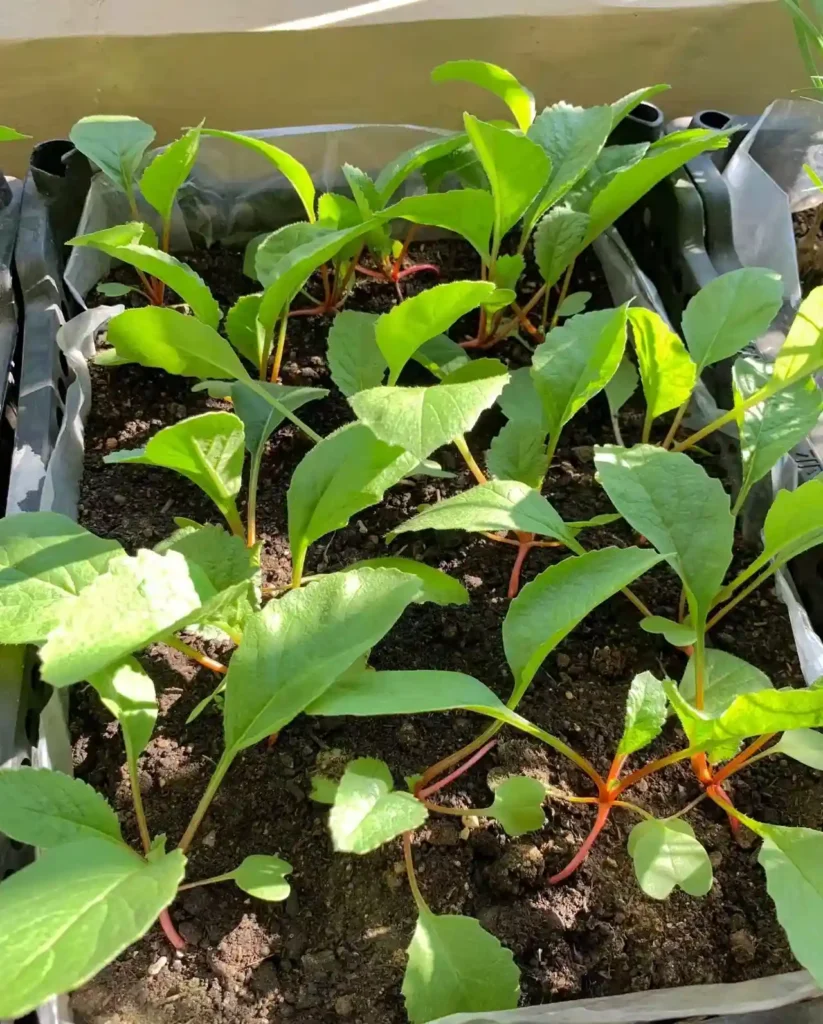
Step 4: Seedling Care and The Critical Step of Thinning
This step requires a little “tough love” but is essential for a good harvest.
- Sub-point: Watering Your New Sprouts
- What to do: During the seedling stage, you only need to keep the soil slightly moist. Use a watering can with a fine spray to water gently, avoiding a strong stream that could knock over the seedlings.
- Why it’s important: The root systems of seedlings at this stage are still very fragile. Watering too much or too often can easily lead to root rot or the “leggy growth” phenomenon, where the stems grow tall and weak without establishing strong roots. Proper watering encourages the root system to explore downwards healthily.
- Sub-point: Why and How to Thin Your Seedlings
- What to do: This is a critical operation that needs to be done in two stages.
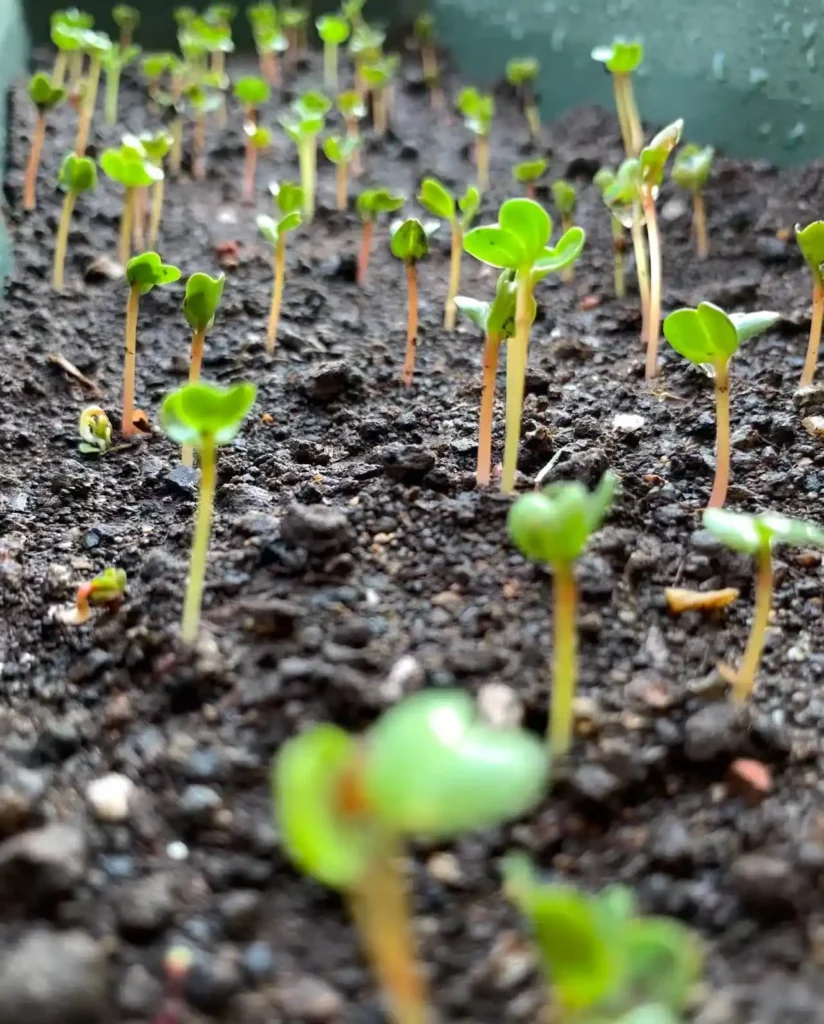
- First Thinning: Once the radish seedlings have developed their first true leaf (usually within a week of sprouting), perform the first thinning. The principle is simple—”seedlings shouldn’t touch,” ensuring their leaves are not overlapping.
- Second & Final Thinning: When the seedlings have grown 4-5 leaves, perform the second and final thinning. For most spring radishes, thin to a final spacing of 1-2 inches. If you are growing larger winter radishes (like Daikon), you must increase the spacing to 3-6 inches to give them enough room to bulk up.For a small pot with a 4-inch (about 10 cm) diameter, leaving only one of the strongest seedlings is ideal. For a larger pot, such as one with an 8-10 inch diameter, you can leave 3-4 seedlings spaced appropriately.
- Pro Tip: After each thinning, you can gently mound a little soil around the base of the remaining seedlings. This effectively prevents the taller seedlings from falling over (a process called lodging).
- Why it’s important: Please, don’t be afraid to sacrifice them! Thinning is the decisive step that determines whether your radishes can successfully form a bulb. If they are too crowded, the plants will compete fiercely for nutrients and sunlight. In an effort to get more light, your radish seedlings will desperately grow upwards, eventually becoming “tall and skinny,” spending all their energy on height while the root underground doesn’t get the “signal” or nutrients to swell. After a couple of months, you might only harvest a bunch of inedible, stringy roots.
Step 5: Ongoing Care for a Healthy Crop
With radishes, “ongoing care” is brief, as they grow so fast! The key is consistency.
- Sub-point: Consistent Watering for Crisp Radishes
- What to do: Radish watering needs to be dynamically adjusted according to the growth stage.
- Seedling Stage: At this point, the root system is shallow. Water lightly, just enough to keep the soil slightly moist. The main goal is to encourage the roots to grow downwards in search of water.
- Root Swelling Stage: This is when water demand is highest. Keep the soil consistently moist—a good rule is to water when the soil surface begins to look pale or dry. Ensure you water deeply and thoroughly.
- Why it’s important: This is key to determining the texture and appearance of your radishes. A lack of water during the root swelling stage will cause the radish skin to become rough, develop more fibrous side-roots, and can even lead to cracking. But just as importantly, the water supply must be even. A sudden, heavy watering after a long dry spell is the most common cause of radishes cracking. Maintaining stable soil moisture is the only way to harvest perfect radishes.

- Sub-point: Mulching and Weeding
- What to do: After the second thinning, apply a 2-3 inch layer of organic mulch (like straw or shredded leaves) on the soil surface and promptly remove any weeds.
- Why it’s important: Mulch not only does an excellent job of maintaining the consistent soil moisture I just emphasized, but it also effectively suppresses weed growth. Prompt weeding prevents weeds from competing with your radishes for precious nutrients and space. Combining weeding with a light “cultivation” (gently hoeing the soil surface) during the seedling stage can break up compacted soil, allowing the root system to breathe more easily.
- Sub-point: Fertilizing for Rapid Growth
- What to do: For radishes in soil enriched with compost, extra fertilizer is often unnecessary. However, for container-grown radishes or in poorer soils, you can apply a balanced, nitrogen-based liquid fertilizer at half-strength about 3-4 weeks after seedlings emerge to promote fast, healthy growth.
- Why it’s important: The key is balance and speed. While excess nitrogen causes leafy growth at the expense of the root, a timely, moderate boost (as recommended by university extensions like Utah State University) ensures the plant doesn’t stall, which can lead to a woody texture. Always avoid high-nitrogen, lawn-style fertilizers.
Step 6: Managing Common Pests and Diseases Naturally
Because they grow so quickly, radishes often outpace pests, but it’s good to know what to look for.
Sub-point: Identifying Common Radish Issues
- What to do: Get into the habit of inspecting your plants regularly. Besides the common Flea Beetles (which create “shotgun” holes in leaves), the single most destructive pest is the Cabbage Root Maggot.
- Why it’s important: The larvae of the root maggot fly tunnel directly into the radish root, making it inedible. This pest is highlighted as a primary concern by Cornell, the University of Minnesota, and Utah State University, making prevention essential for a successful harvest.
Sub-point: Natural and Organic Solutions
- What to do: The best defense against both Flea Beetles and Root Maggots is a physical barrier. Cover your radish bed with a floating row cover from the day you sow the seeds.
- Why it’s important: This simple fabric cover prevents the adult flies and beetles from laying their eggs on or near your plants in the first place. This preventative, non-chemical method is far more effective than any treatment after the pests have arrived and is the top recommendation from horticultural experts.
Step 7: Harvesting Radishes at Their Peak
This is the fun, fast reward!
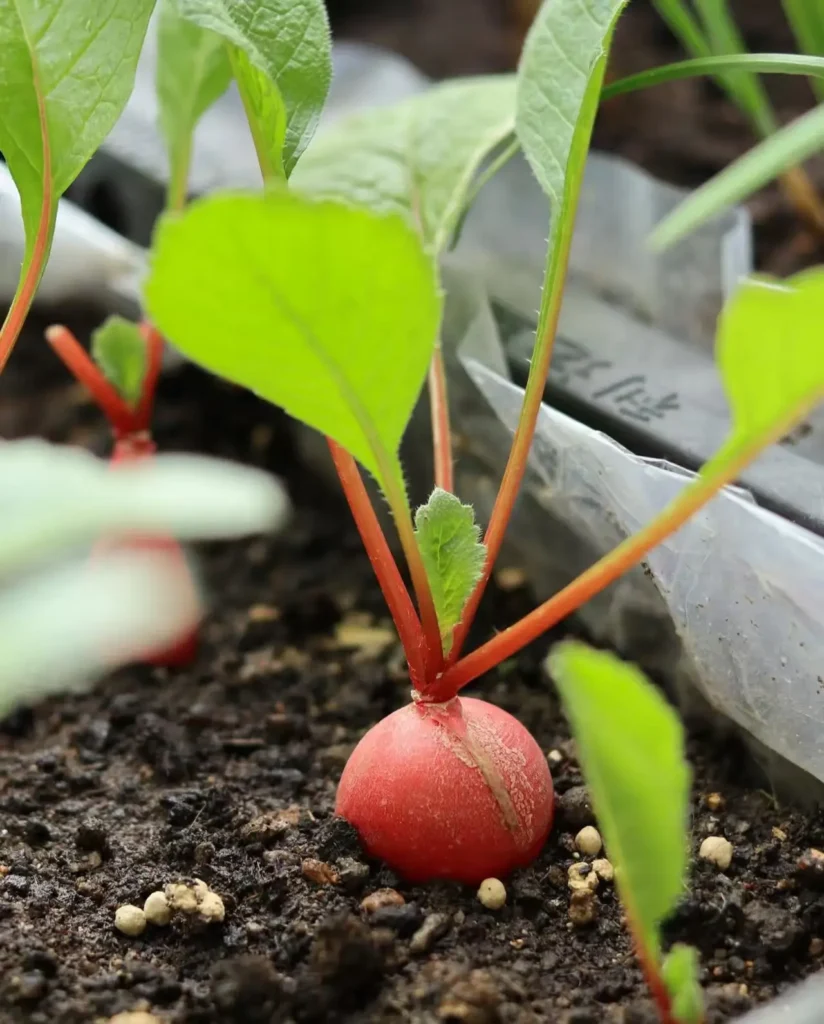
- Sub-point: Knowing the Signs of Readiness
- What to do: Start checking your radishes as soon as they reach the date listed on your seed packet (often 21-25 days). Gently brush away the soil at the base of the leaves to peek at the “shoulder” of the root. If it’s about 1 inch (2.5 cm) across, it’s ready.
- Why it’s important: The perfect radish is young and tender. It’s always better to harvest a radish a bit too early than a bit too late. Overripe radishes become woody and their flavor turns unpleasantly sharp.
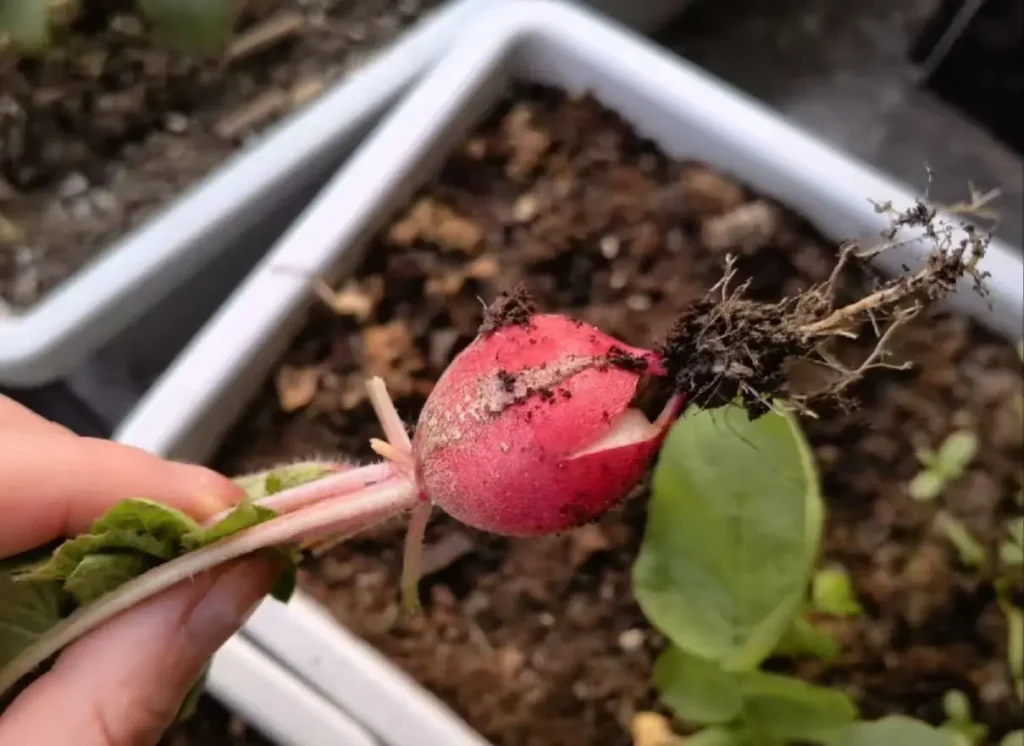
- Sub-point: The Best Way to Pull Your Radishes
- What to do: Grasp the leaves firmly at the base and pull straight up. They should pop easily out of the loose soil.
- Why it’s important: A gentle, straight pull prevents the root from breaking. The ease with which it comes out is also a final confirmation that your soil preparation in Step 2 was successful!
Step 8: Post-Harvest: How to Store Your Radishes
A few simple steps will keep your harvest crisp and fresh.
- Sub-point: Preparing Radishes for Storage (Removing leaves)
- What to do: As soon as you harvest, twist or cut the leaves off the radish root, leaving about an inch of stem.
- Why it’s important: The leaves will continue to draw moisture out of the root, even after harvesting. Removing them immediately is the single most important step to prevent the radish from becoming soft and limp. But don’t throw the greens away—they are delicious and can be cooked like spinach!
- Sub-point: Best Methods for Keeping Them Crisp
- What to do: Store the unwashed radish roots in a plastic bag with a damp paper towel in the refrigerator’s crisper drawer.
- Why it’s important: The bag prevents moisture loss, and the damp towel provides just enough humidity to keep them perfectly crisp. Don’t wash them until you are ready to eat, as the excess water can encourage rot. They can last for 1-2 weeks, and sometimes up to 4 weeks, in the refrigerator’s crisper drawer.
Frequently Asked Questions (FAQ)
1. Why are my radishes spicy and woody? What went wrong?
- This is almost always a result of stress, which slows down growth. A perfect radish grows very quickly. If you encounter a spicy or woody texture, it’s typically due to one of three reasons: 1) The weather was too hot during its growth, 2) The watering was inconsistent (too dry), or 3) It was harvested too late.
2. My radish plants bolted and sent up a flower stalk. Is everything lost?
- The root is lost, but you’ve gained a new opportunity! Once a radish bolts, the root will become tough and inedible. You should pull that plant. However, the flowers are great for attracting pollinators to your garden, and the green seed pods that form after the flowers are surprisingly delicious—they are crisp, juicy, and have a mild, peppery flavor perfect for salads.
3. Why did my radishes grow into thin, stringy roots instead of round bulbs?
- This is a classic sign that the plant prioritized leaf growth over root growth. The most common causes are: 1) Overcrowding (the seedlings were not thinned properly), giving the roots no physical space to swell, 2) Too much nitrogen in the soil (from over-fertilizing), which signals the plant to just make leaves, or 3) Not enough sun, meaning the plant didn’t have enough energy to form a proper root.
4. The roots of my radishes are cracking or splitting. How can I prevent this?
- This is caused by a sudden, uneven supply of water. It typically happens when the soil is allowed to get very dry, and then is suddenly drenched by a heavy rain or a deep watering. The root tries to grow too quickly in response, causing its skin to split. The key to prevention is maintaining consistent, even soil moisture throughout the entire growing cycle.
5. Do I need to plant radishes in a different spot each year?
- Yes, it’s highly recommended. This practice is called crop rotation. Planting radishes (which are in the brassica family) in the same spot year after year can encourage the buildup of soil-borne diseases and pests specific to that family. Rotating your crops to a new location each year is one of the best and easiest ways to keep your garden healthy naturally.
6. I thinned my seedlings, but I’m still not sure if I removed enough. Is there a simple rule?
- Yes, a great rule of thumb is to look at the leaves. The leaves of one radish plant should not be significantly overlapping or shading the leaves of its neighbor. If the radish patch looks like a single, dense mat of leaves, you probably need to thin a bit more. Each plant needs its own “personal space” of sunlight to form a healthy root.
7. My radishes grew beautifully, but they have no flavor at all. What happened?
- This is a less common but interesting problem, often linked to excessive water and rapid growth in low-nutrient soil. While you want them to grow fast, if they grow too fast with too much water and not enough minerals in the soil to develop complex flavors, they can end up tasting watery and bland. This can sometimes happen in soil that is very sandy or after a period of extremely heavy rain.
8. Can I reuse the soil in a pot after harvesting my radishes?
- Yes, but you should refresh it first. The radishes will have used up some of the nutrients in the potting mix. Before planting your next crop in the same pot, it’s a great idea to mix in a few handfuls of fresh compost or a balanced organic granular fertilizer to replenish what the radishes took out.